
It’s autumn, so it’s cold! Like many of you (I bet!) I’ve been craving comfort food and snacks, so I’ve decided to share a handful of my favorite cold weather recipes cooked in copper!
VFC says: This lovely post and its delicious recipes come from Amy L. Please enjoy!
I’m dedicating this post mostly to recipes, since I often find myself mesmerized by pictures of delicious food online that I have no idea how to make (which is fine, sharing recipes takes time, but extra details here and there are helpful!). I found most of these recipes on the internet and doctored them up to fit my household preferences (see notes). I also included a “husband’s rating,” figuring that households are often composed of varying tastebuds and appetites, so it would be fun to add some extra perspective. This was my husband Matt’s idea 🙂
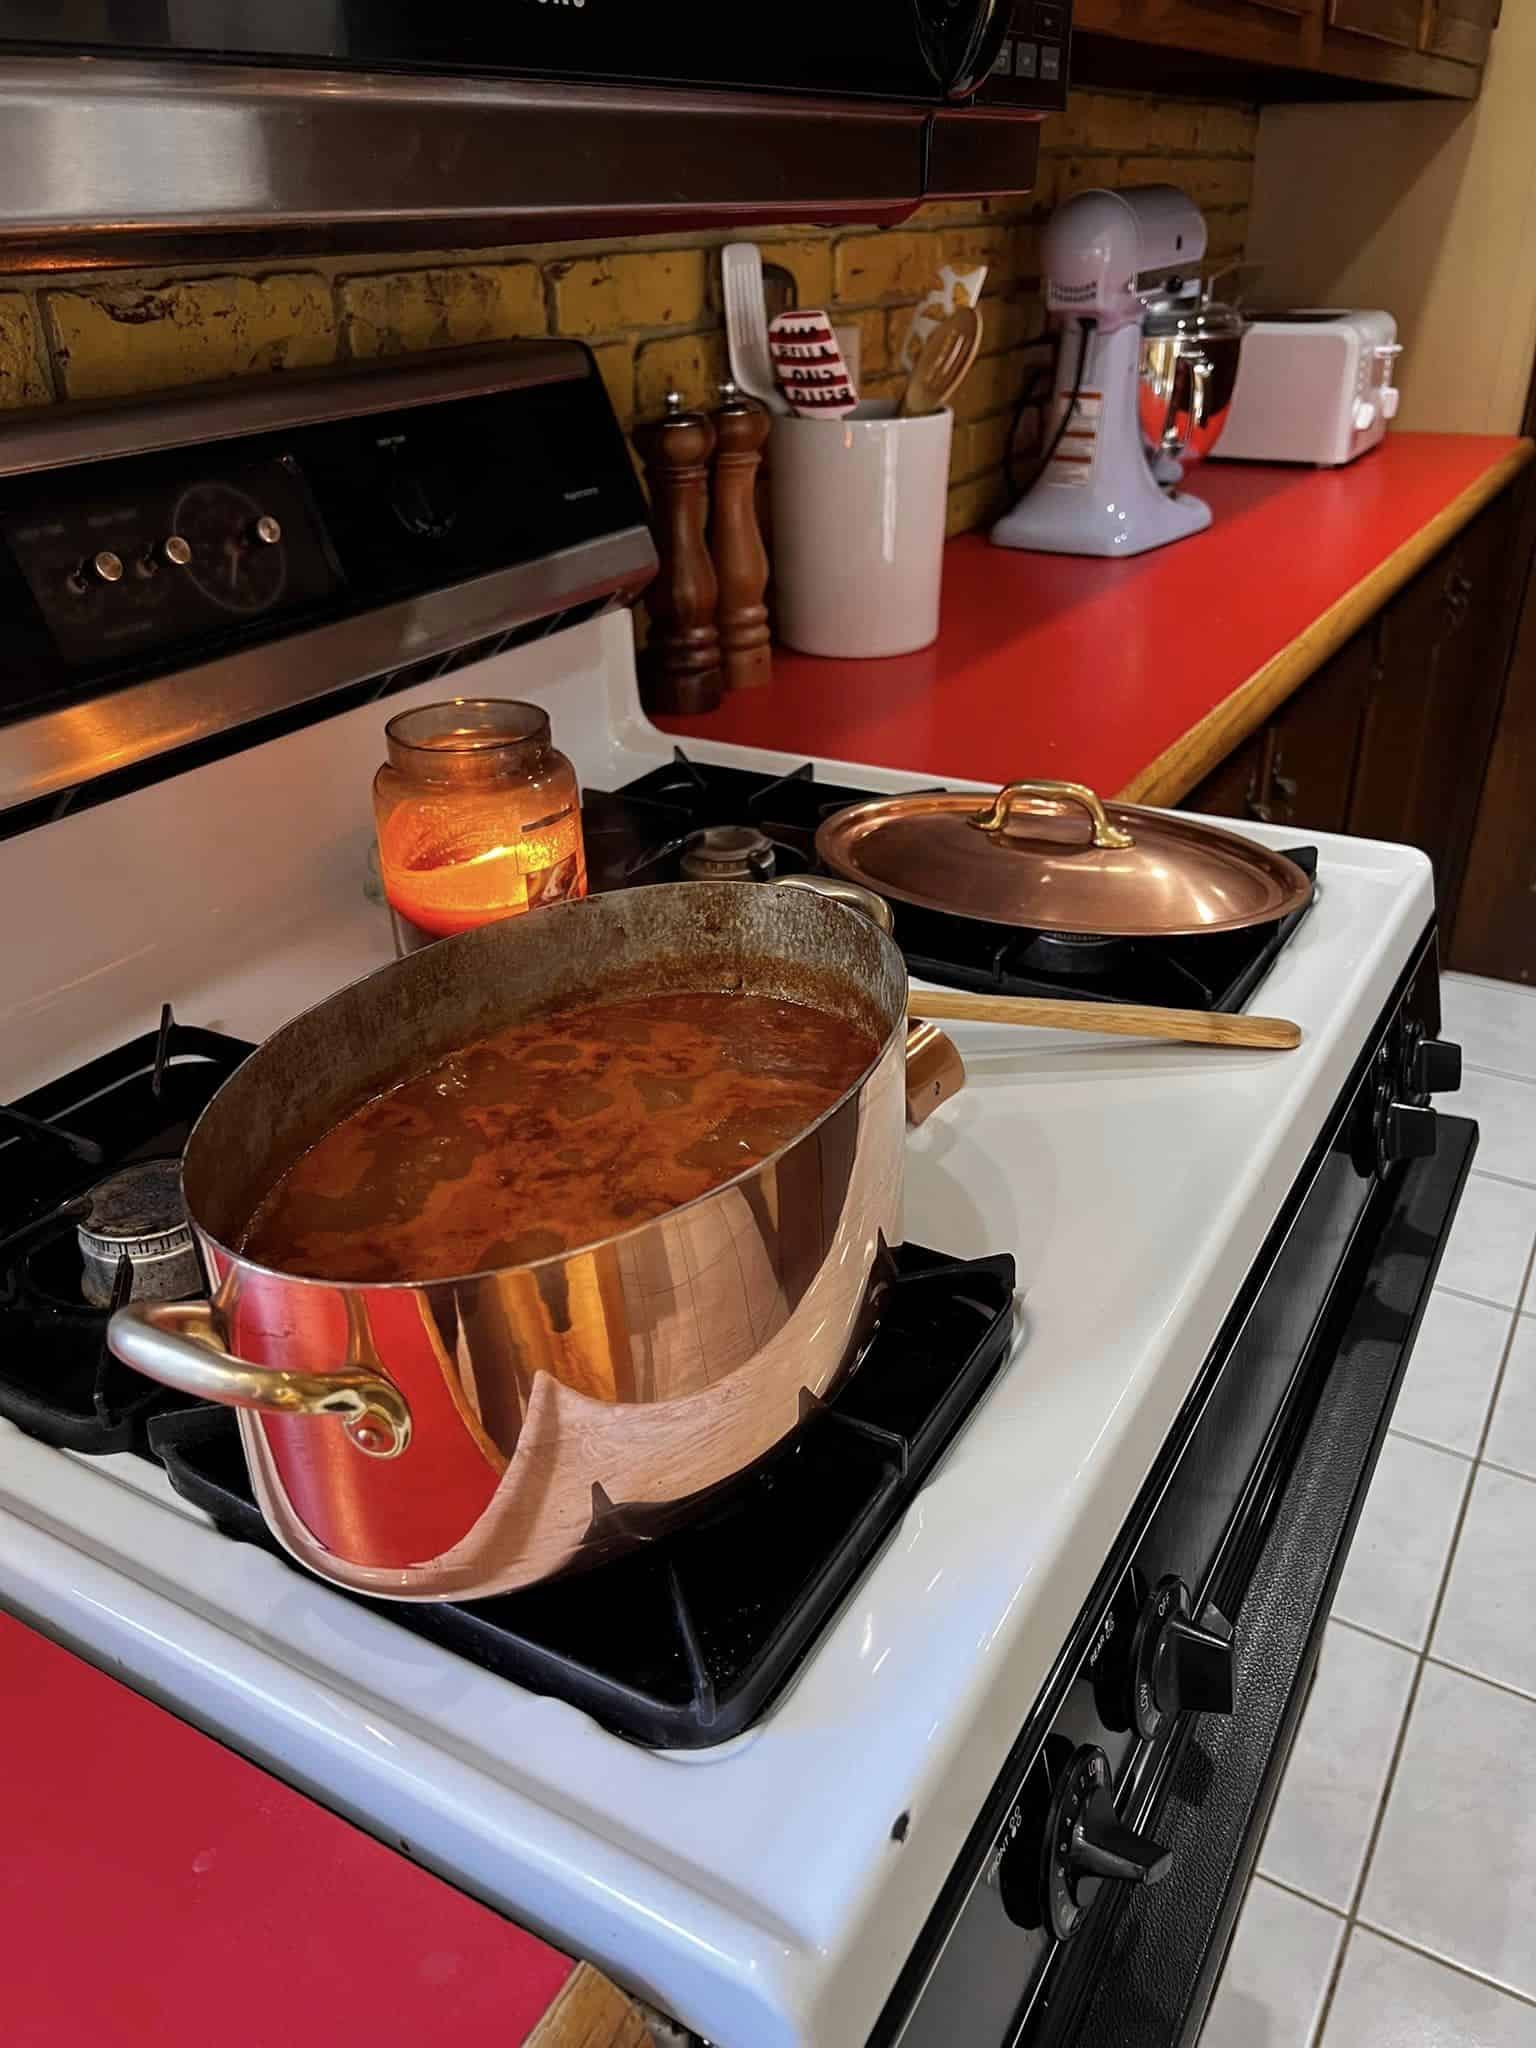
Hearty Chili

Husband rating: 5/5 stars
Ingredients
- 1 tablespoon olive oil
- 1 medium yellow onion (diced)
- 1 lb 90% lean ground beef
- 2½ tablespoons chili powder
- 2 tablespoons ground cumin
- 2 tablespoons granulated sugar
- 2 tablespoons tomato paste
- 1 tablespoon garlic powder
- 1 ½ teaspoons salt
- ½ teaspoon ground black pepper
- ¼ teaspoon ground cayenne pepper (optional)
- 1 ½ cups beef broth
- 1 can (15 oz) petit diced tomatoes
- 1 can (16 oz) red kidney beans, rinsed and drained
- 1 can (16 oz) black beans, rinsed and drained
- 1 can (8 oz) tomato sauce
Instructions
- Add the olive oil to a pan and place over medium heat for two minutes
- Add the onion and cook for 5 minutes. Stir occasionally.
- Add the ground beef and break it apart with a wooden spook. Cook for 6-7 minutes until beef is brown. Stir occasionally.
- Add chili powder, cumin, sugar, tomato paste, garlic powder, salt, pepper, and optional cayenne. Stir until combined.
- Add broth, diced tomatoes (with juice), drained beans and tomato sauce. Stir well.
- Bring to a boil, then reduce heat to a gentle simmer. Simmer uncovered for 20 minutes.
- Remove from the heat and allow the chili to rest for 5 to 10 minutes before serving.
Notes
There are many chili recipes out there (I’ve tried several) and this one is my favorite! The chili is packed with flavor, and straight-forward instructions and ingredients make altering the recipe to fit your preferences easy! For instance, my husband and I love spicy food, so I wasn’t shy about adding spices (feel free to over pour a little on the spices for an extra kick). I also doctored up the original recipe by adding black beans.
I used my 20cm 2mm oval cocotte for cooking.


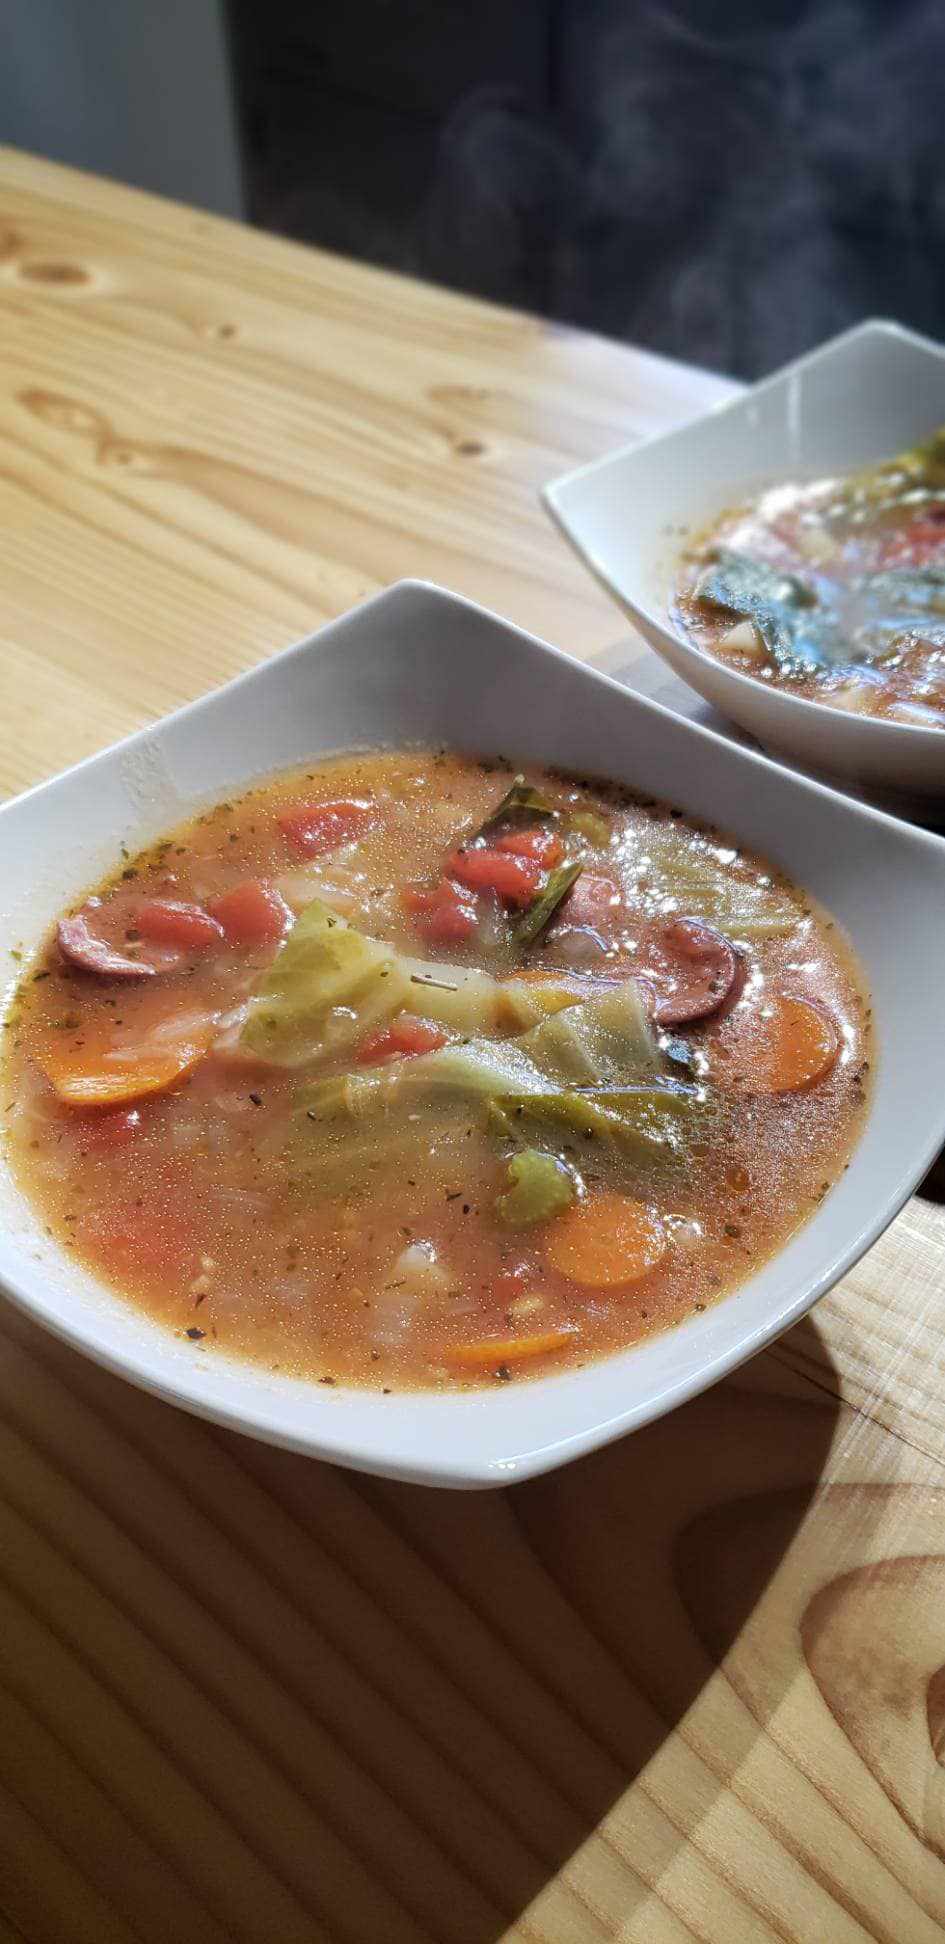
Sausage and Potato Soup
Husband rating: 4.5/5 stars
Ingredients
- 1 onion, diced
- 1 tablespoon butter
- 1/2 pound smoked sausage, sliced
- 3 cloves garlic, minced
- 1 stalk celery, chopped
- 1 carrot, chopped
- 1 large potato, peeled and diced
- 2 to 3 cups cabbage, chopped
- 4 cups low sodium beef broth
- 2 cups water
- 1 bay leaf
- 1 teaspoon Italian seasoning
- 1/4 teaspoon dried dill
- 15 ounces diced tomatoes with juice
- 1 to 2 tablespoons cornstarch
Instructions
- Cook onion, butter, garlic, celery, and sausage in a saucepan until onion is tender, about 5 minutes.
- Add carrot, potatoes, cabbage, beef broth, water, bay leaf, Italian seasoning and dried dill. Simmer uncovered until potatoes are tender, about 15 minutes.
- Add tomatoes with juice and cornstarch and simmer for 10 more minutes.
- Remove bay leaf, very carefully taste (it will be hot!), and season with salt and pepper.
Notes
There isn’t a lot say about this soup other than it’s hearty, filling, and delicious. I’m a big fan of one-pot or -pan recipes, and this soup does the trick. You can enjoy it with bread or salad, but it is more than capable of standing alone. This is a great recipe to make on fall and winter days (maybe in a few months after shoveling snow!). I made this soup twice, once using regular smoked sausage and the second time using chicken sausage, and both came out very good!
For this recipe, I used my 25cm 2.3mm Grands Magasins du Louvre saucepan.


Chicken Thighs with Apples

Husband rating: 5/5 stars
Ingredients
- 6 bone-in, skin-on chicken thighs
- Sea salt
- 3 tablespoons extra virgin olive oil, divided
- 6 sprigs fresh thyme
- 1 bay leaf
- 4 shallots, sliced
- 4 cloves of garlic, crushed)
- 1 granny smith apple, peeled and sliced
- ½ cup chicken bone broth or chicken stock
- 1 tablespoon apple cider vinegar
- 1 cinnamon stick
Instructions
- Preheat the oven to 350°F (176°C).
- Pat chicken dry and sprinkle with sea salt on both sides.
- In a large skillet or sauté pan, heat 2 tablespoons of the olive oil over medium heat.
- Add chicken thighs, skin side down, and cook for 4-5 minutes until golden brown. Flip them over and cook for another couple of minutes. Remove from pan.
- Add the remaining 1 tablespoon of olive oil, shallots, and garlic to the pan. Sauté for 2-3 minutes.
- Add sliced apple, thyme, and bay leaf, and sauté for an additional 3-4 minutes
- Add chicken bone broth or stock, apple cider vinegar, and the cinnamon stick. Bring to a boil and carefully stir to loosen brown bits in the pan. Reduce the liquid by 1/3.
- Serve hot.
Notes
If you enjoy a balance of sweet and salty flavors, this chicken recipe is for you! This dish is also very fragrant! Your kitchen will smell amazing while you’re cooking! You can make this dish year round, but definitely try to make it now to maximize its flavor while apples are in season! You won’t be disappointed!
You can forego the cinnamon stick (I completely forgot about it and threw it in last minute!). The flavor is tasty either way! Also, depending on the size of your pan, you may not need to reduce the liquid by 1/3 (step 7). The goal here is to avoid submerging the chicken into the liquid, not to reduce the liquid to strengthen its flavor — the liquid’s flavor will be vibrant and tasty regardless. For instance, I used my 28.5cm 3.2-3.5mm Chomette Favor sauté pan (a perfect width if you plan to cook six chicken thighs at once) and the liquid seemed low enough to place the chicken back into the pan and put it into the oven right away. I could have reduced the liquid a bit, but it didn’t alter the outcome much.


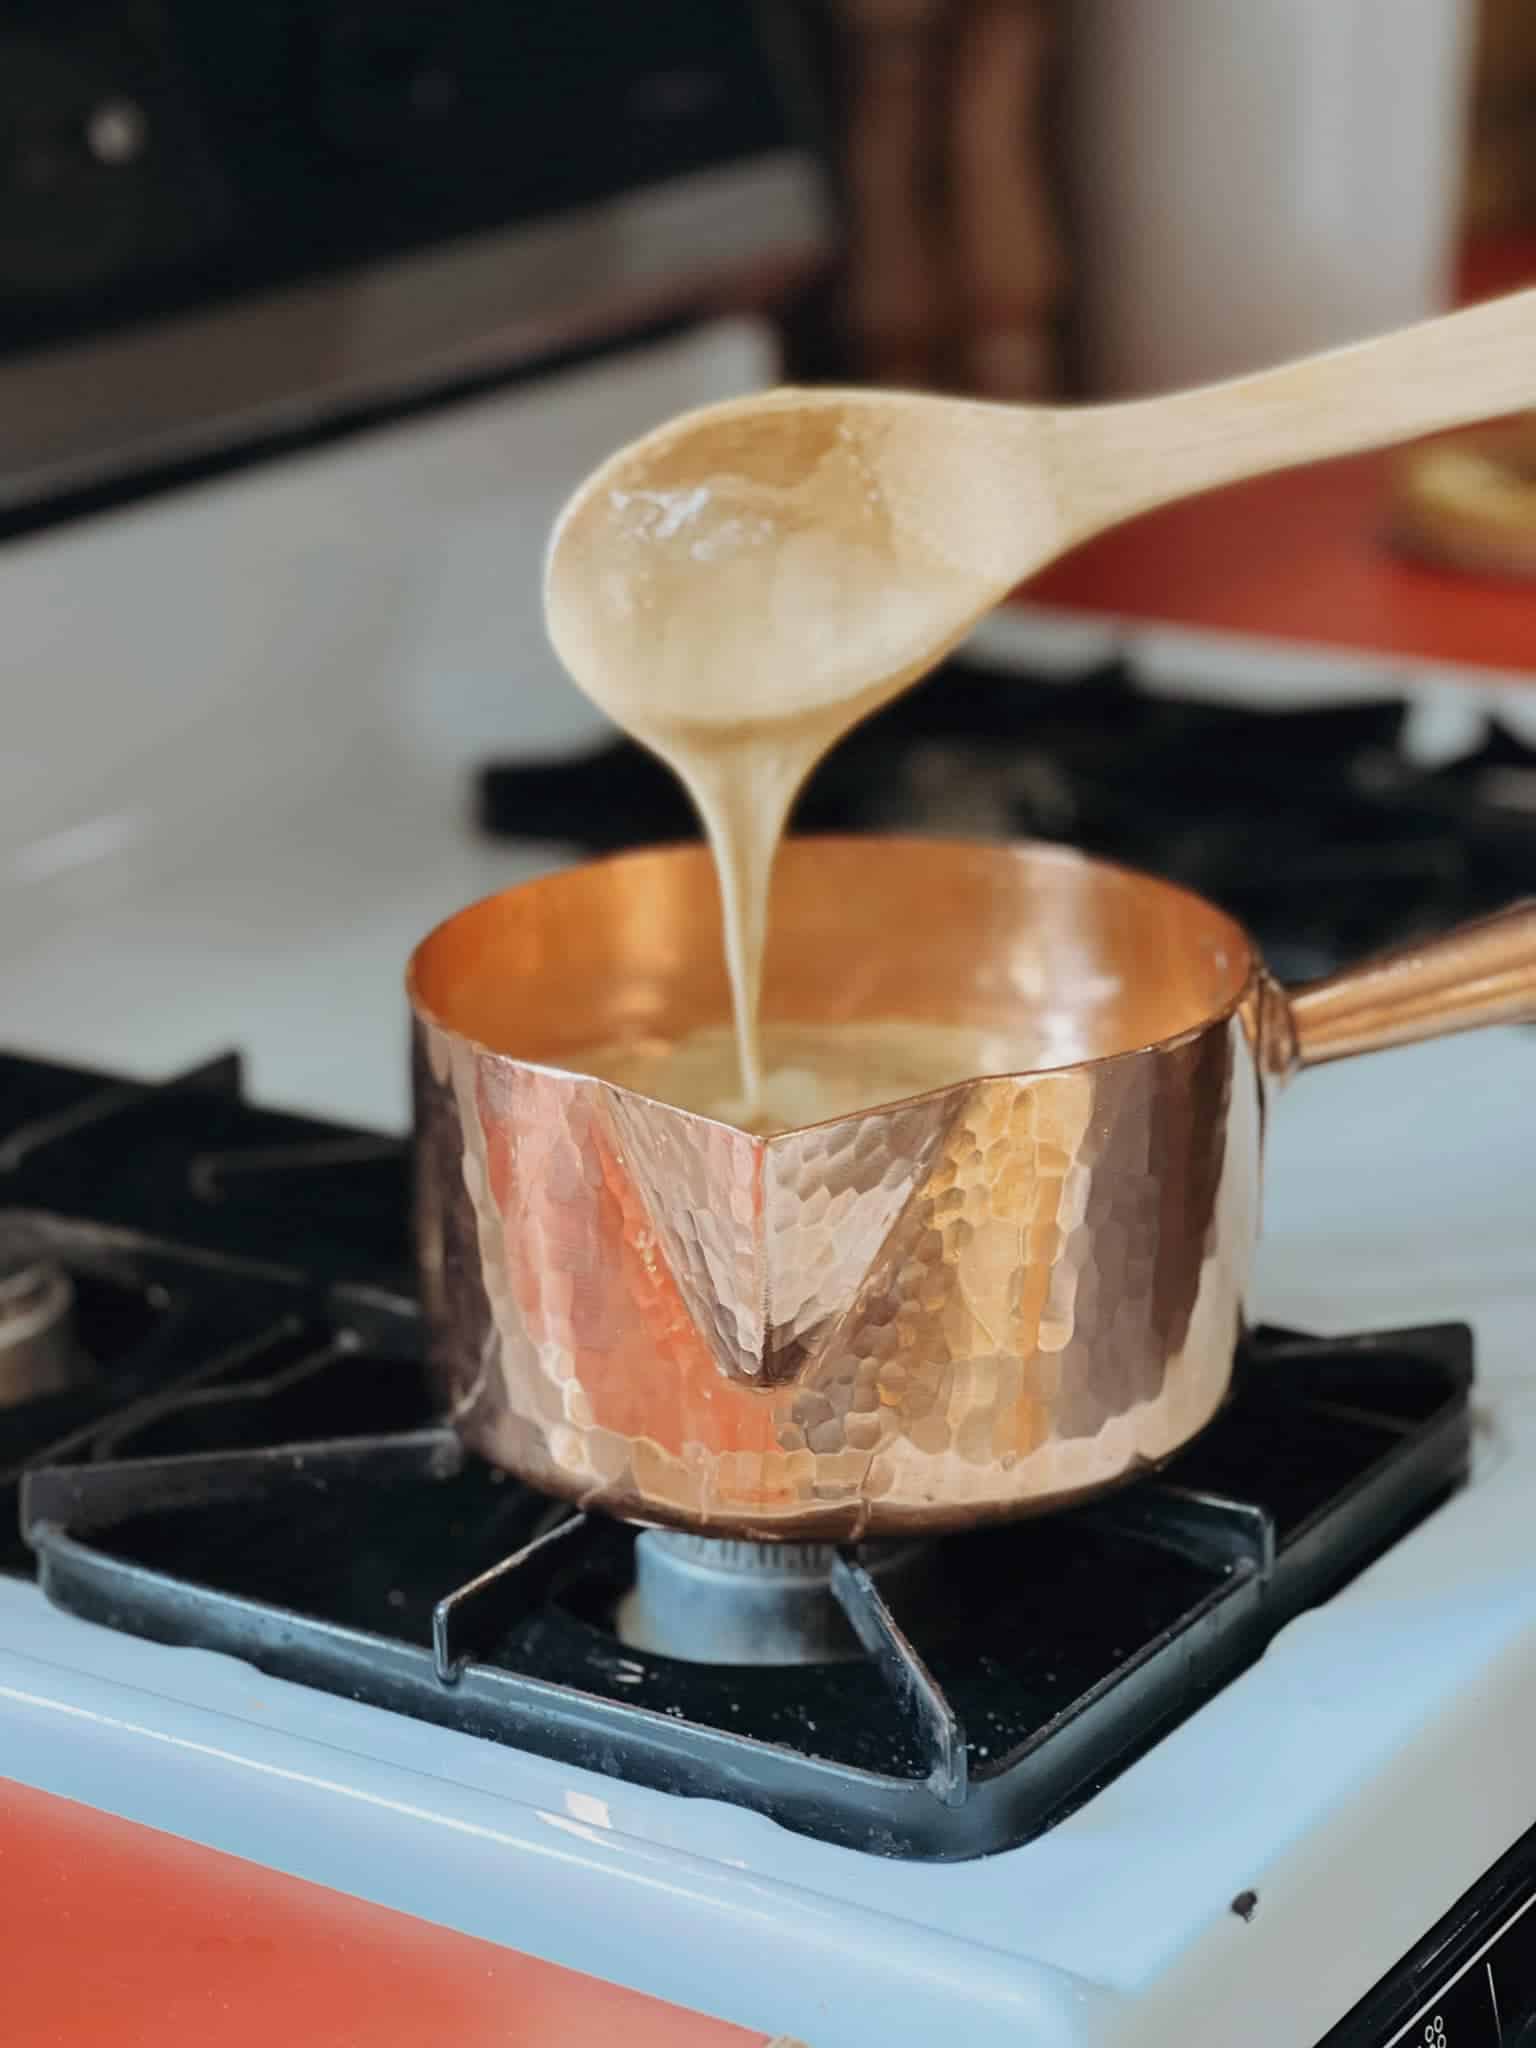
Caramel Popcorn

Husband rating: 5/5 stars
Ingredients
- 5 quarts popped popcorn
- 1 cup butter
- 2 cups brown sugar
- ½ cup corn syrup
- 1 teaspoon salt
- 1 teaspoon vanilla extract
- ½ teaspoon baking soda
Instructions
- Preheat the oven to 250°F (121°C).
- Place popped popcorn in a large bowl.
- Melt butter in a sugar pan (or medium sauce pan) over medium heat. Stir in brown sugar, corn syrup, and salt. Bring to a boil stirring constantly. Boil without stirring for 4 minutes.
- Remove pan from heat and stir in vanilla and baking soda.
- Pour caramel in a thin stream over the popcorn. Stir until evenly coated.
- Divide the popcorn between two large shallow baking dishes.
- Bake in the preheated oven stirring every 15 minutes for 1 hour.
- Remove from the oven and allow the popcorn to cool before breaking it into pieces.
Notes
Caramel popcorn brings back memories of outdoor crisp weather fairs, markets, and festivals. This is one of my husband’s favorite treats.
If you don’t have a copper sugar pan (I didn’t until very recently) you can make the caramel in a regular small to medium size saucepan. My 2.1mm antique sugar pan is 16cm in diameter and 9cm high, so aim for a pan around that size or any saucepan that can hold 2-3 quarts. My pan was just large enough to accommodate the caramel without spilling over.


Skillet (for me, sauté pan) Caramel Apple Crisp

Husband rating: 5/5 stars
Ingredients
For the caramel sauce:
- 2 cups (400 g) granulated sugar
- ¾ cup (170 g) unsalted butter (1 1/2 sticks) diced
- 1 cup (240 ml) heavy cream
- 1 teaspoon vanilla extract
- 1 teaspoon kosher salt
For the filling:
- 3 lbs (1360 g) tart and firm apples such as Honey Crisp, Mutsu, Jonathan (about 6 apples)
- 1 tablespoon fresh lemon juice
- 1 teaspoon ground cinnamon
- ½ teaspoon ground cardamom
- 1/8 teaspoon ground cloves
- Pinch of kosher salt
For the topping:
- 1 cup (130 g) all-purpose flour
- 1 cup (90 g) old-fashioned oats
- 1/3 cup (40 g) chopped pecans (optional)
- 1/3 cup (75 g) light brown sugar
- ½ teaspoon kosher salt
- One stick (½ cup, 115 g) unsalted butter, softened
Instructions
Prepare the caramel sauce:
- Add the granulated sugar and ¼ cup water to a saucepan and stir to combine.
- Add the butter and set it over medium-high heat. Do not stir. Allow to melt completely, untouched, for 4-5 minutes.
- When the mixture has begun to brown on the edges, use a heat-proof spatula to carefully stir occasionally for 4-5 minutes until the mixture is a deep golden brown color. Don’t walk away during this step as the mixture can quickly burn.
- Remove the pan from the heat and carefully whisk in the heavy cream. The mixture will bubble.
- When the mixture settles down to a smooth consistency, add vanilla and salt. If the caramel is lumpy, you can place the pan on low heat and whisk until it is smooth.
- Set aside in a heat-safe bowl to cool.
Yield: 2 cups
Prepare the filling:
- Preheat oven to 350°F (176°C) and set the oven rack in the middle level of the oven.
- Peel, core, and slice apples into half-inch slices.
- Combine sliced apples, lemon juice, spices, and salt in a large bowl and stir to combine.
- Drizzle ½ cup of cooled caramel over the top and stir again.
- Scrape the apples and all juices into a 9 or 10 inch oven safe skillet (this size pan comes from the original recipe, but see notes!).
Prepare and apply the topping, and bake:
- Combine the flour, oats, pecans, sugar, and salt in the same bowl, and stir until well combined.
- Mash the butter into the dry ingredients with your hands until crumbs form.
- Add the crumb topping to the top of the apples in the skillet (or sauté pan).
- Bake in preheated oven for 40 to 50 minutes until the topping is golden and juices are bubbling.
Notes
I have a confession, apple crisp isn’t my go-to favorite dessert, but in the spirit of seasonal baking I decided to make it. I’m not disappointed that I did though, because this dish turned out very tasty! This is a multi-step recipe, but it’s not super complex. I made notes as I went along.
A few notes on making the caramel: If you’re a sugar-work novice like myself you might also make the silly mistake of picking up your spatula and accidentally touching what appears to be hardened and cooled off caramel (if it has been resting for a bit after you’ve moved on to your whisk). DON’T DO THIS, or proceed with caution because there’s a chance that the caramel is still very hot. I burnt my right pointer finger and had to quickly run it under cold water. Ouch! Also, I’m still learning about how to tell when caramel is darkening in color underneath boiling bubbles, and how to feel for clumps during the final step (I didn’t feel any clumps but found a few sugar clumps later when it was cooling). Maybe you’ll be able to assist with some knowledge here, or maybe you’ll be like me and watch a timer and guess! Either way (light, dark, clumps or no clumps) I’m certain your caramel will come out delicious! As with the caramel popcorn, my pan was just large enough to make the caramel in the recipe, so aim for a 2-3 quart saucepan.
Notes on the filling: Save time by slicing your apples with a potato peeler, and be generous when adding the caramel to your filling (this, plus adding it on top later, is what you made all of that delicious caramel for!). If you use a skillet, you’ll need one that is at least 12 inches (30 cm) wide, and if you use a sauté pan use a pan that is 24cm or larger. I think that 26cm is ideal. I used my 24cm, 2.8mm E. Dehillerin saute pan and the apples barely fit.
Notes on the topping: I didn’t use chopped pecans, as my husband is not a fan of nuts in desserts, but definitely add them for extra flavor and texture! I also cut the softened butter prior to adding it into the filling because for me, it made incorporating it easier. Lastly, my husband and I agreed that the old-fashioned oats made the texture of the topping different from the crumbly and sugary topping that we’re used to when eating apple crisp, but the taste was still delicious! This is hard to describe so you will have to make this recipe and see for yourself. My husband loved it and I thought it was tasty, but I enjoyed it more the next day after the oats softened in the refrigerator overnight.


I hope you all enjoy darkening hues of patina on your pots and pans, kitchens warmed by ovens, spaces filled with sweet and savory aromas, and the many pleasures of cooking and baking (especially in copper!) during this time of the year!
Happy cold weather copper cooking!
VFC says: Amy, this is a fantastic and mouth-watering post! Thank you for sharing these recipes and taking the time to walk us through them with photos and your notes! And it’s always a pleasure to see vintage copper put to good use like this. I can’t wait to try these!

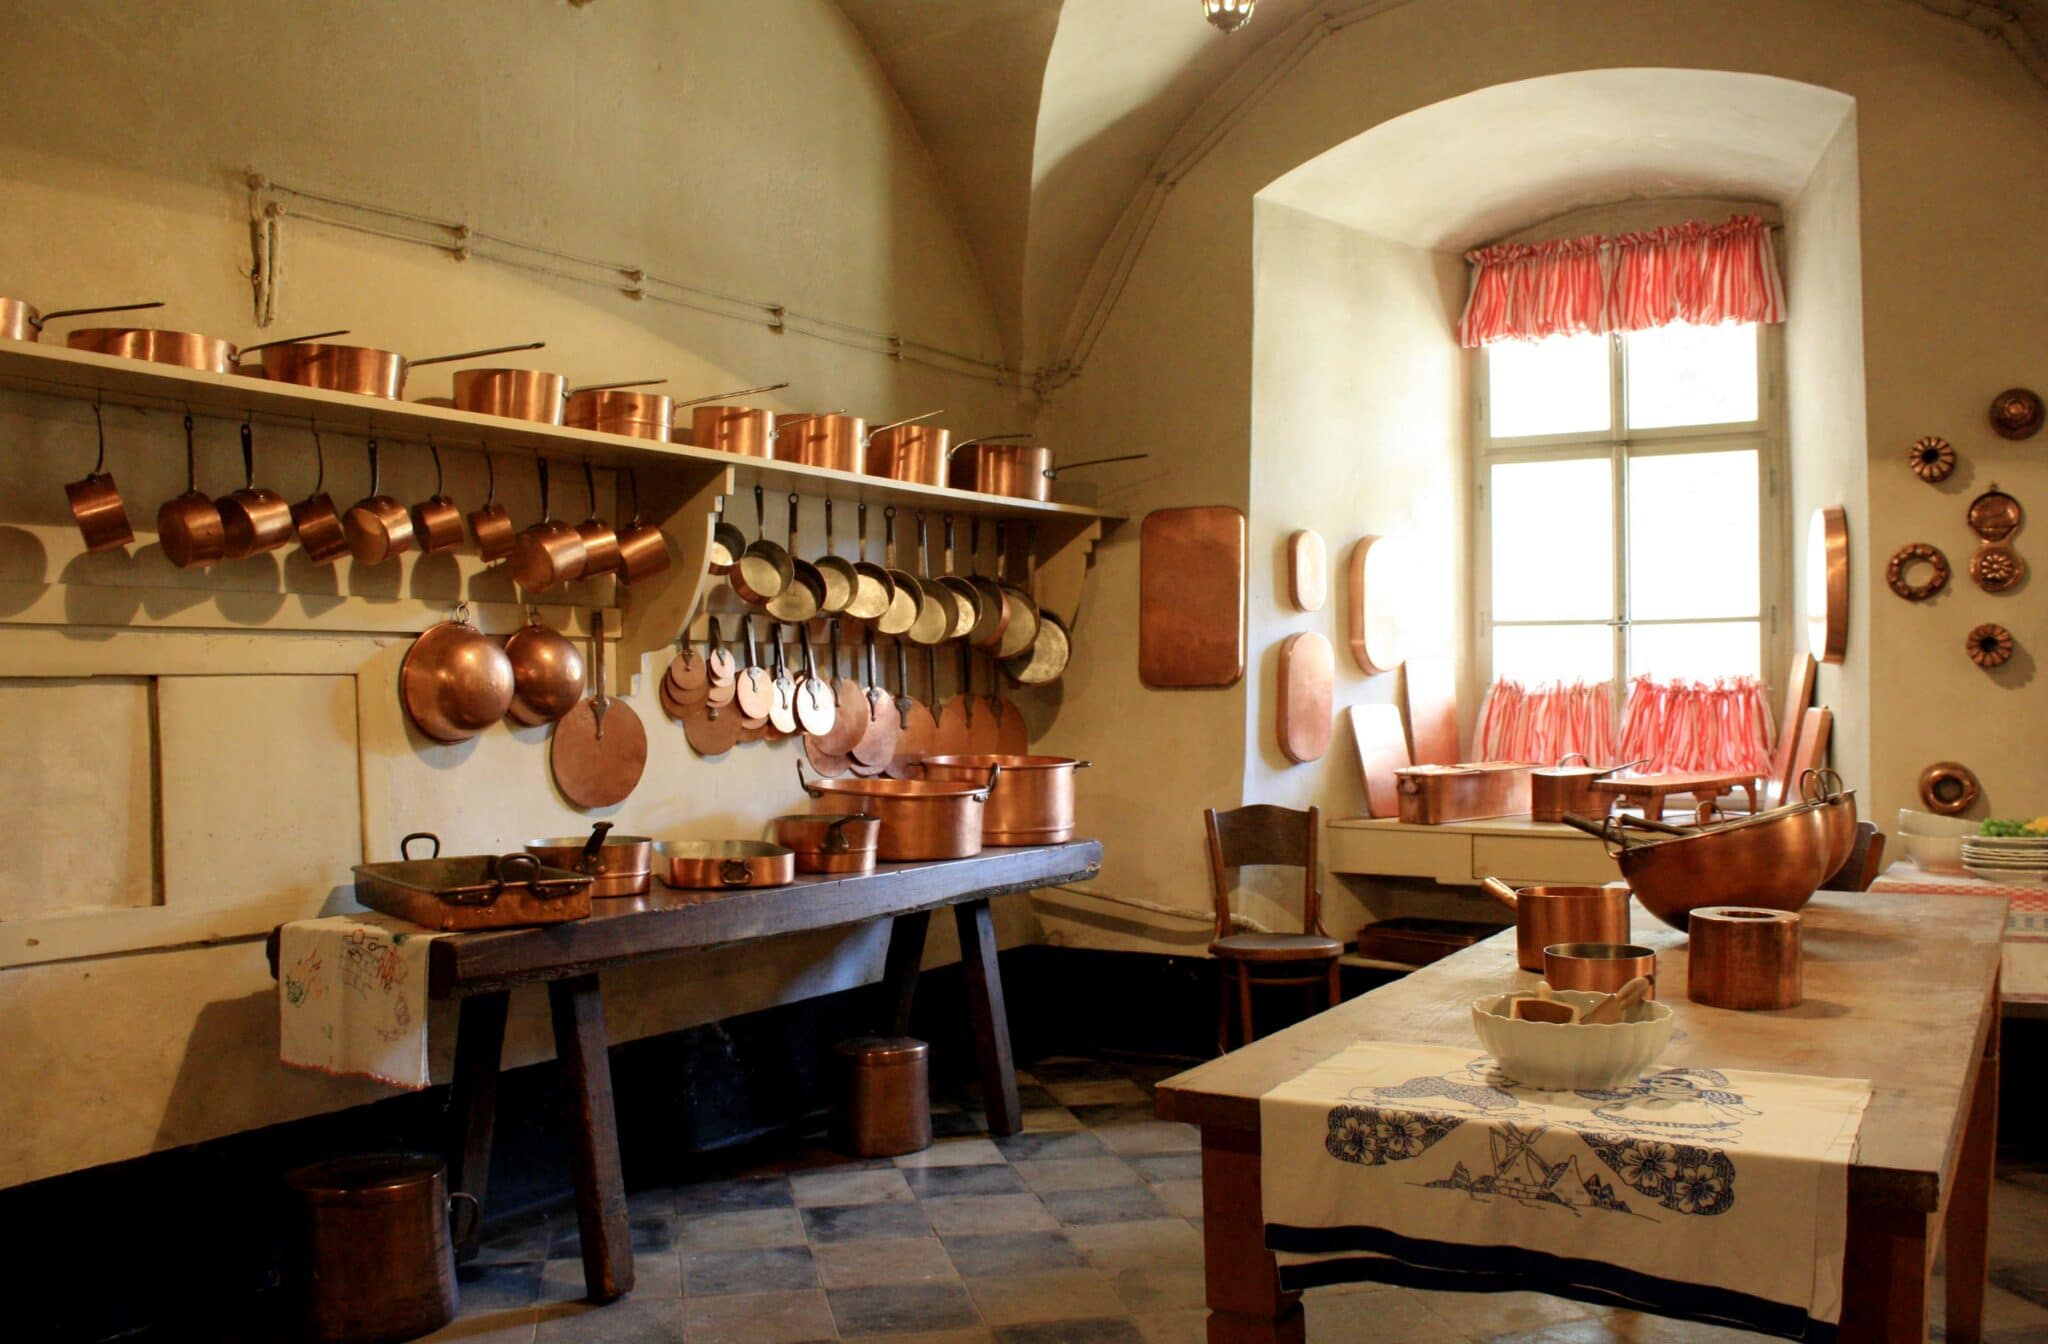

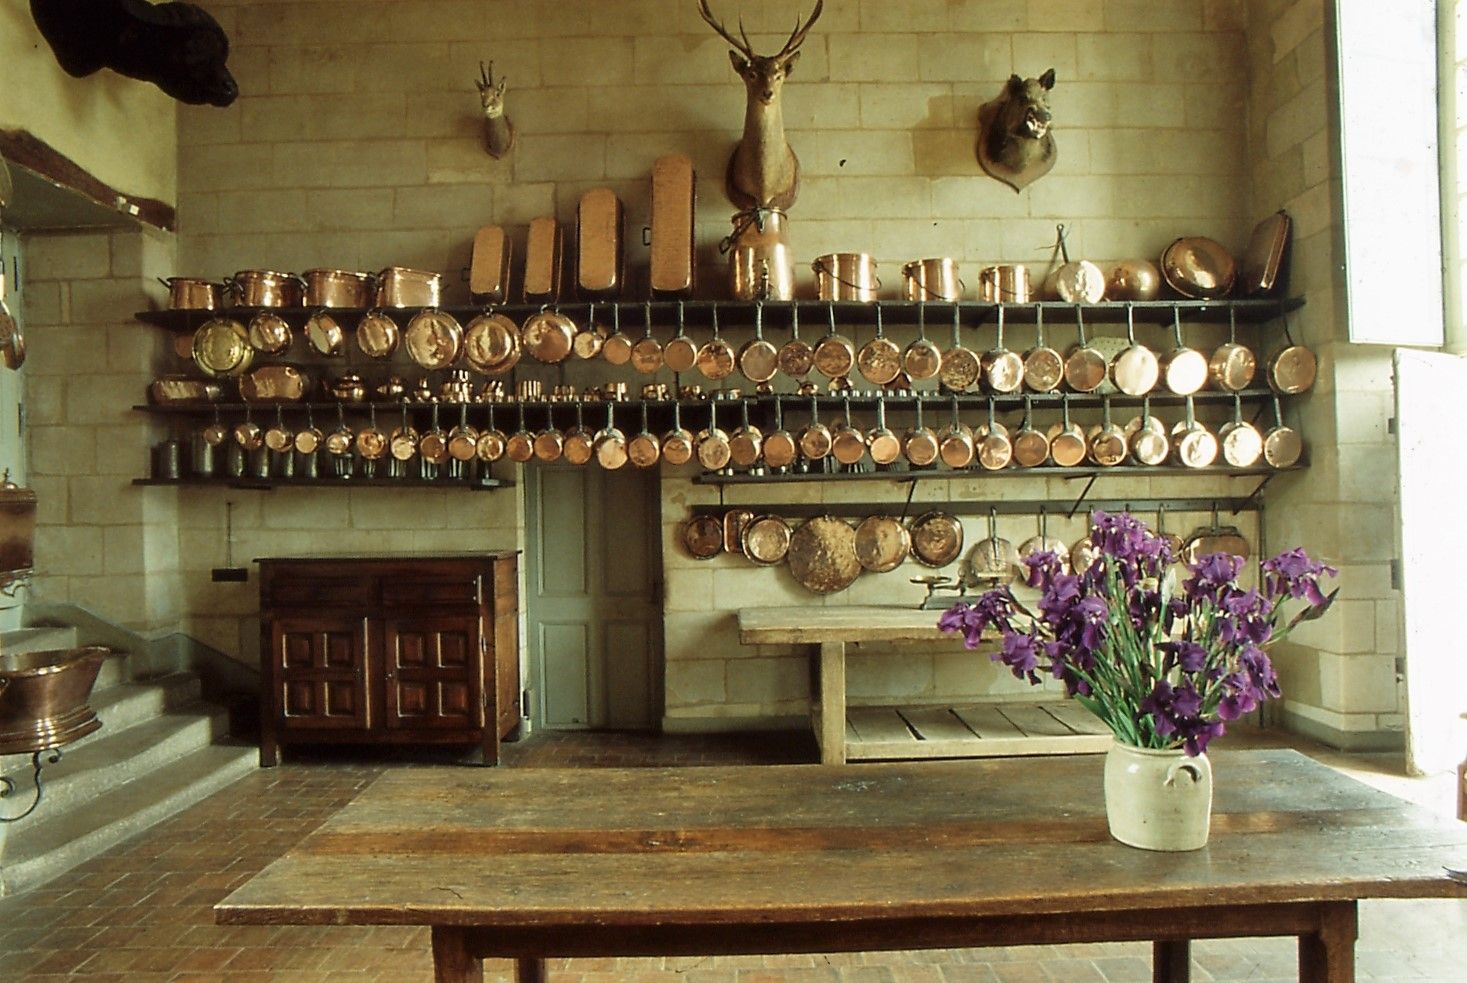
Yum! Thanks for the delicious looking recipes along with the beautiful photos of your copper collection, Amy.
You’re very welcome, Sus! I love finding good recipes so I had to share 🙂
I forgot to mention! If you don’t have a copper sugar pan, I wouldn’t recommending using a tin lined copper saucepan in it’s place. I never cranked the heat up to high, but the sugar gets VERY hot and (I’m assuming) it could damage the tin. I don’t know for certain, but to play things safe I’d recommend using any other saucepan. Input, of course, is welcome! But please be careful for your tin!
Wow Amy, I love all of these. You’re really putting that copper to work
Beautiful
Thank you so much, Brock! 🙂
Hi Amy, great to see you beautifully showcasing some of your fall recipes and whetting our appetites!
I too am a big fan of soups and stews in the winter months. An hour ago I devoured 3 plates of cream of nutmeg squash soup (much tastier than hokaido squash, I think); I ate good German bread with it. Many of these dishes you can cook in advance, then you have it more comfortable some days or you can offer spontaneous visits after a walk something to warm up (it does not always have to be tea, coffee and something sweet).
Instead of chili powder I take fresh or self-dried chili peppers, which I chop very small. Since olive oil can have a strong taste of its own, I prefer to use clarified butter for sautéing chicken or other meat with a rather delicate taste of its own. For example, I do this with my variations of coq au vin. I find butter enhances the inherent flavor of a meat, while olive oil tends to dominate in flavor or at least add something of its own. But this different nuance may be desired, of course.
Another small difference I noticed: I usually leave a lid on the pan, unless I need to stir more often (as with risotto, where evaporation of the cooking liquid is also desired). The point of the narrow and tall shape of soup pans, after all, is to have as little of the contents evaporate as possible while simmering. Lowest possible heat is also still important. While it’s wonderful to smell the kitchen, most of the flavor should stay in the pan. But you may want to reduce the liquid to increase the concentration and thus the flavor in a different way.
A star chef likes to present his own variation on gentle braising in his TV show. Instead of a lid, he places parchment paper, cut exactly to the size of the pan, on the food being cooked. On the one hand, the paper retains the steam and flavor in the pan; at the same time, you can monitor the braising process through the semi-transparent paper.
Hi Martin, thank you so much for all of your great tips!!
I agree with all that you mentioned, including the olive oil. I’ll try substituting it for clarified butter next time. I haven’t used this ingredient yet, but I’m excited to try it and I’m sure the outcome will be very tasty!
I’ll also keep lids on pans to retain extra moisture and flavor during future cooking endeavors, and I’ll give semi-transparent parchment paper a try! You make great points here! So you know though, if you make the chicken and apples recipe above, it should come out moist and with a very strong flavor with the pan uncovered. A stronger flavor might overpower the dish, but your recommendation I’m certain stands true in all other cases!
Matt also loves chili peppers, so when I mention to him that you shelf dry and cut them into small pieces as a substitute for chili powder I’m sure that he’ll be enthusiastic about trying this as well! You can’t beat the flavors and quality of fresh ingredients! (In addition to needing to try this with chili peppers, Matt and I plan on starting an herb garden next spring!)
Also, I think that having soups and stews on standby for visitors is a great idea! I’m sure that something warm and ready to go during the even colder months ahead will be enjoyed by all.
Cooking is fun! I’m still relatively new to it, but I don’t think I’ll ever stop learning, so I appreciate you sharing this! I’m sure that other readers appreciate it as well! 🙂
You have nice cookware. I wonder how you feel cooking with tin-lined copper on open flame. I prefer glass top electric. Do you get much apple flavor in your chicken briase? Apples are hard to get flavor out of.
Let me take a guess at where you are from. You put ground meat, beans and tomatoes in your chili. My guess is New Jersey. It is such an American Italian spin on Mexican cuisine. The other New England states prefer chowders, milk, potato and fish. That’s Irish. My second guess would be Texas, but you don’t add any dried chili. And they put yellow cheese on everything.
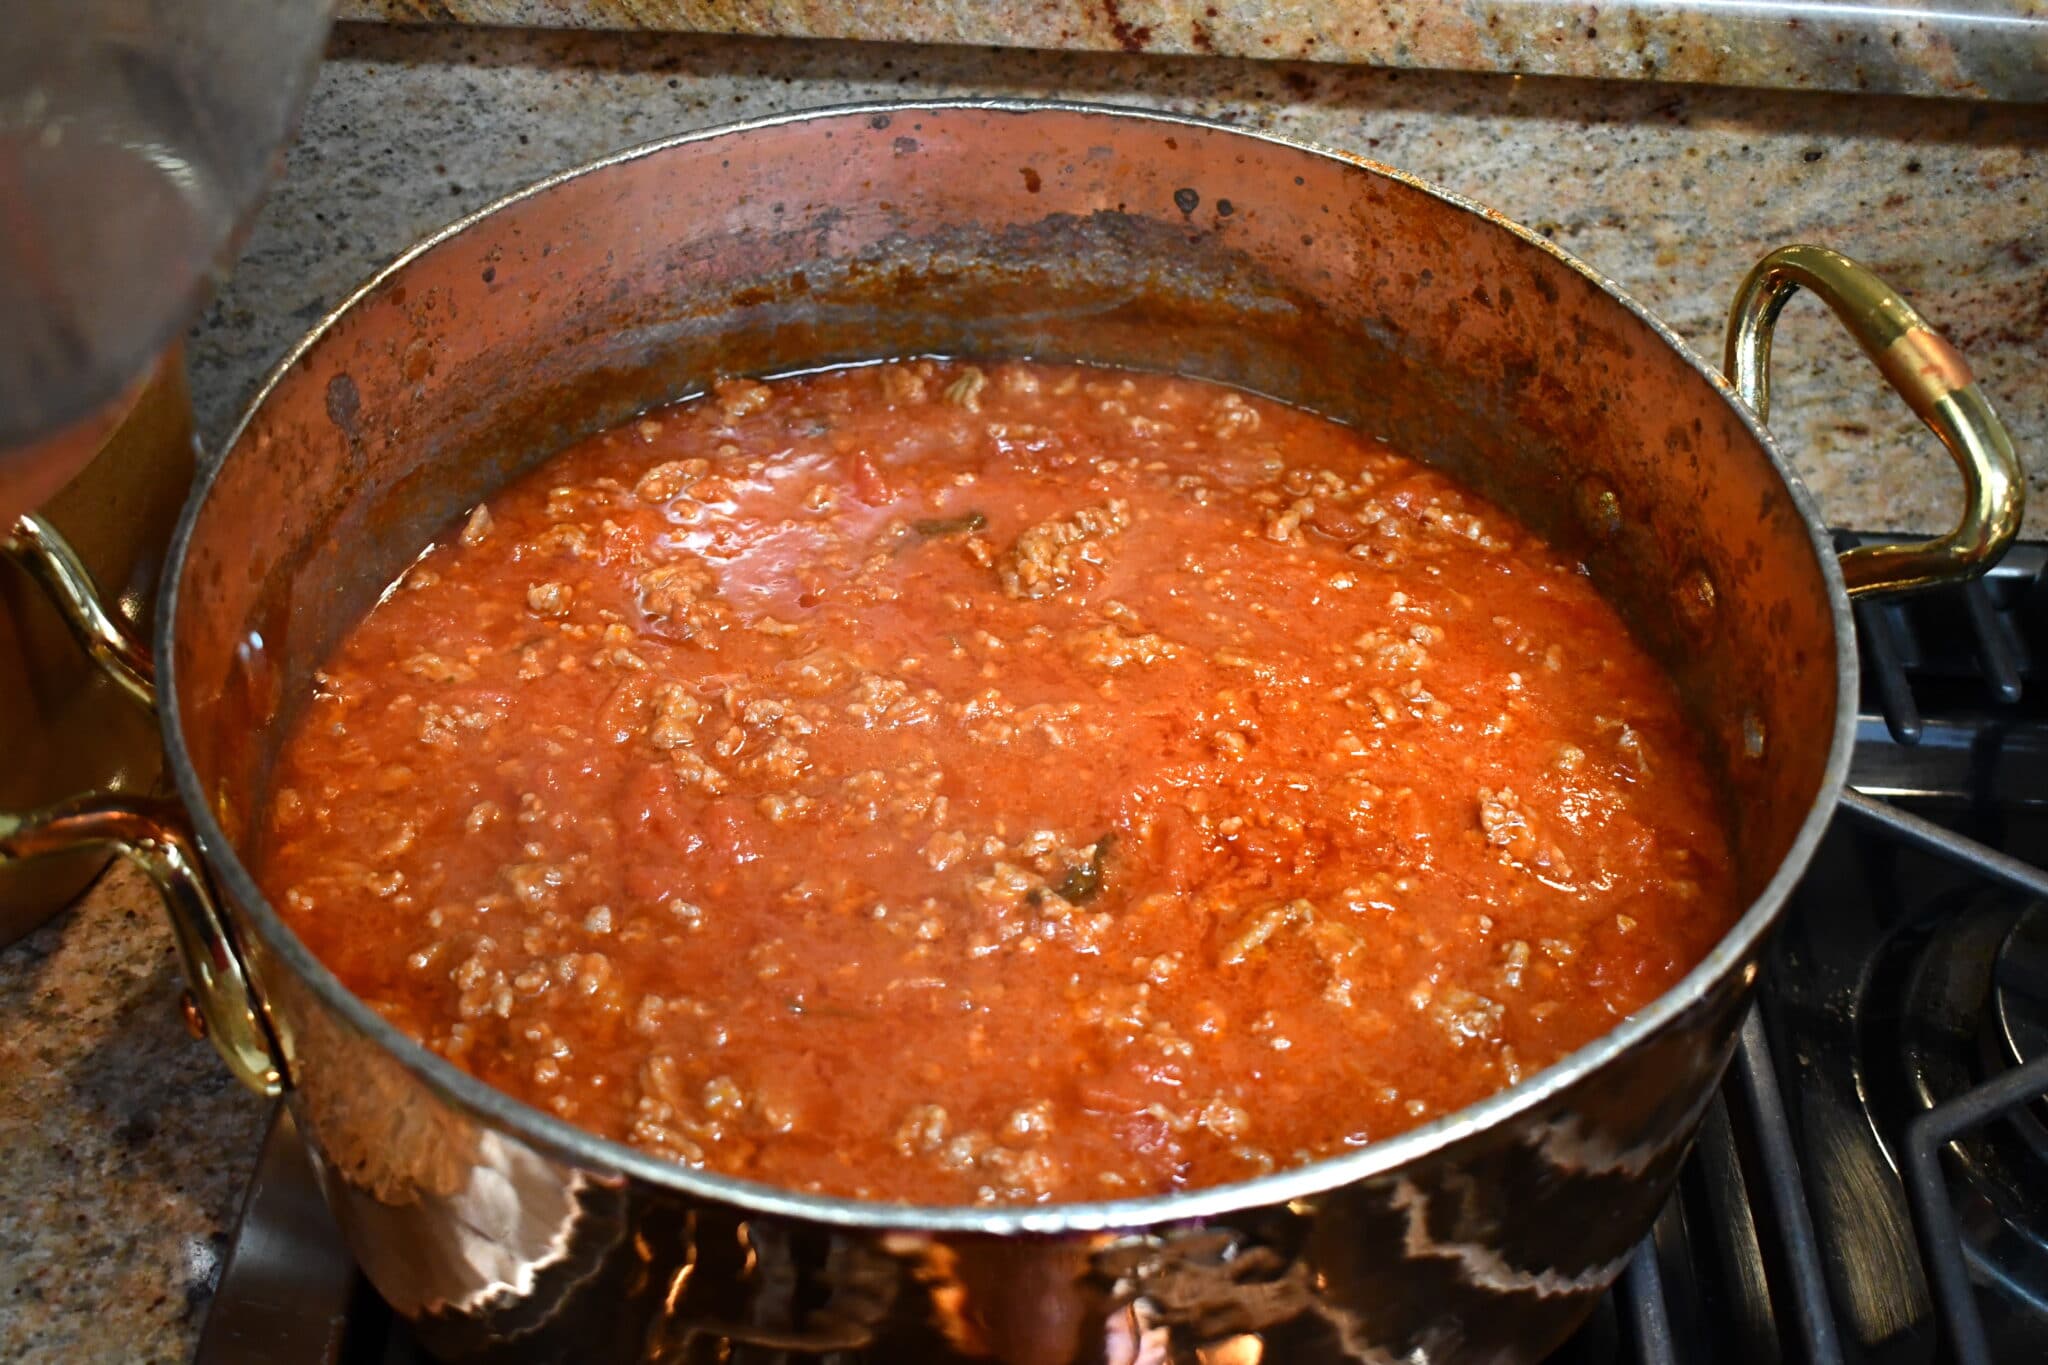
You are making a Bolognese sauce variant. Drop the garlic. Finely chopped onion, celery and carrot cooked in oil is called sofrito. That is italian savory. Too, Italians add finely chopped meat to the sofrito. The addition of garlic is Portuguese, or Latin American.