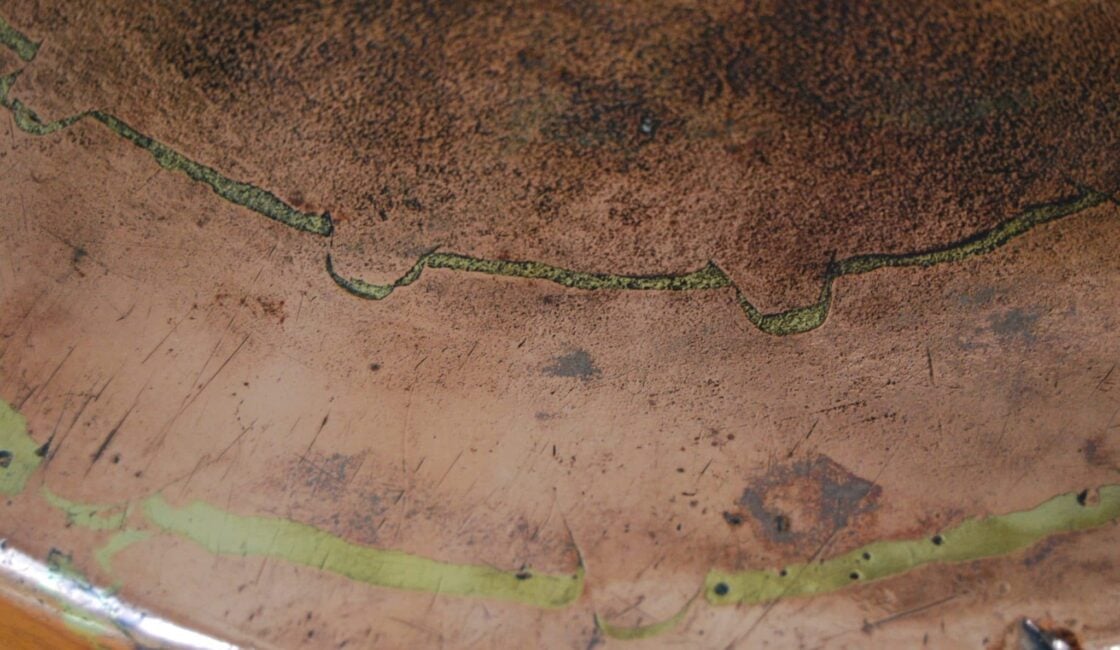
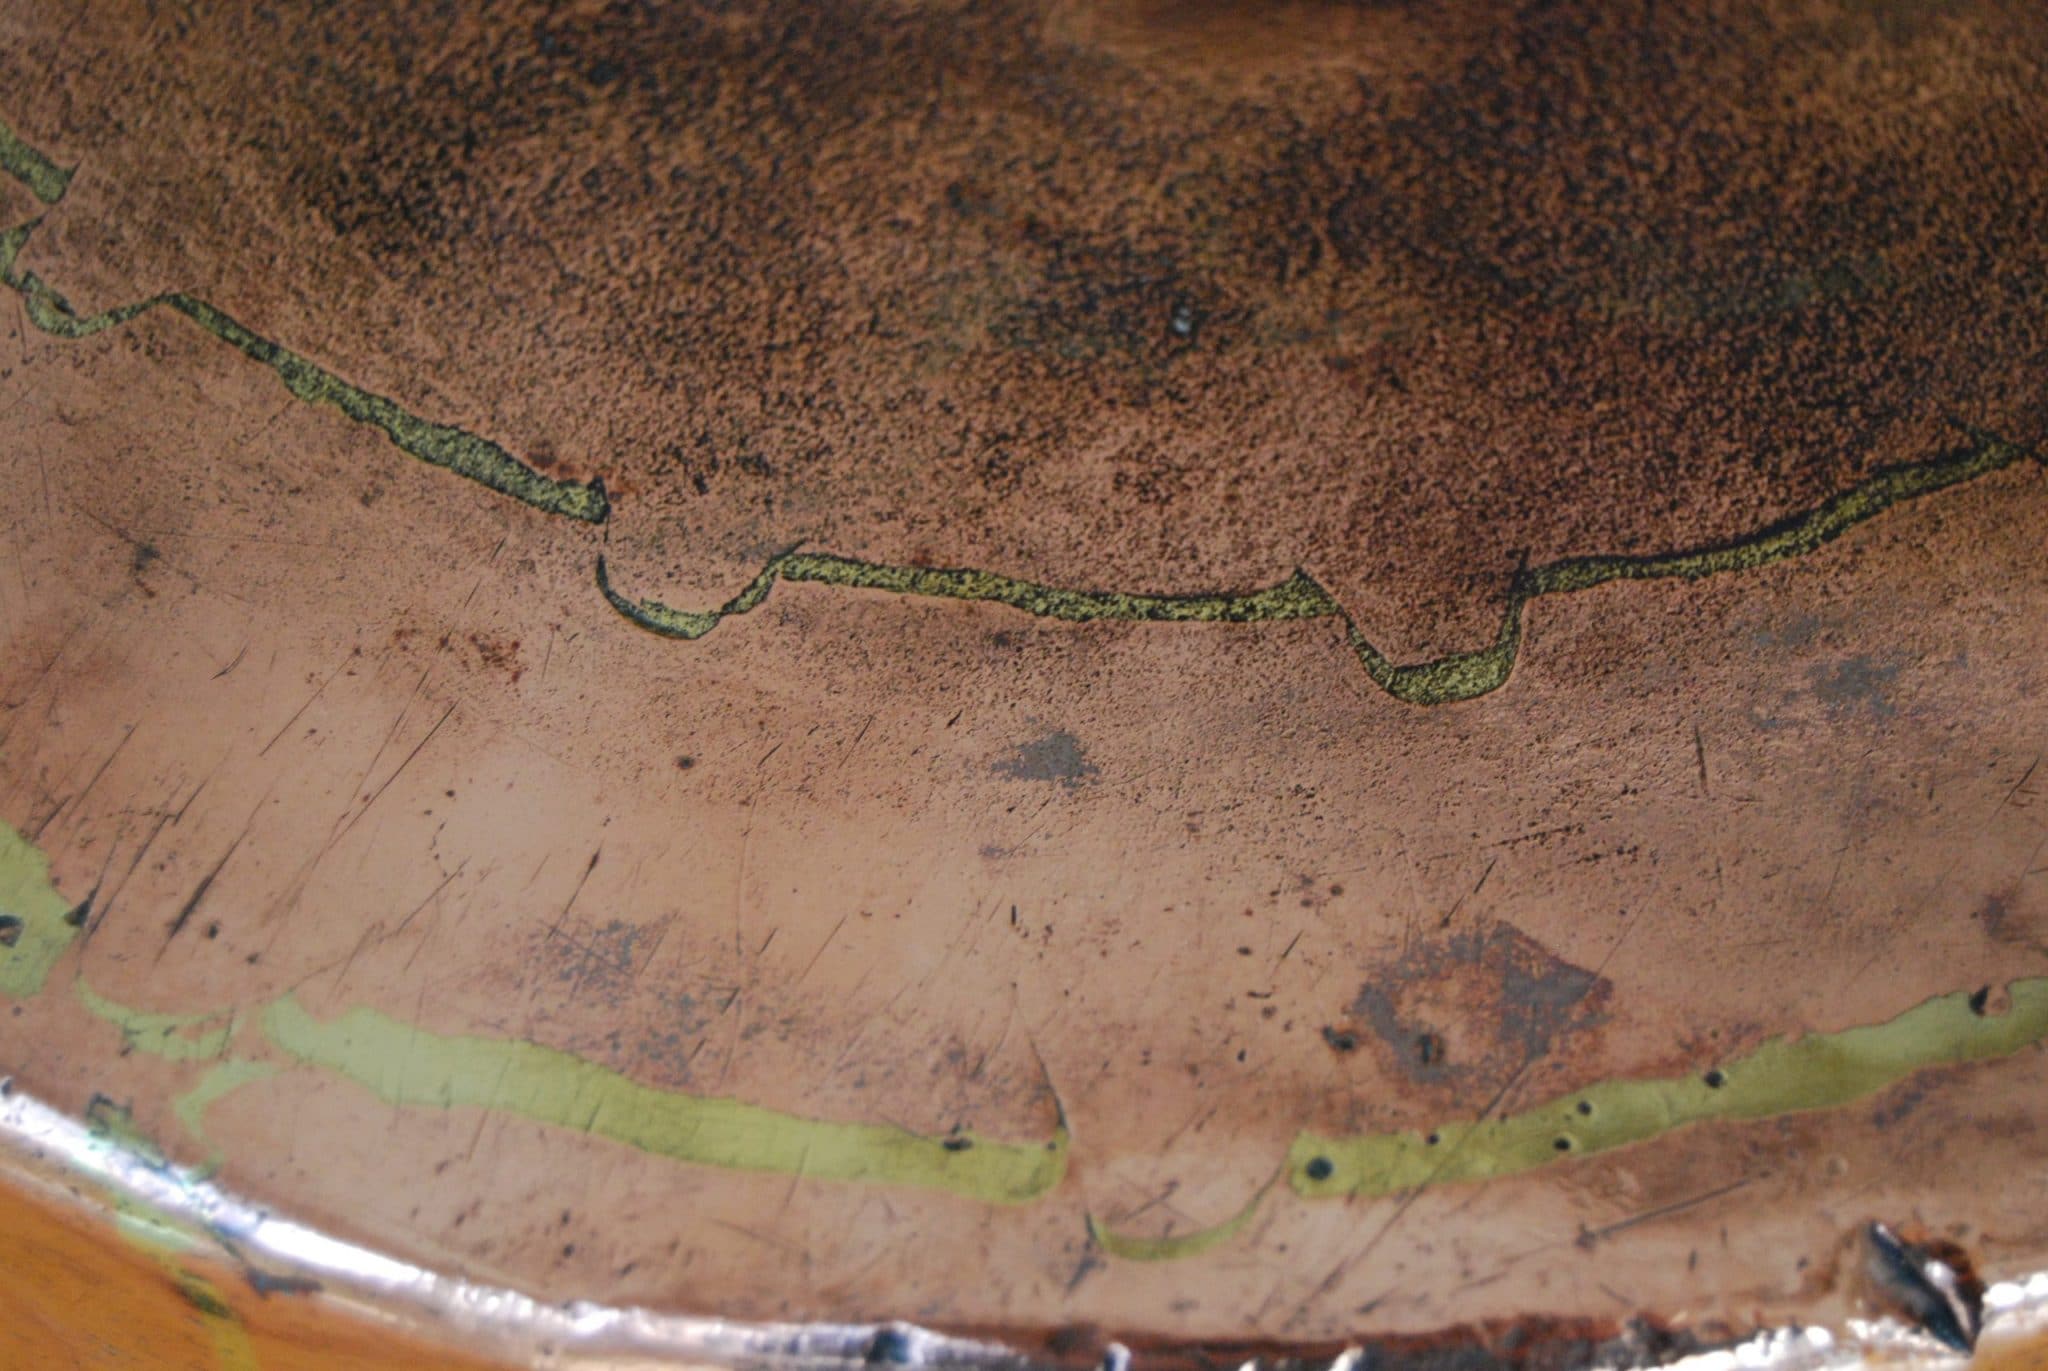
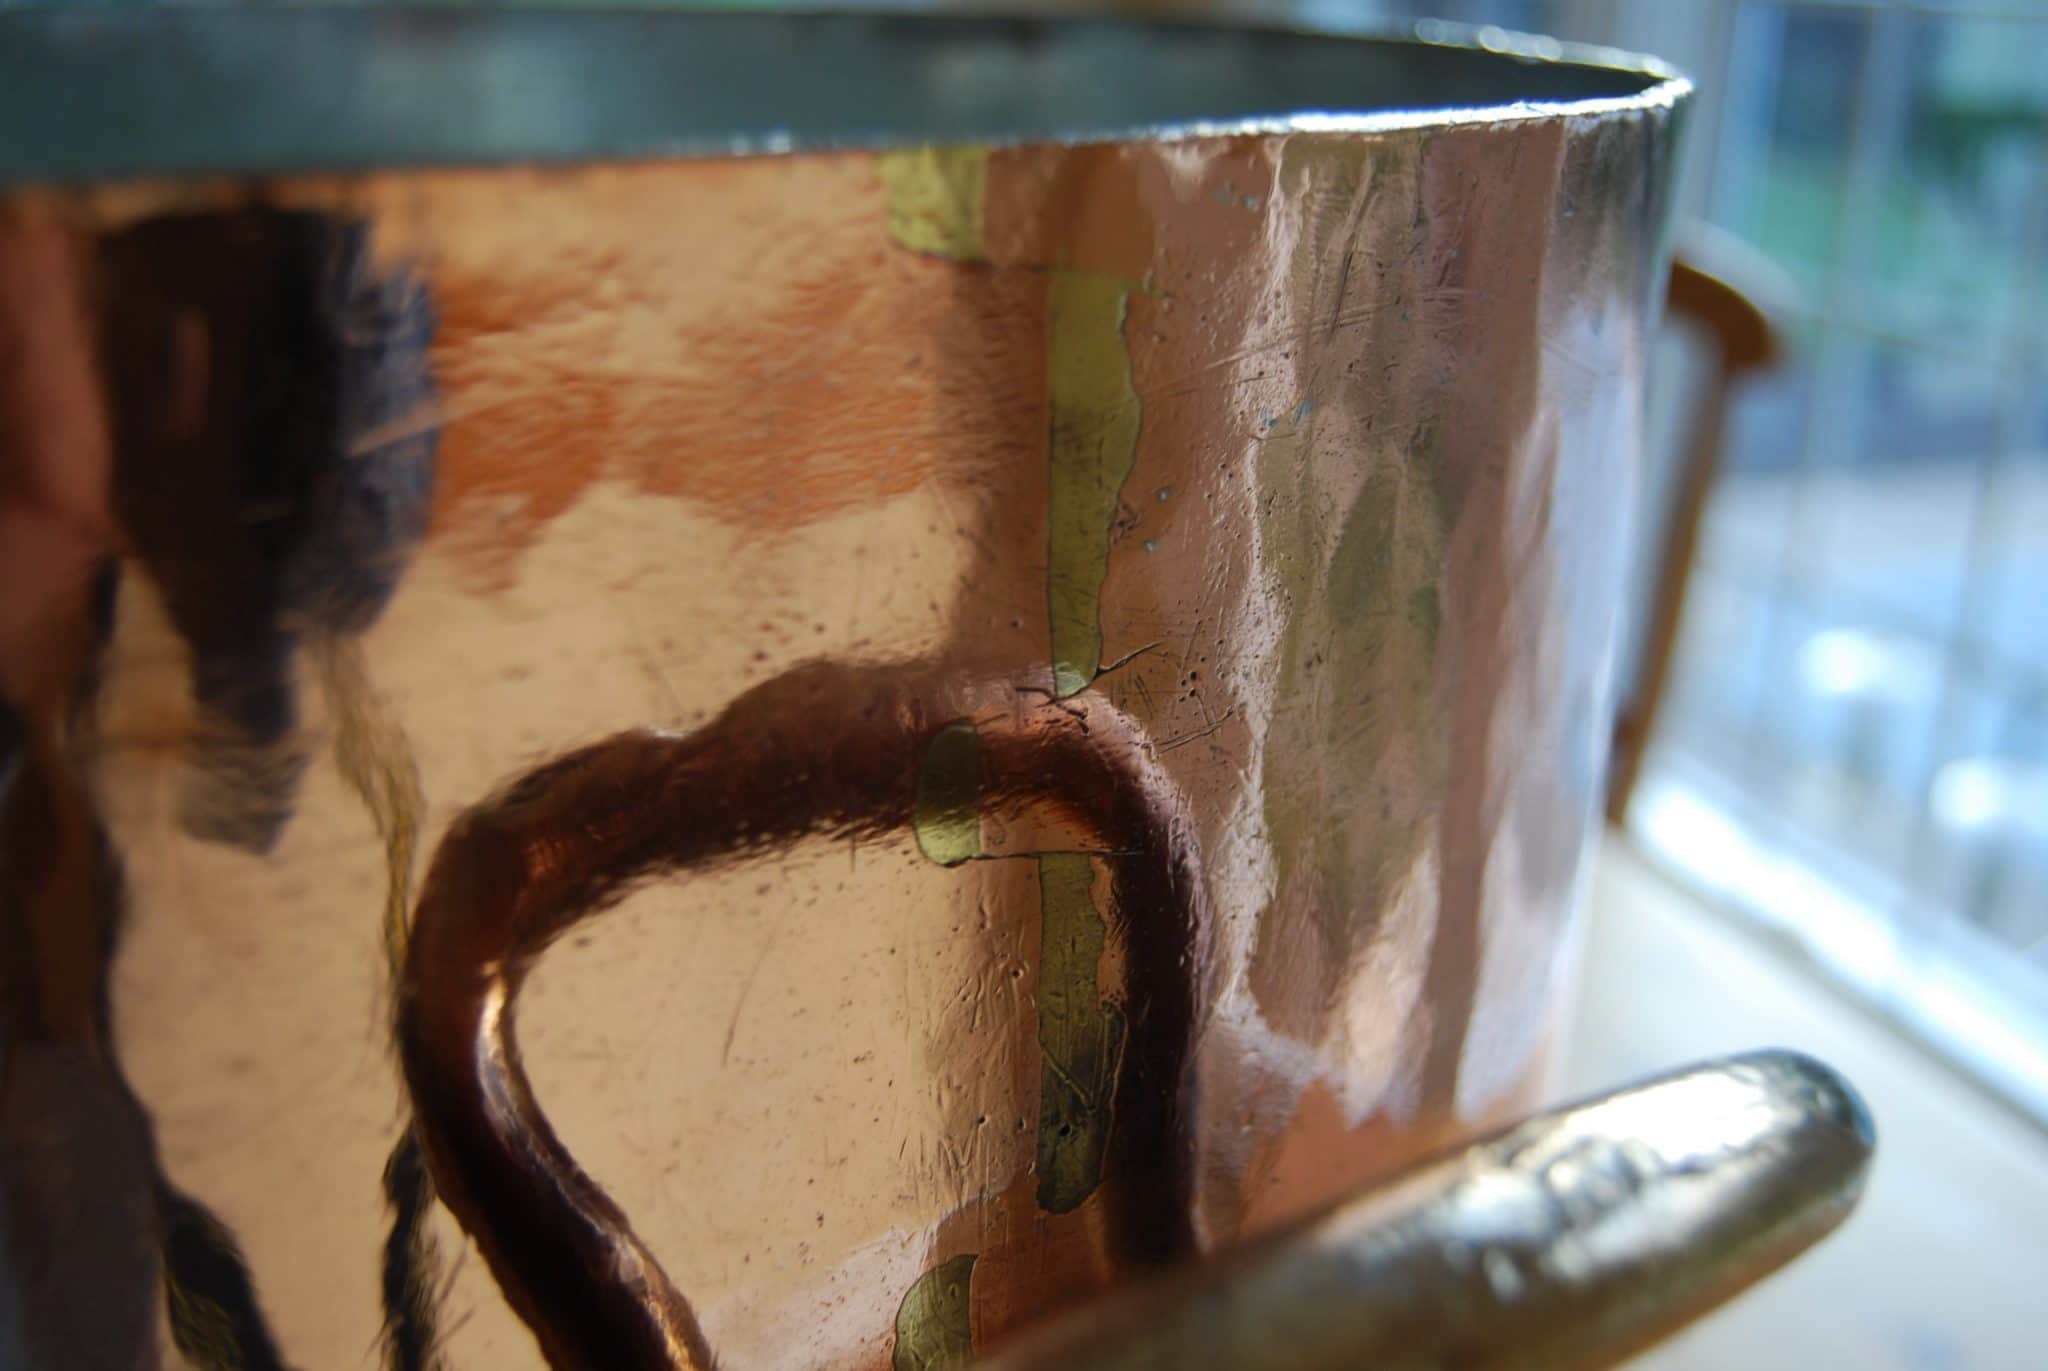
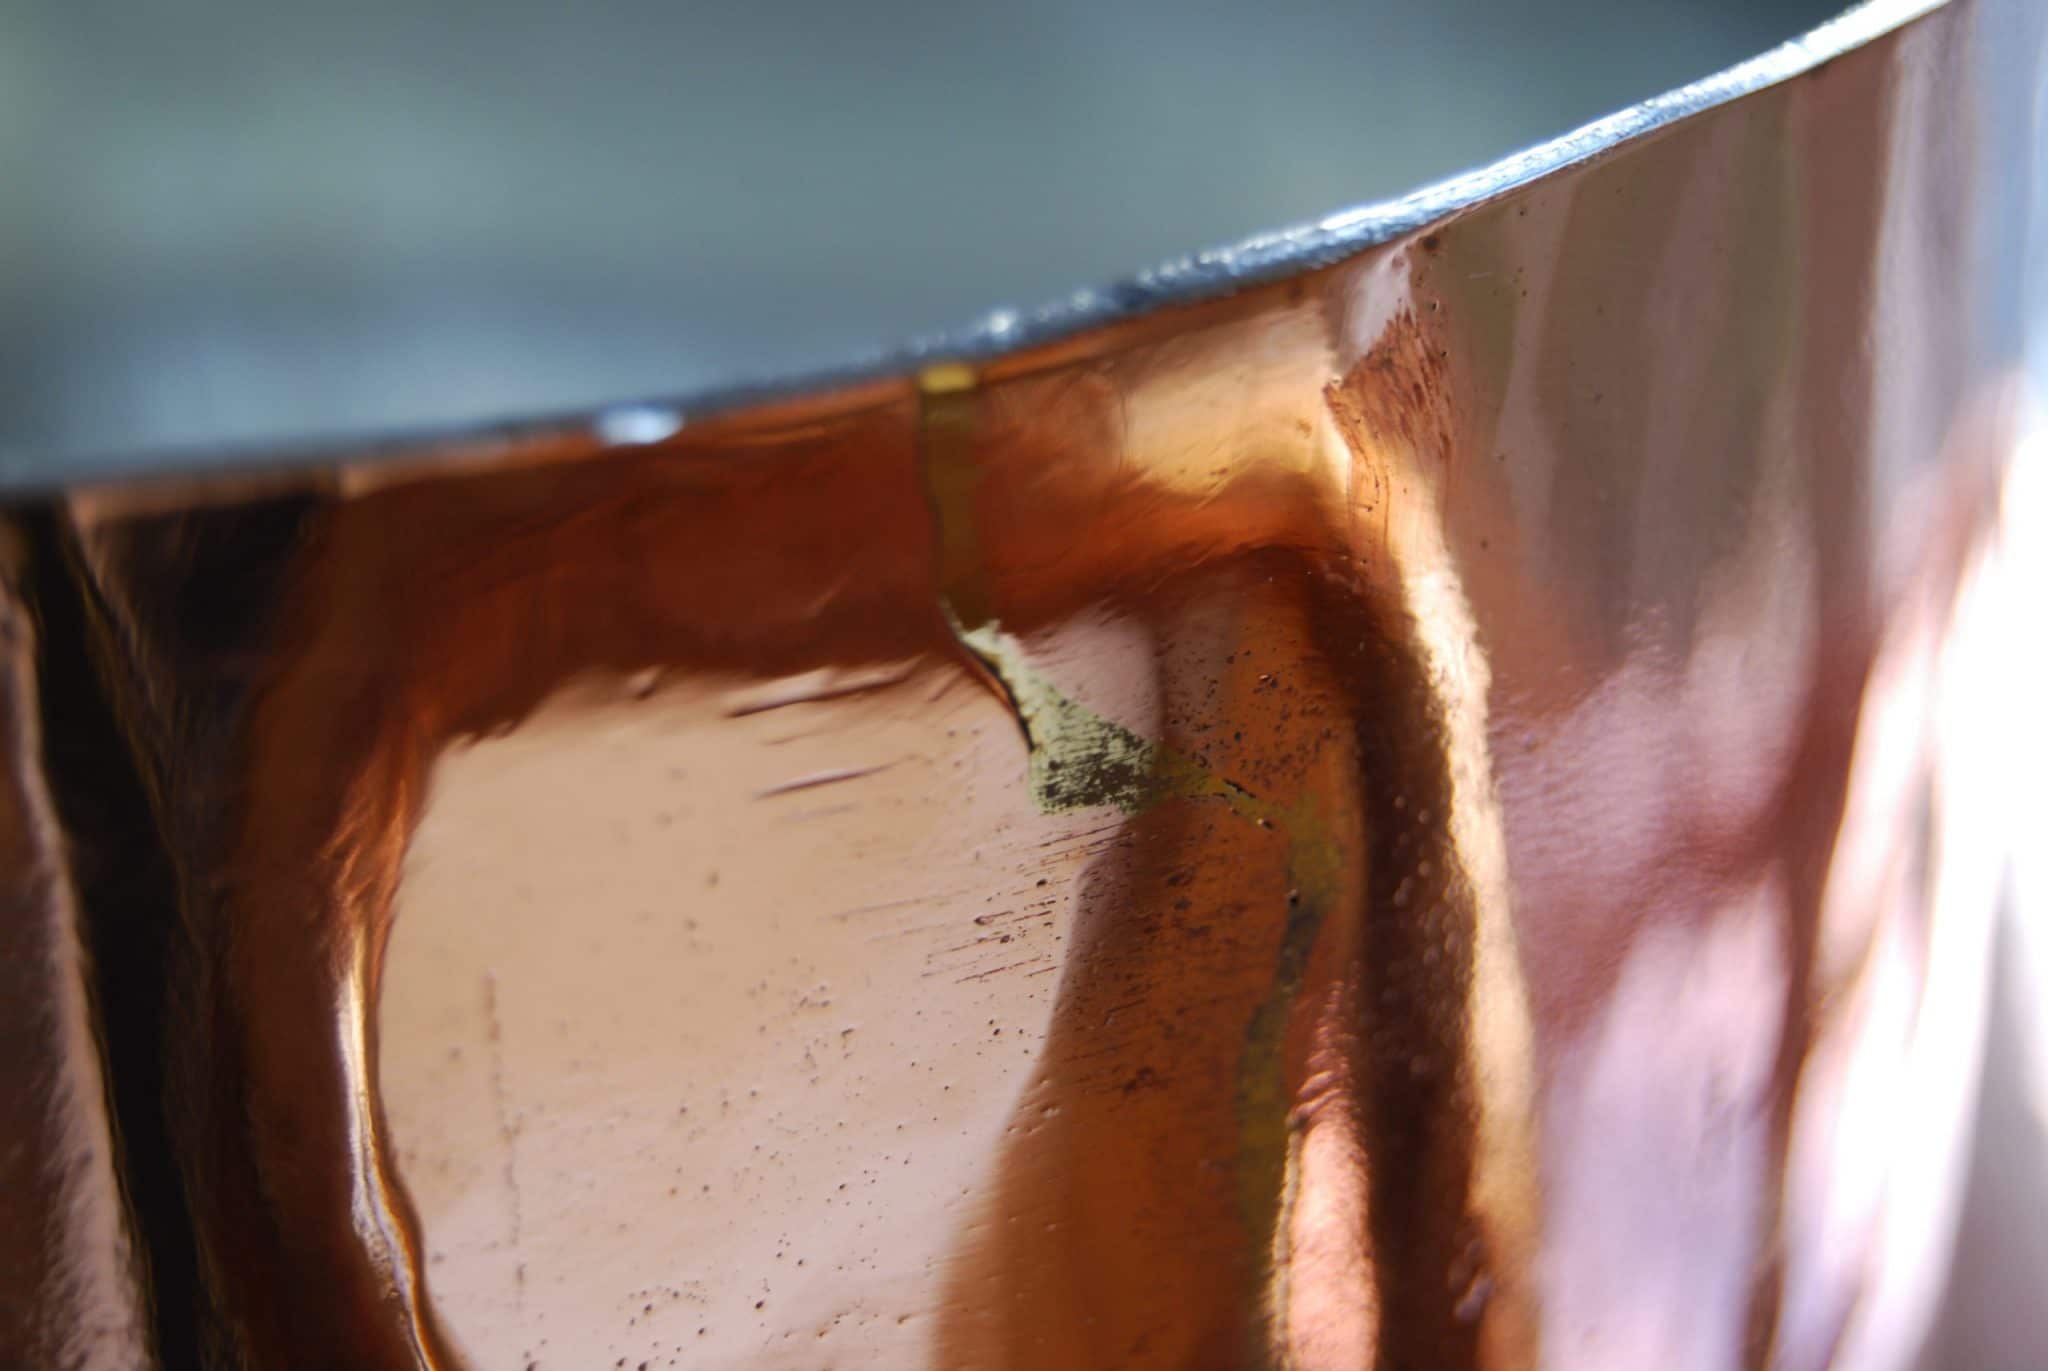
A dovetail — more correctly, a cramp seam — is the zig-zag brassy-yellow line running around the base and up the sides of an antique copper pot.
The line marks where the coppersmith joined pieces of copper together to form the pot, something like how a dressmaker sews pieces of cloth together to make a dress. Like a good tailor, a skilled coppersmith makes nice flat seams that are tight and strong, but these are seams that can survive for centuries.
How dovetailing works
One reason why coppersmiths keep politely reminding us that it’s really called a cramp seam is because dovetailing is a term borrowed from carpentry and cramping only superficially resembles it. Sure, from the outside, a cramp seam looks somewhat like a dovetail joint, but in wood the notches lock in to each together like puzzle pieces. In a cramp seam, the notches (called crenellations, like the top of a medieval castle wall) cut into one piece of copper slide over the edge of the other piece along the entire length of the seam and are pounded — cramped — together until they fuse into a single layer. The smith then lets molten brass flow into the crevices along the seam to seal it, a process called brazing. (Brass and copper readily bond to each other, so the filler brass helps to strengthen the join across the layers of copper.) A well-executed brazed cramp seam with copper and brass is a strong and long-lasting join.
Oldcopper.org has a page called Joining Copper and Brass that explains the different methods of joinery, and provides some good cross-section photos of the layers of a cramp seam.
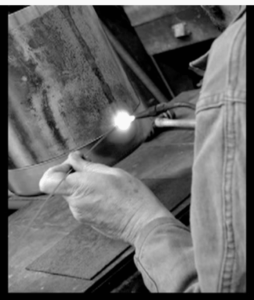
Reader Dietmar also pointed out this video, in German, showcasing Swiss kupferschmeide (coppersmith) Walter Hauser who continues to hand-assemble and dovetail pieces to this day. The segment begins at 4:35 in the video.
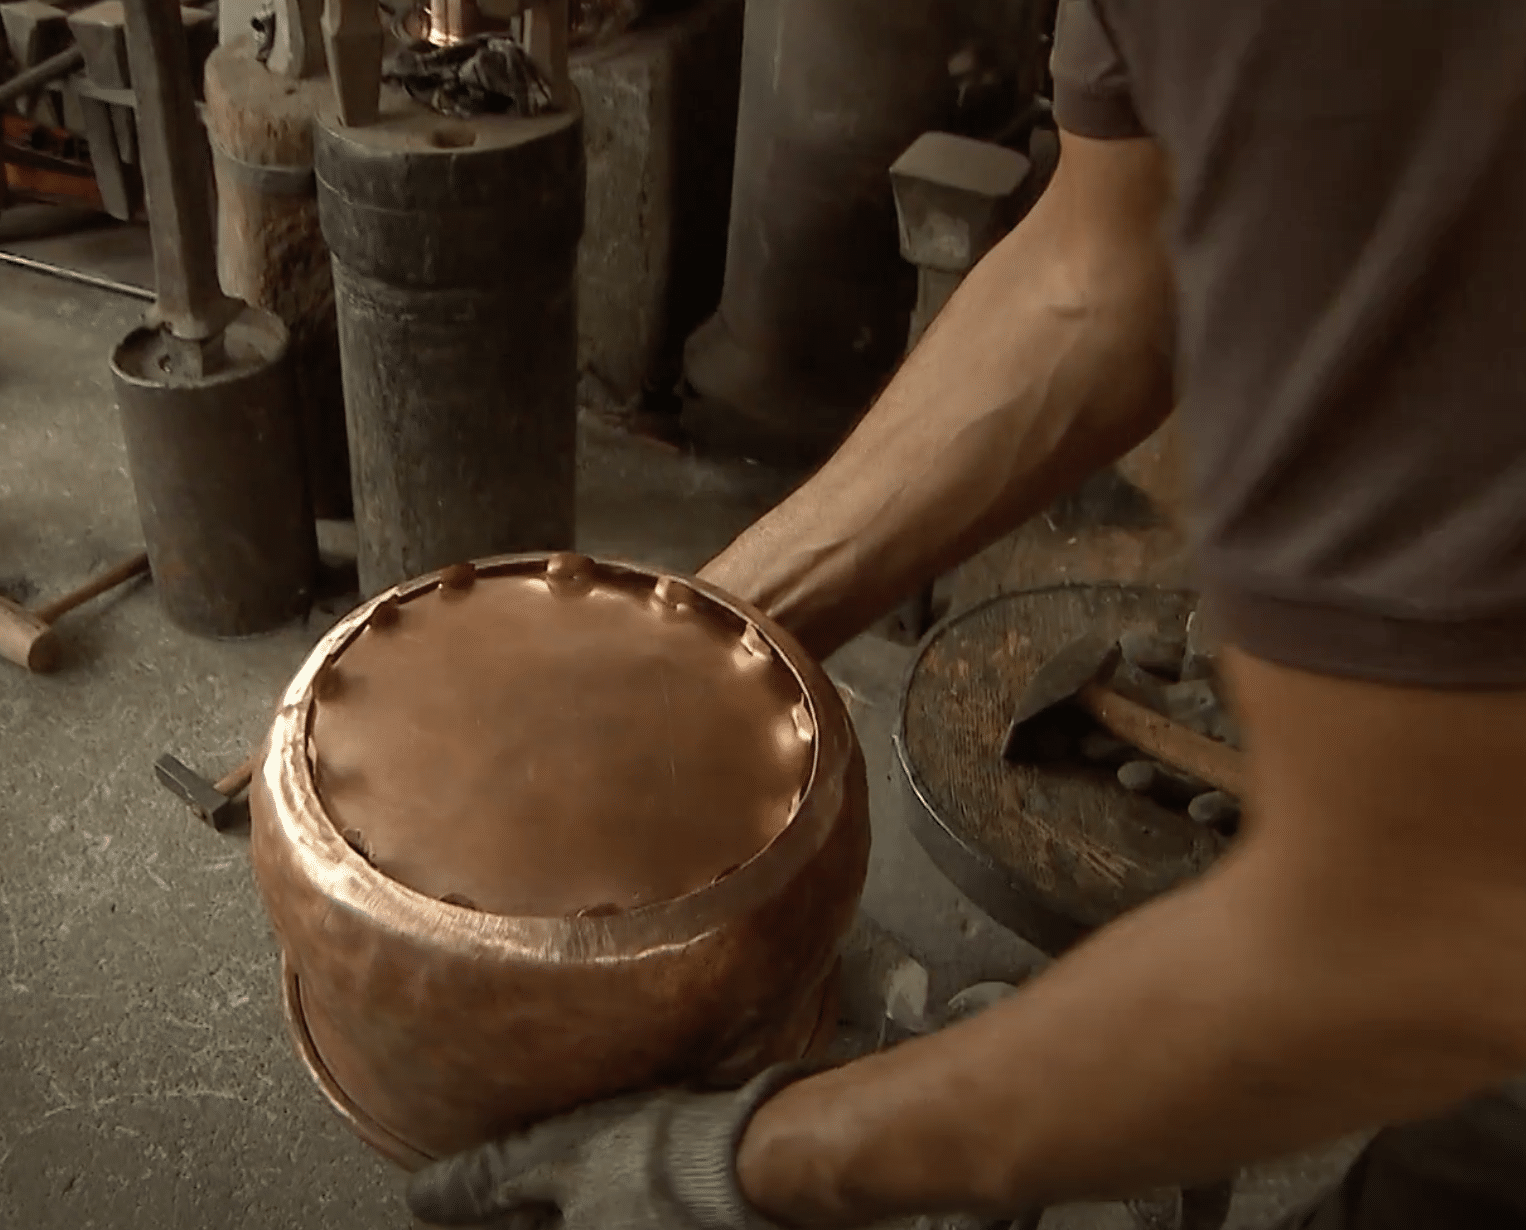
The video tracks him as he makes a dovetailed pot from scratch. At 5:44, he runs a sheet of copper through an electric rolling mill that smooths it and applies a curvature. At 5:55, he lights an acetylene torch and solders the curved sheet into a cylinder, and at 6:05 he is shaping the rolled rim of the pot with a hand hammer.
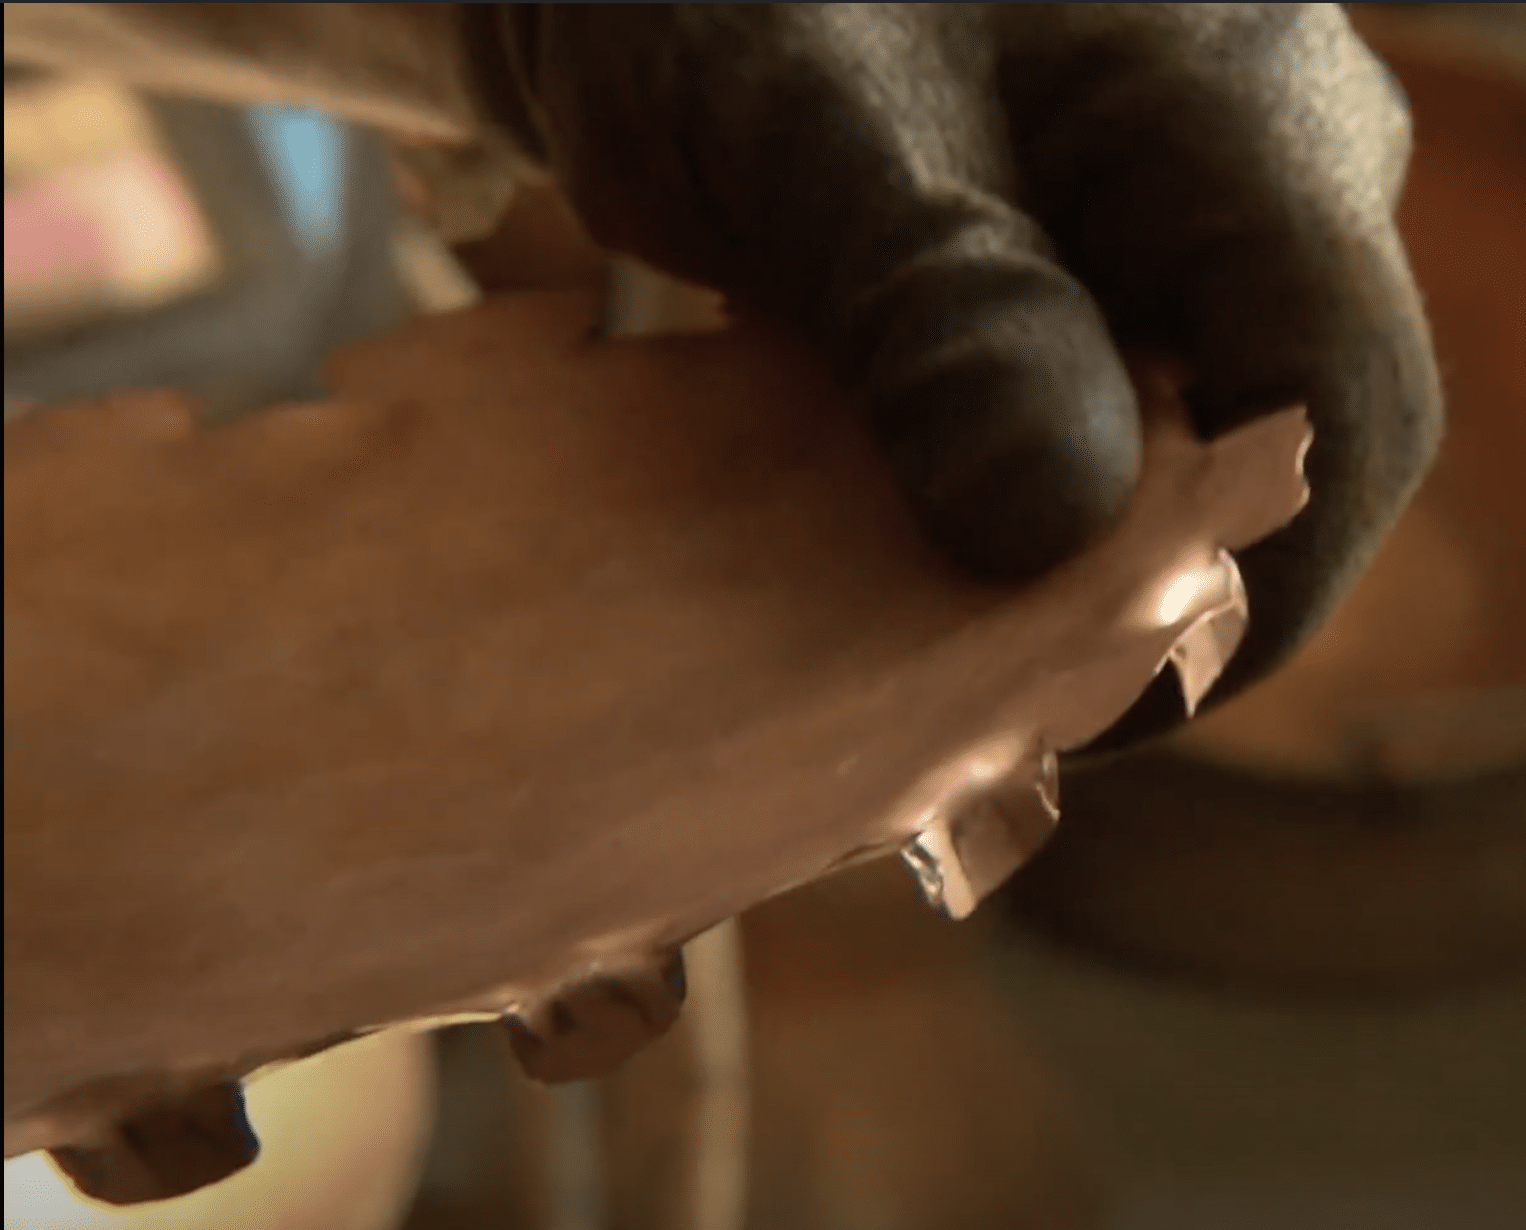
Things get interesting for us at 6:15 when he begins shaping the circular base piece. He gives the piece a slight bowl shape on an anvil; you can see that the edges of the circle are quite thin. Then begins a sequence of shots showing the dovetailing process step by step.
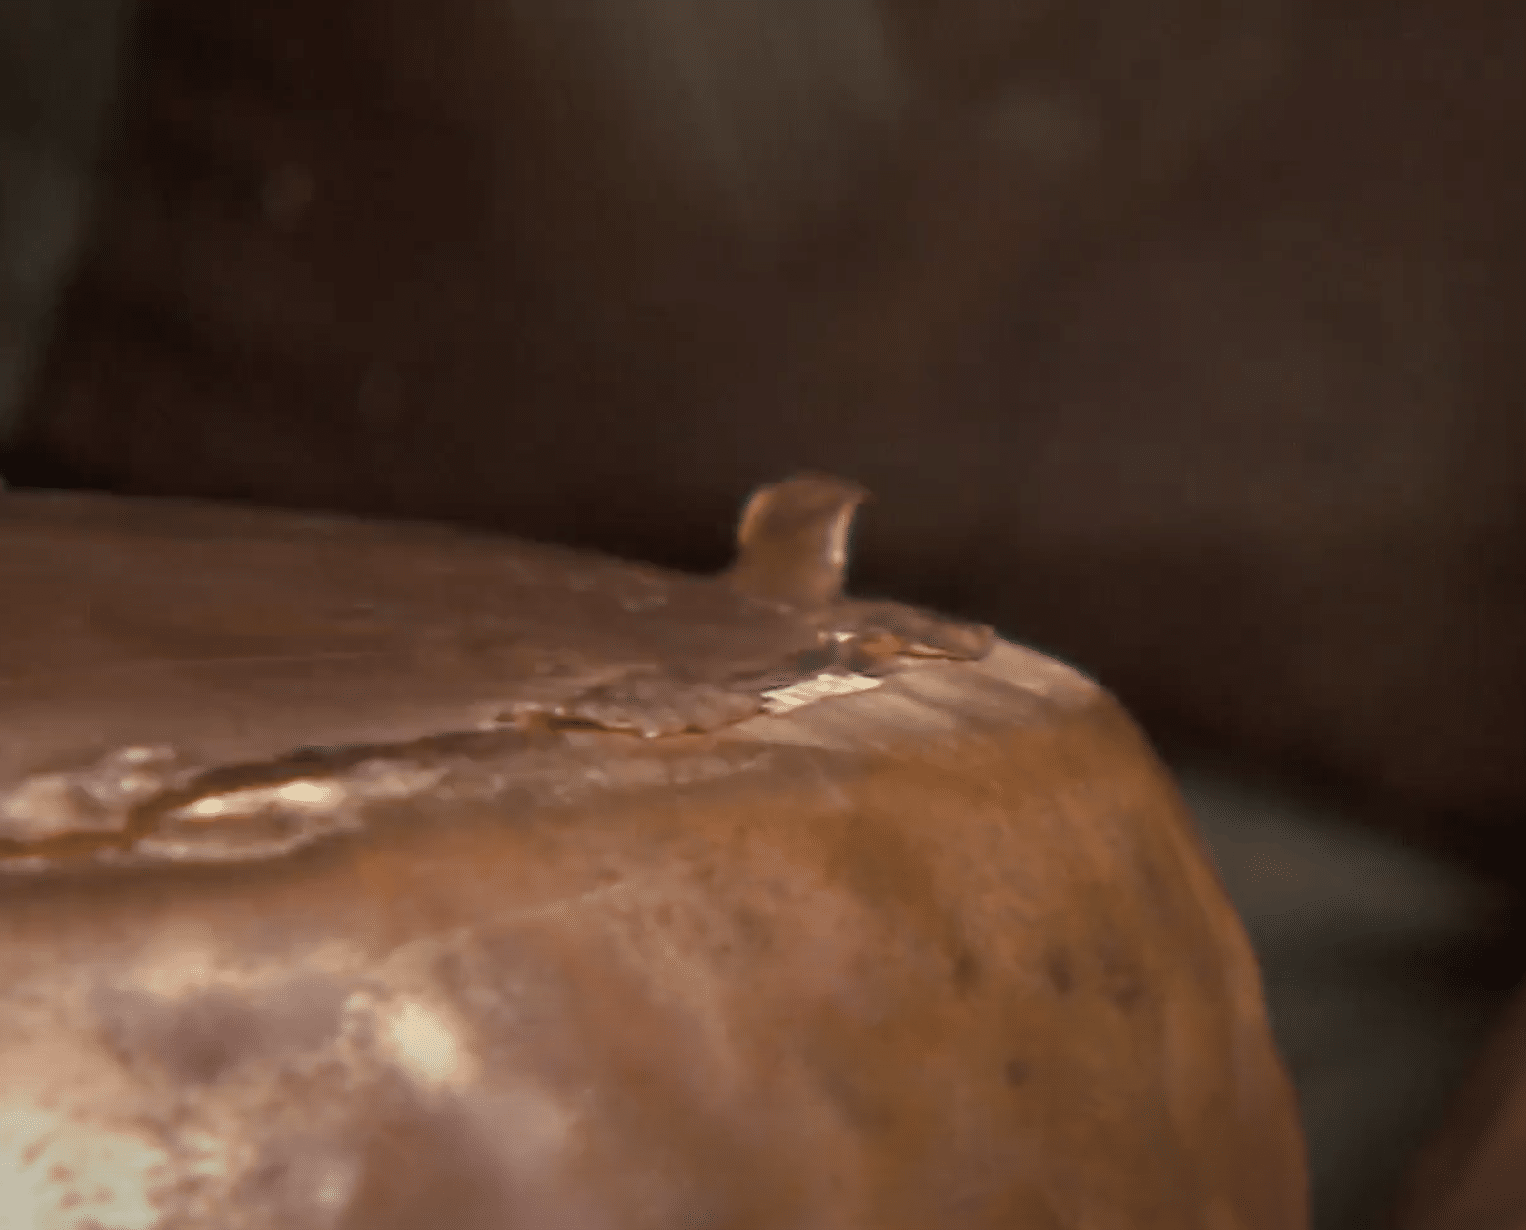
It’s not shown in the video, but according to Dietmar’s translation of Hauser’s commentary, the seam is geschlaglotet — schlagotet is the Swiss-German term for brazing. That final brazing step is what produces the distinctive yellow lines around the base and up the sidewall of pieces joined this way.

Hand-cut versus machine-cut dovetails
The first step of the dovetailing process is to make cuts into the sheets of copper. Oldcopper.org states that until “the later 19th century,” coppersmiths used metal shears to clip the crenellations, but after “the later 19th century,” machine punches came into use to cut the crenellations. (I’m seeing French and English patents starting in the 1840s for machines such as hydraulic presses with interchangeable dies that would make short work of punching cuts into sheet copper.) The shop created punch dies for the size and shape of all the pieces they made, which is how copper pots and pans settled into the regular uniform size increments we see today.
According to oldcopper.org, coppersmiths kept on dovetailing the seams until about 1900, after which better joinery technology made the time-consuming dovetail process obsolete. This means that a dovetailed pot or pan could have been hand-cut or machine-cut. Wouldn’t it be useful to be able to recognize a hand-cut dovetail? Such a skill might help the amateur copper collector to estimate when a pot was made.
I spent some time looking closely at my copper pots and I think I’ve identified two tell-tale signs of hand-cut dovetails.

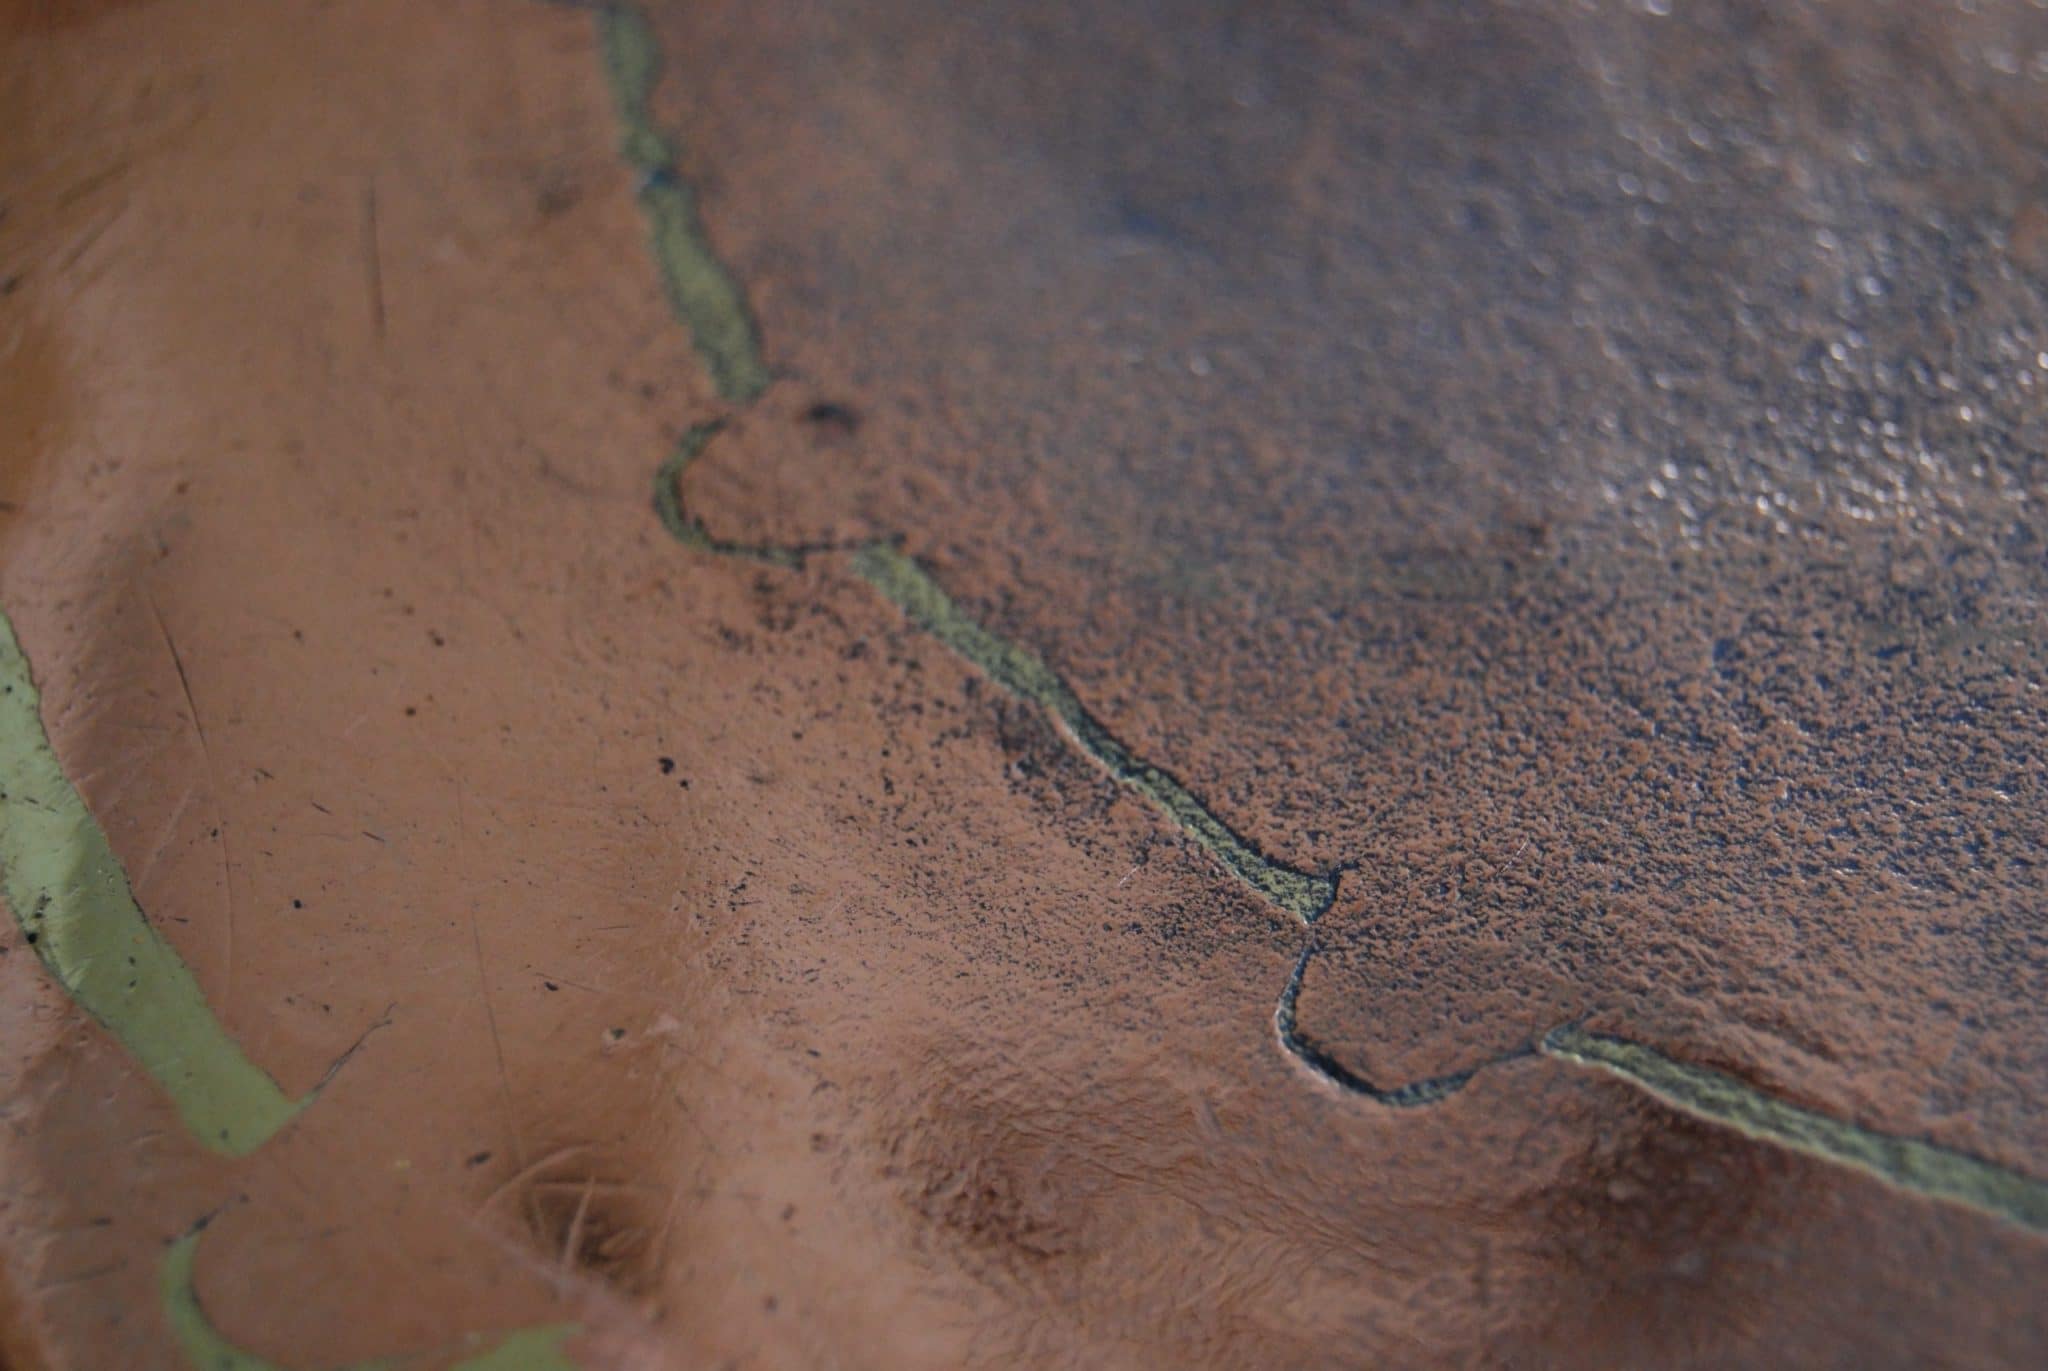
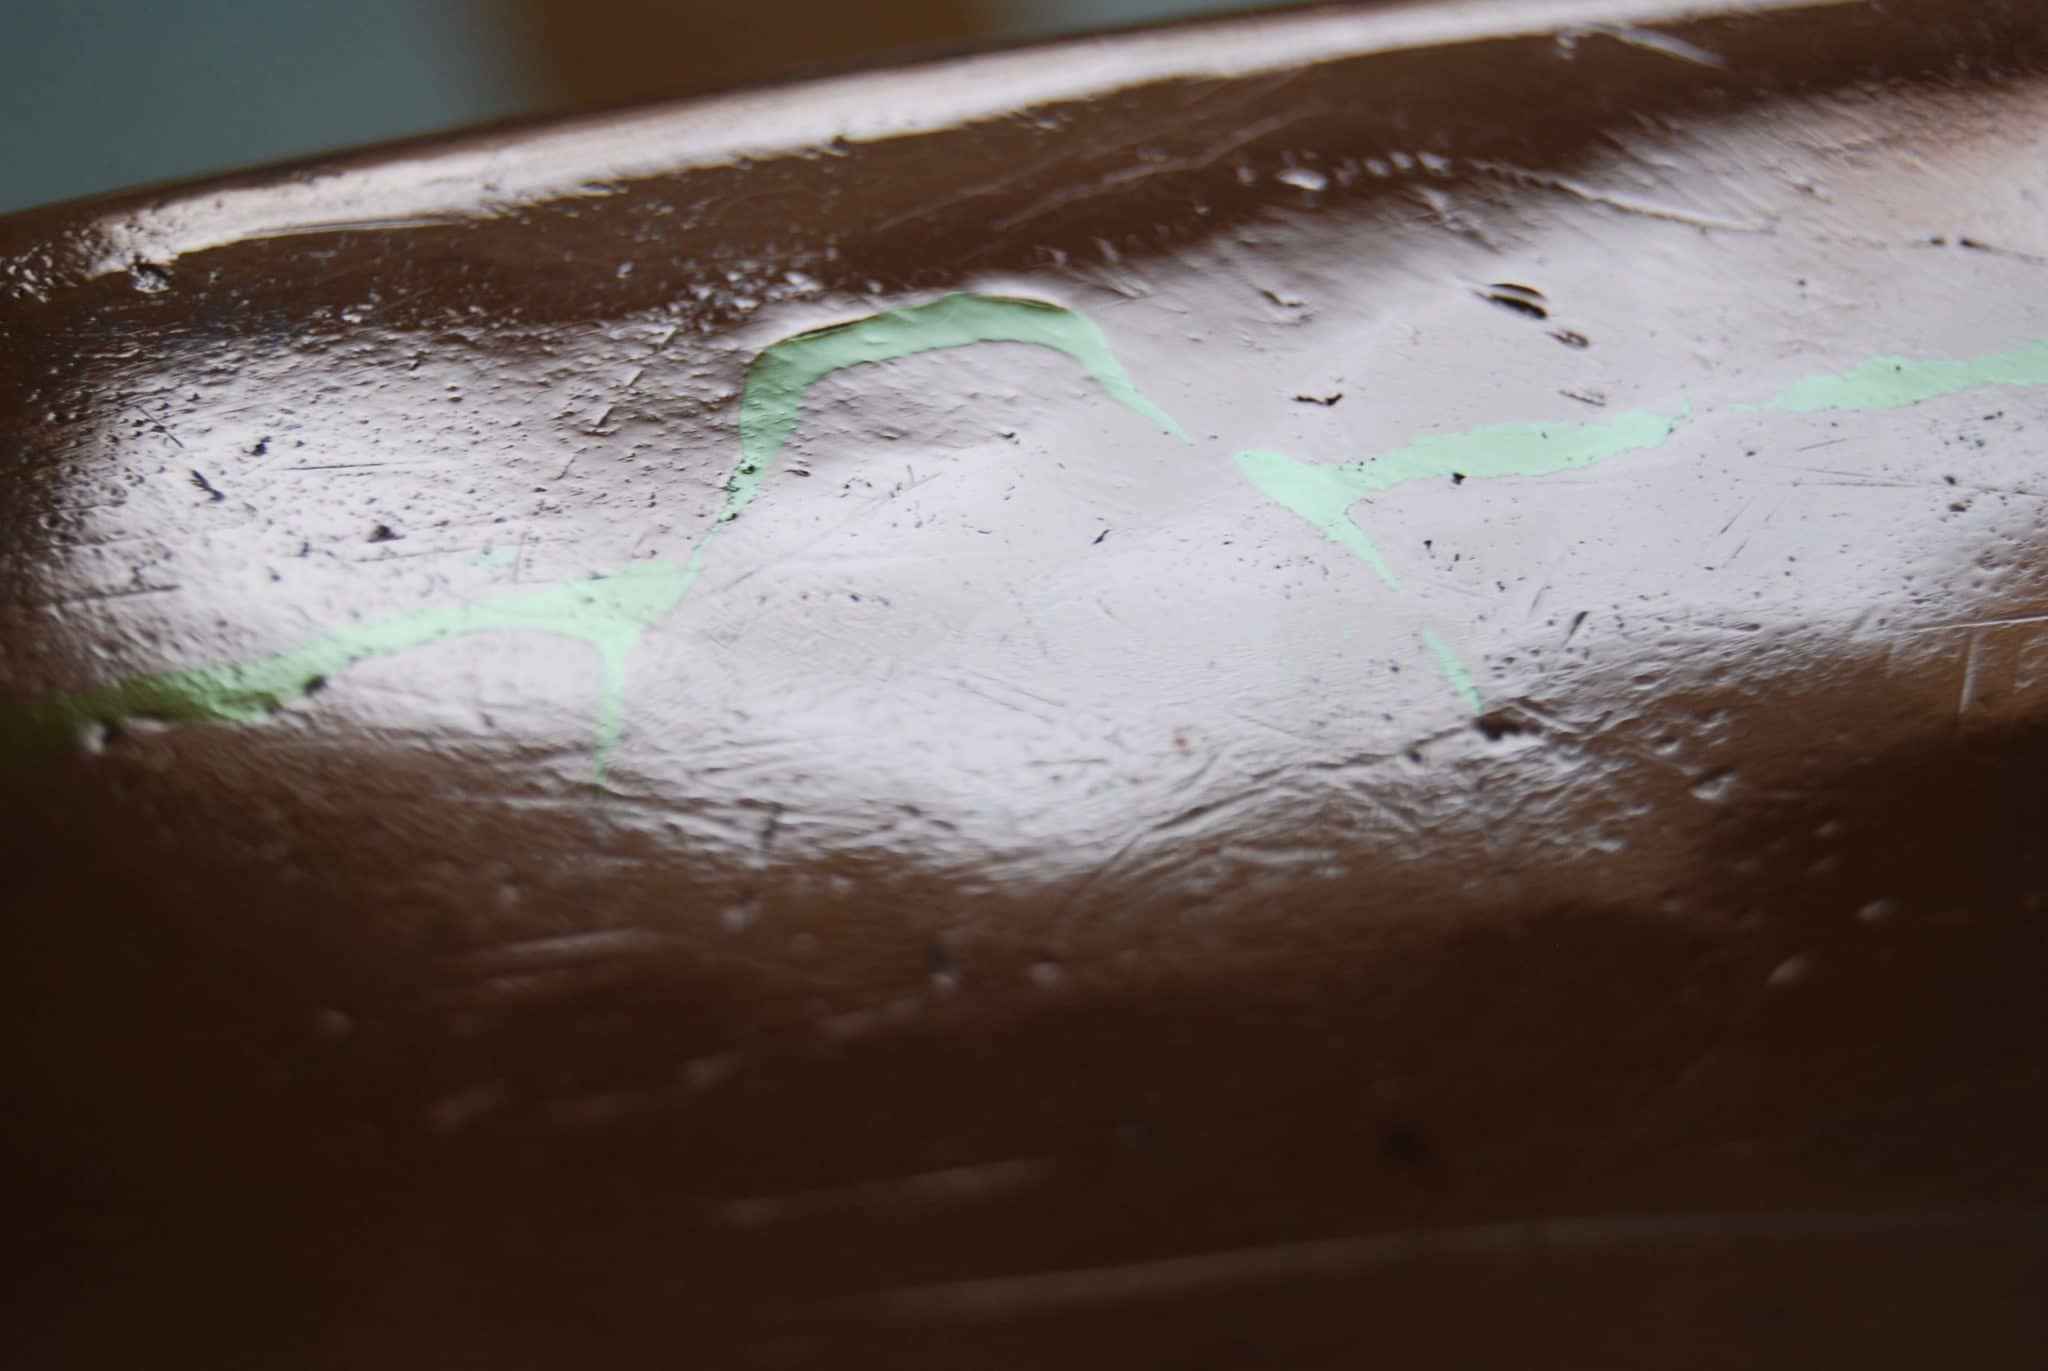
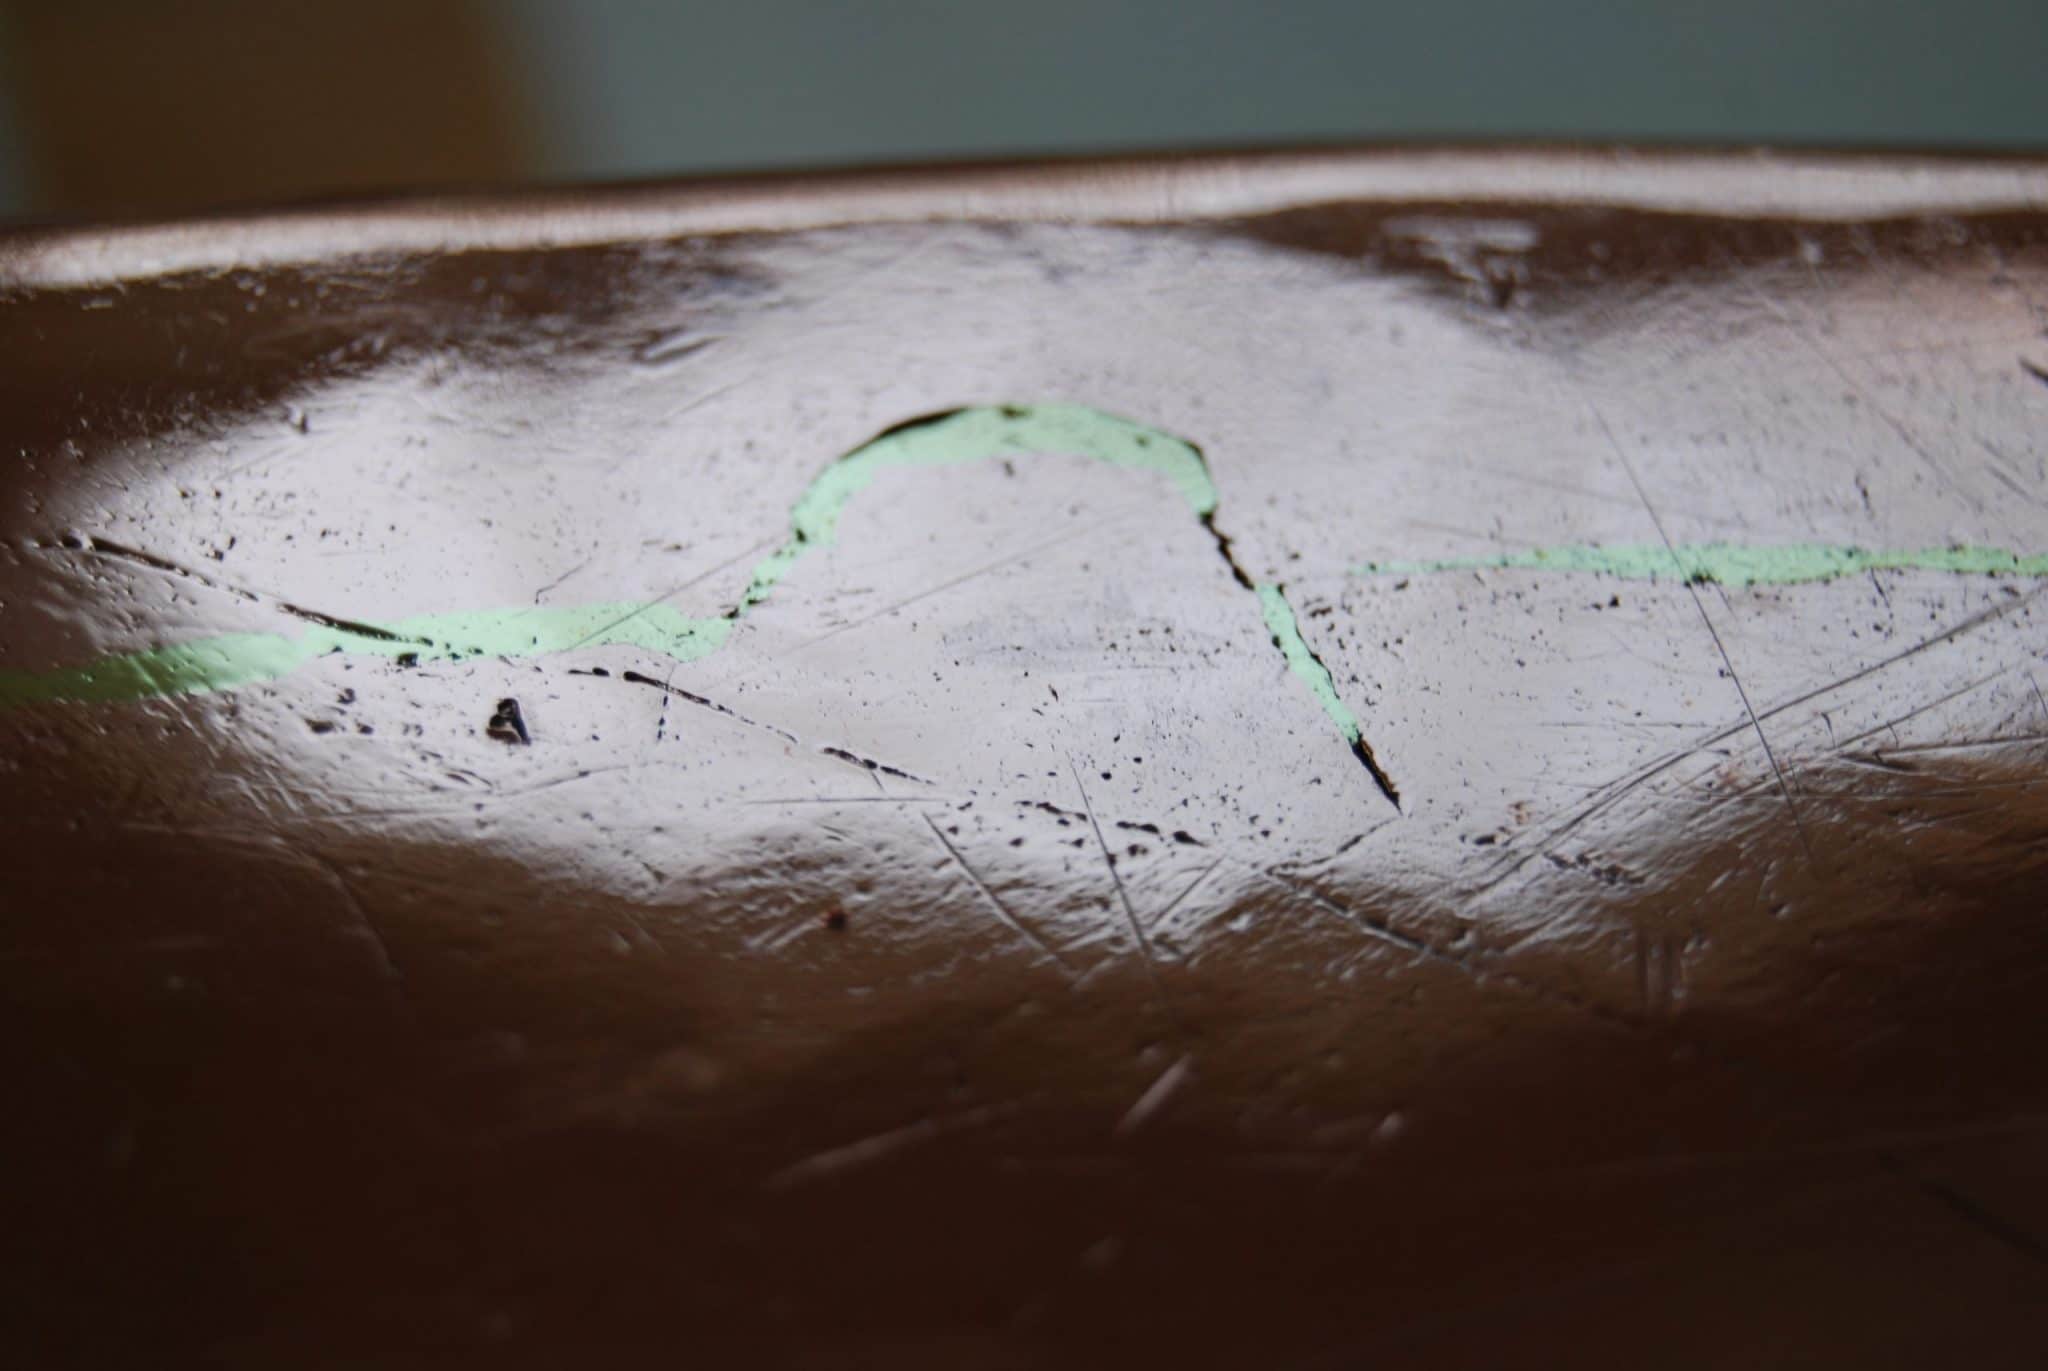
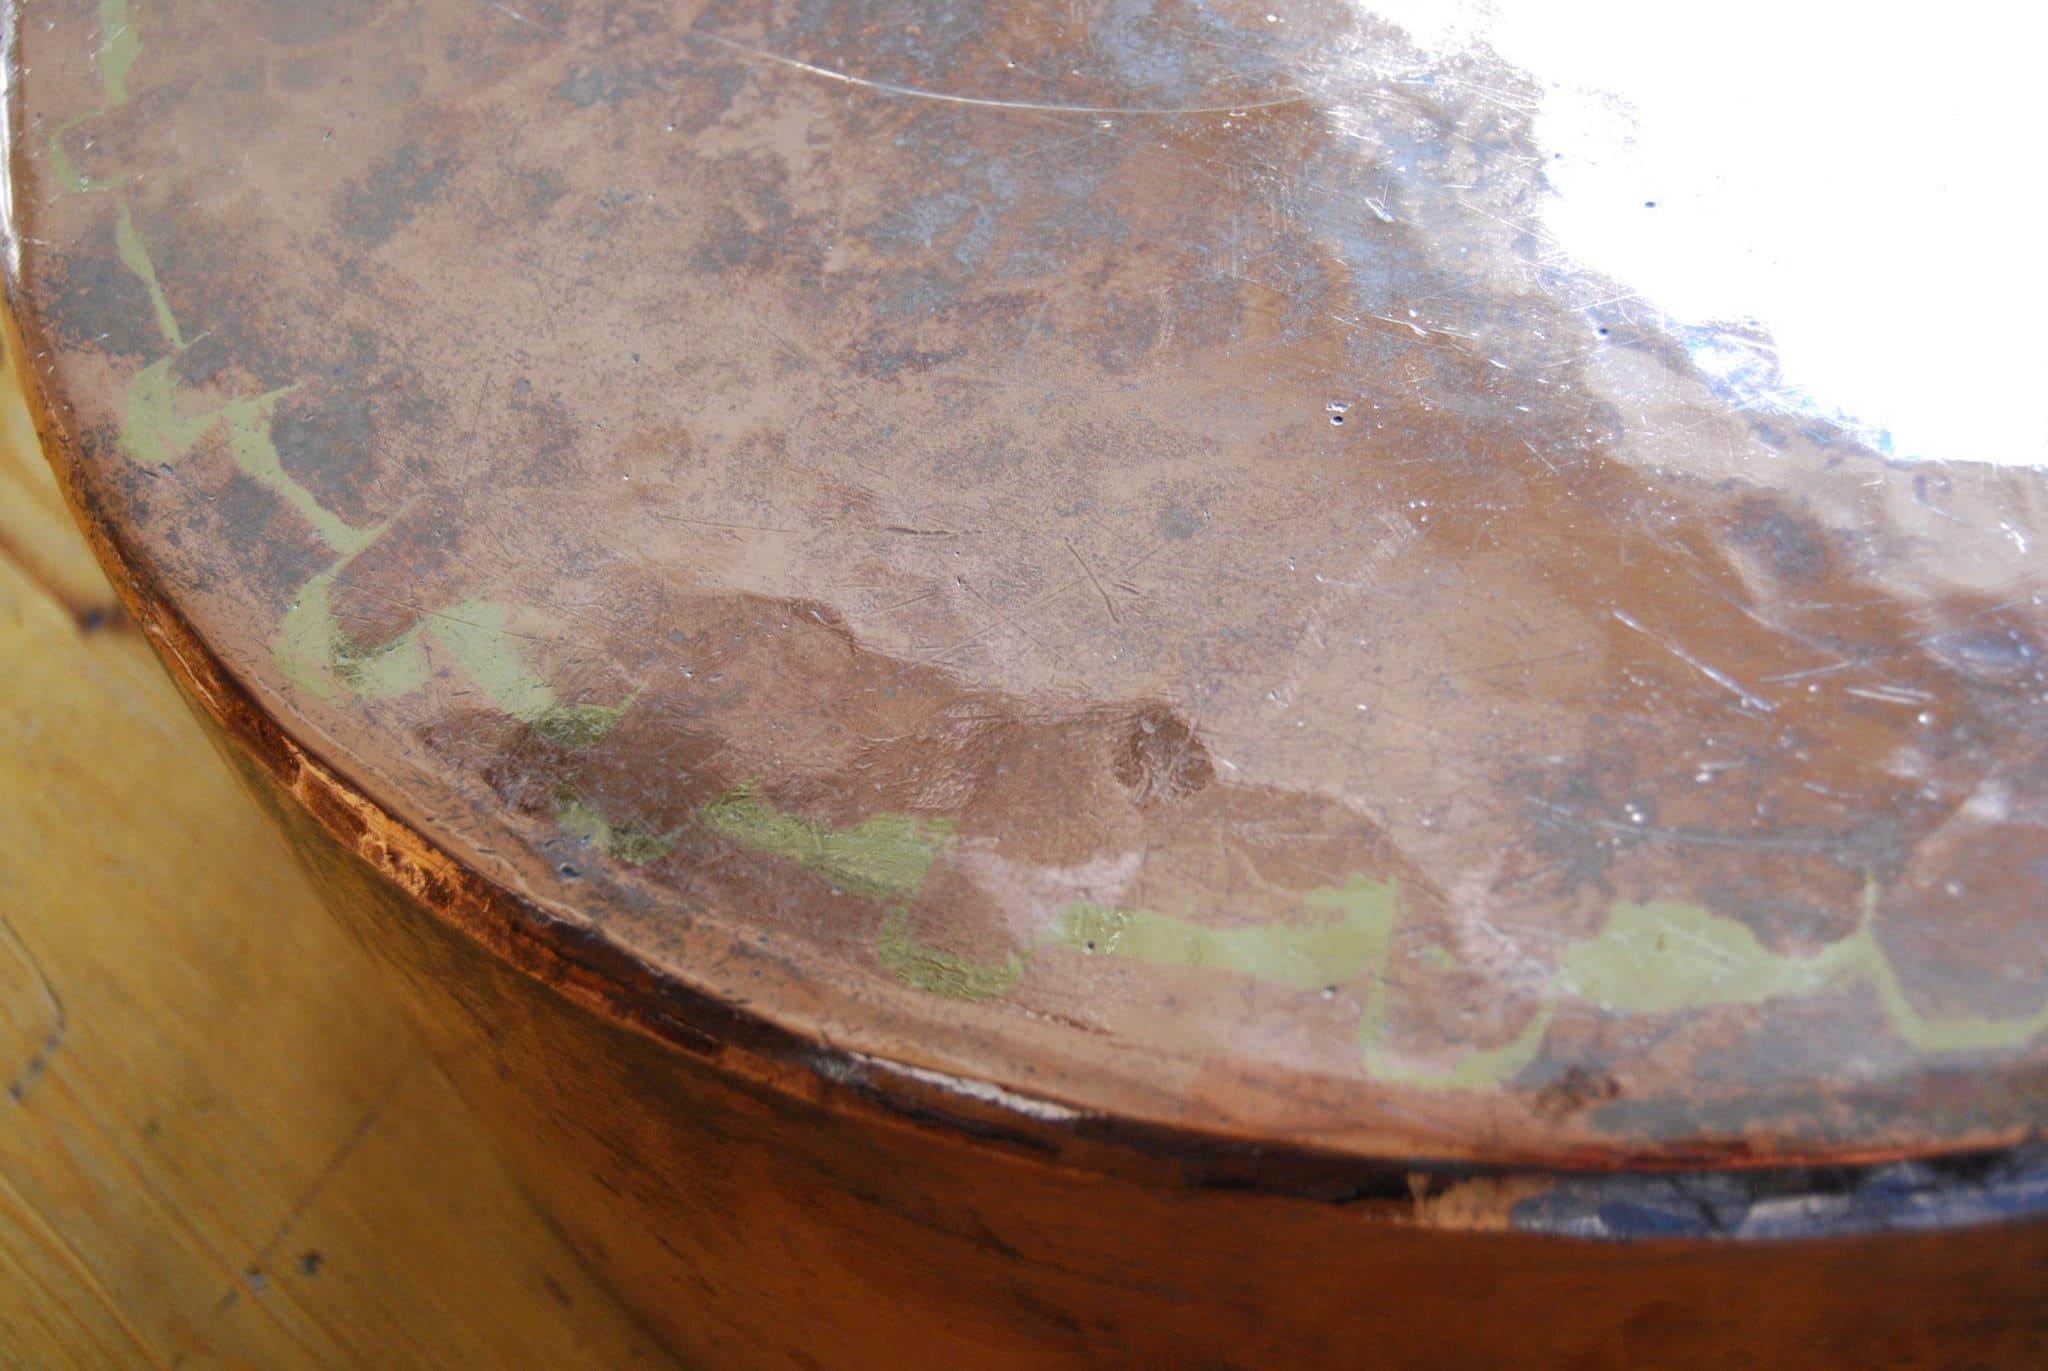
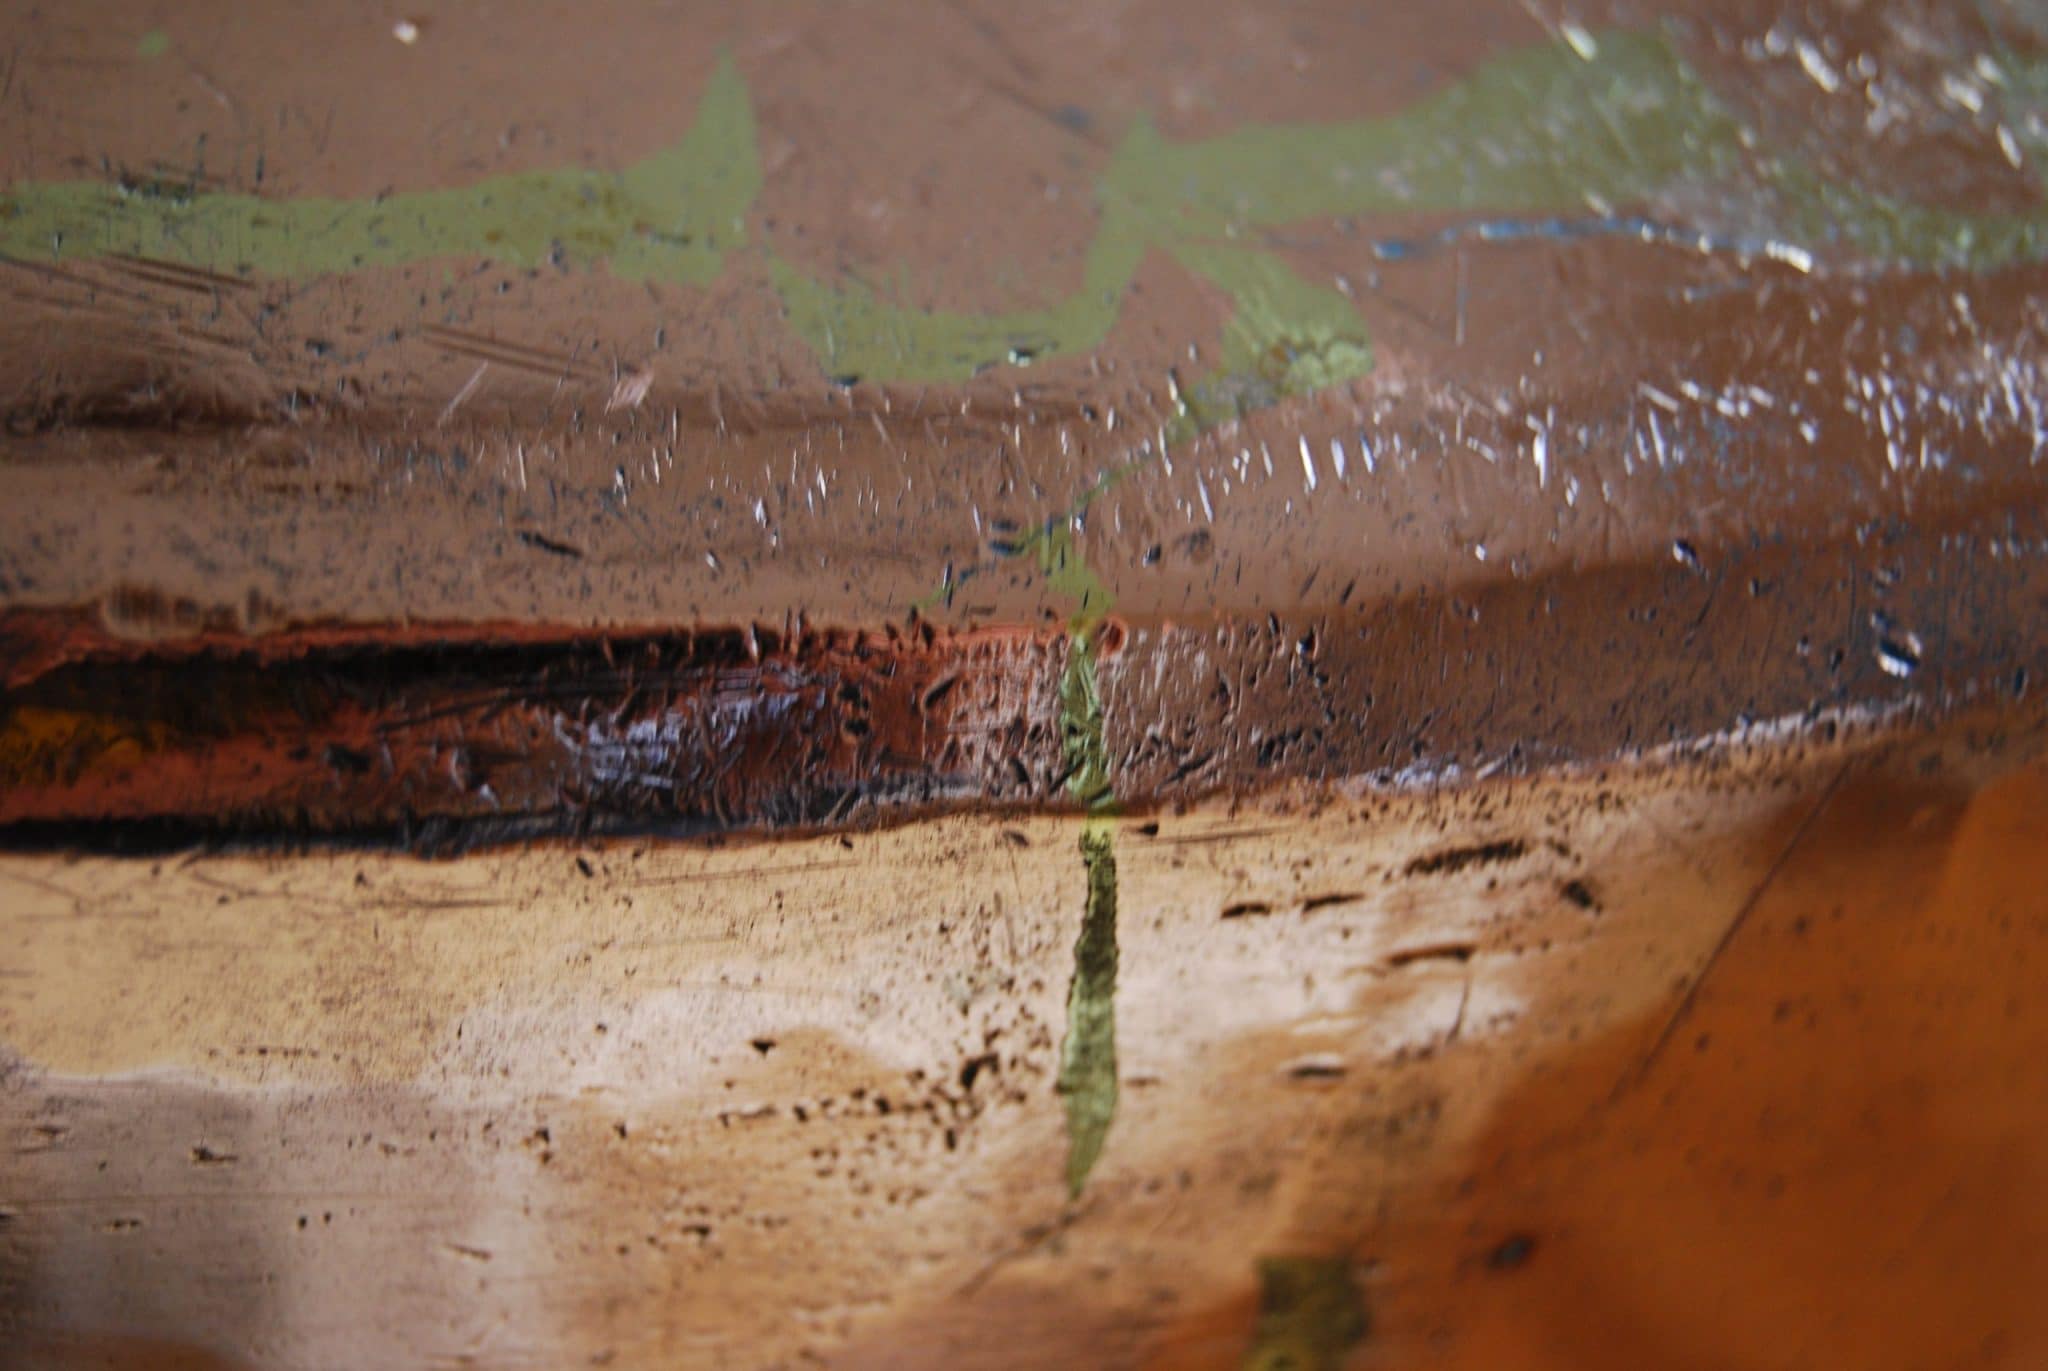
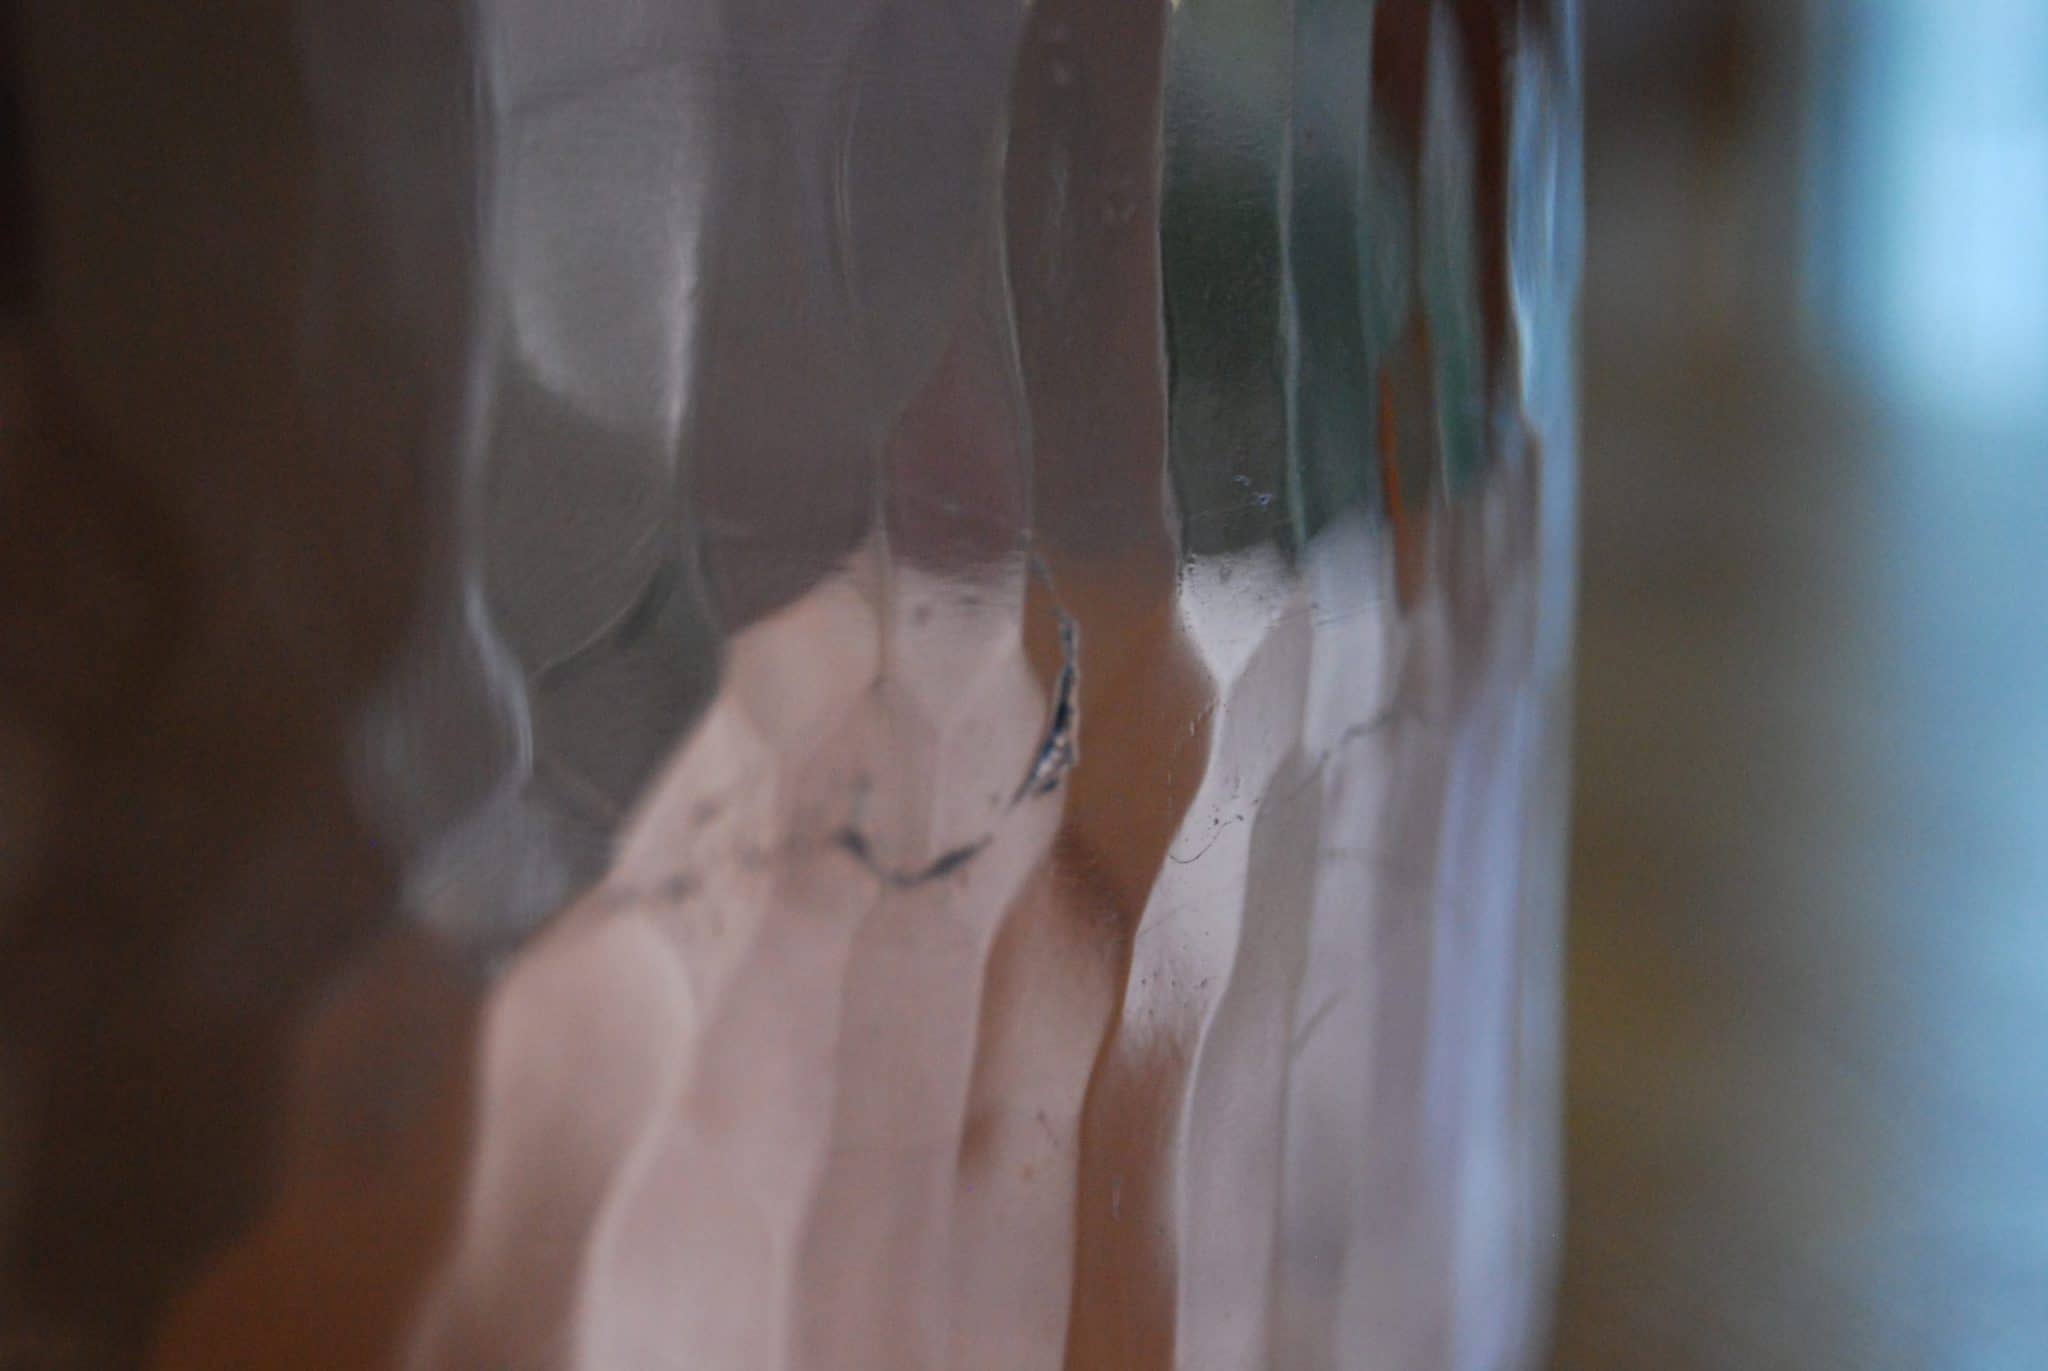
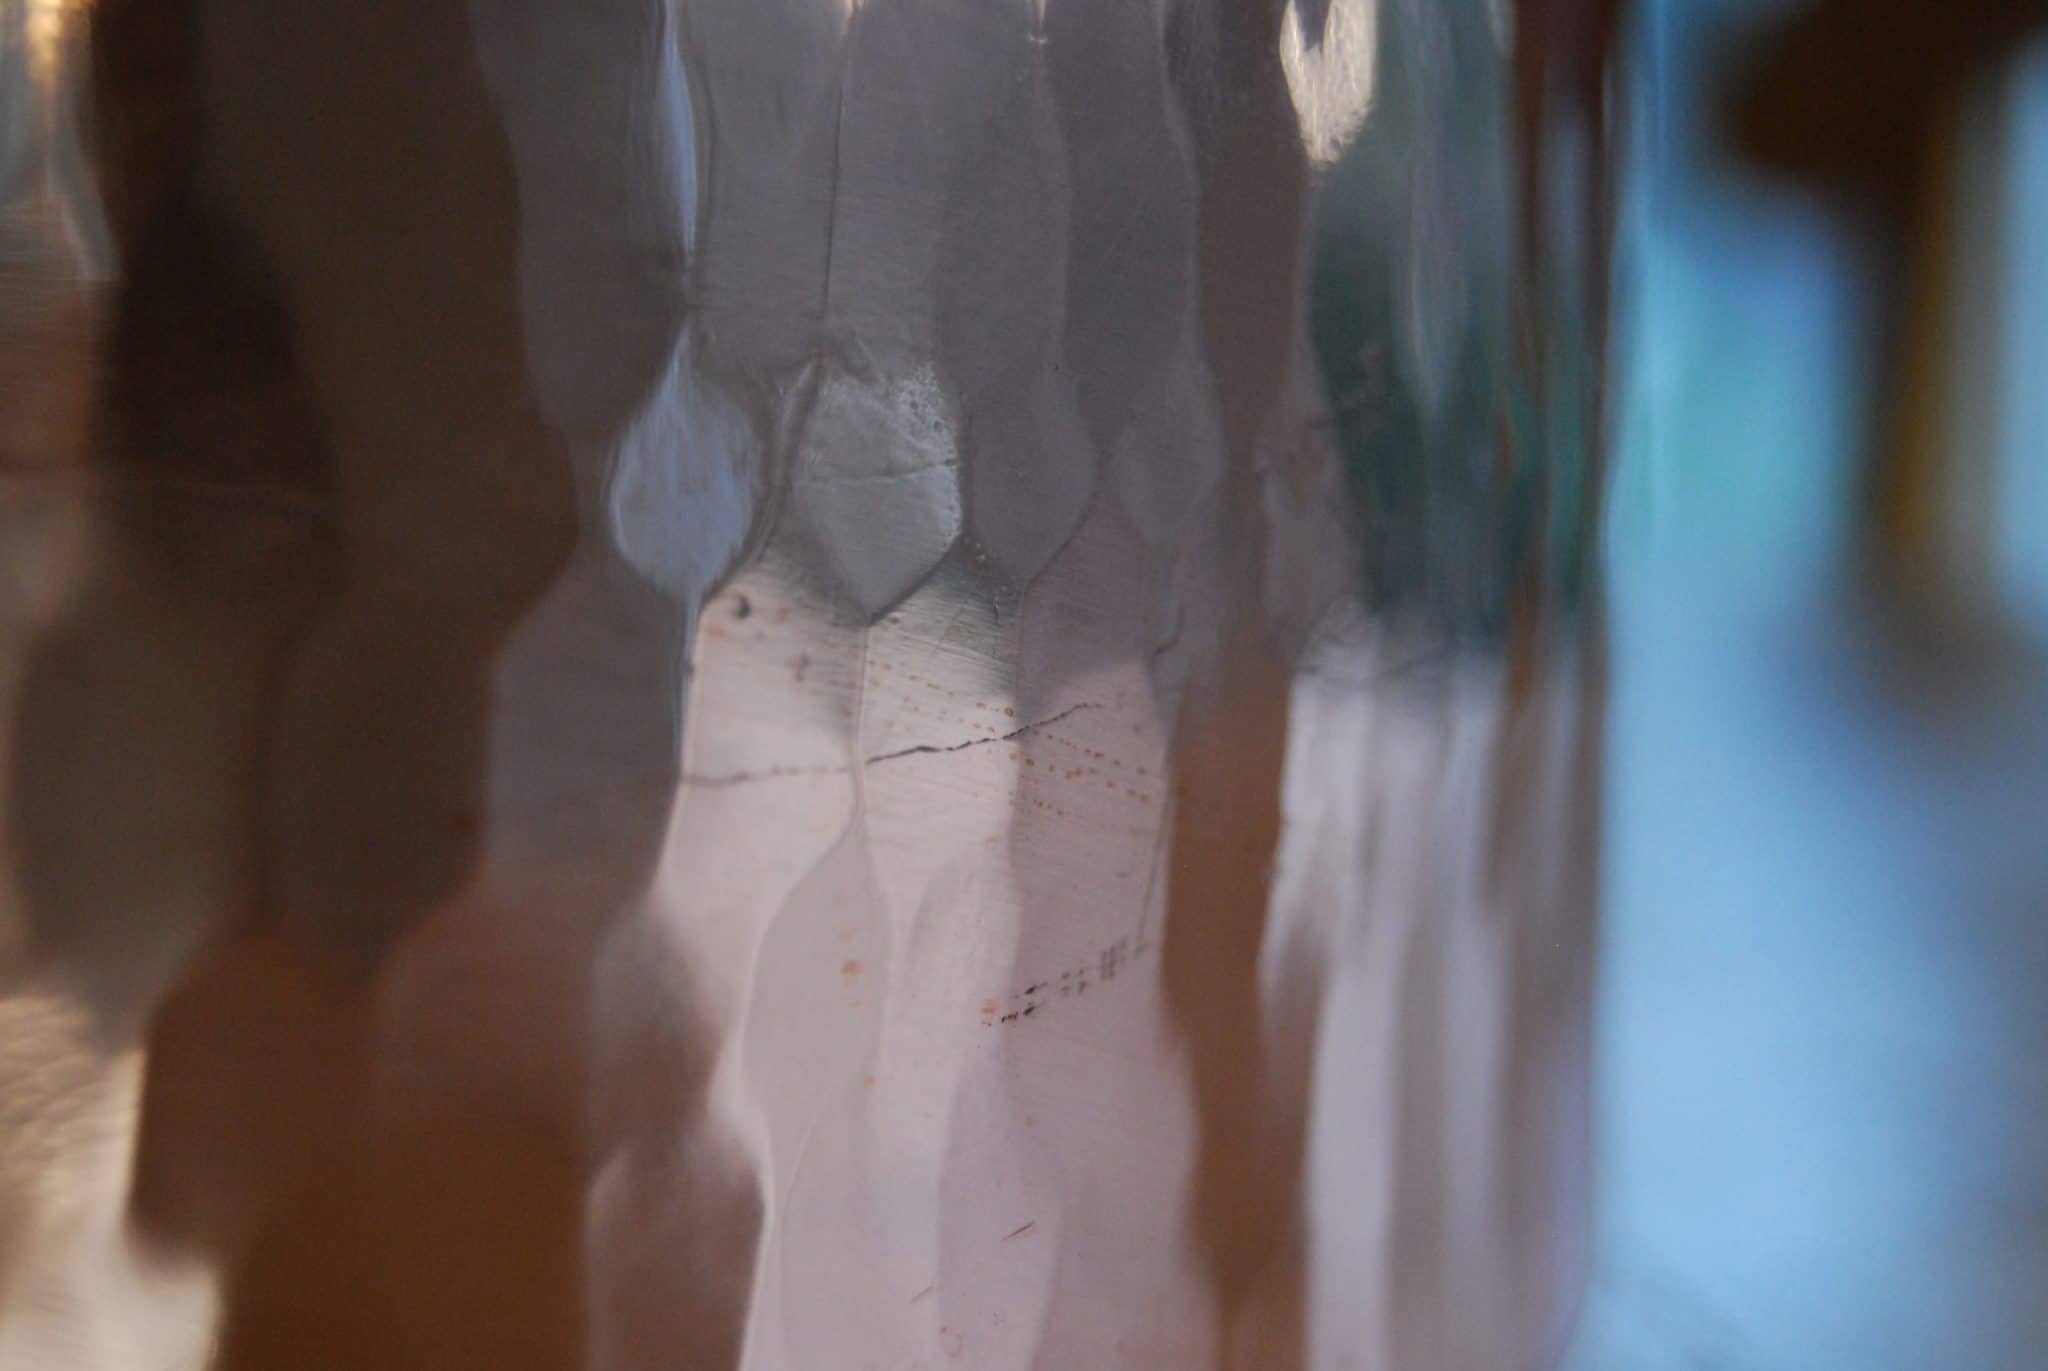
Over-cuts: I see tiny extra cut marks at the base of the crenellations, and I call them over-cuts. If you look closely, you may see that the copper smith cut a millimeter or two too far into the copper when he or she clipped its shape into the sheet. I speculate that to make these crenellations, the smith first cut the sheet into a circle or rectangle or whatever and then made a series of short clips all along it that would become the crenellations. He or she would then bend certain panels back and cut along the fold to remove them, leaving the crenellations sticking out. Imagine doing a similar thing with a piece of paper — you might very well snip a little too deeply from time to time. By contrast, a machine would just punch out the crenellations like a cookie cutter and wouldn’t leave any unnecessary cut marks.

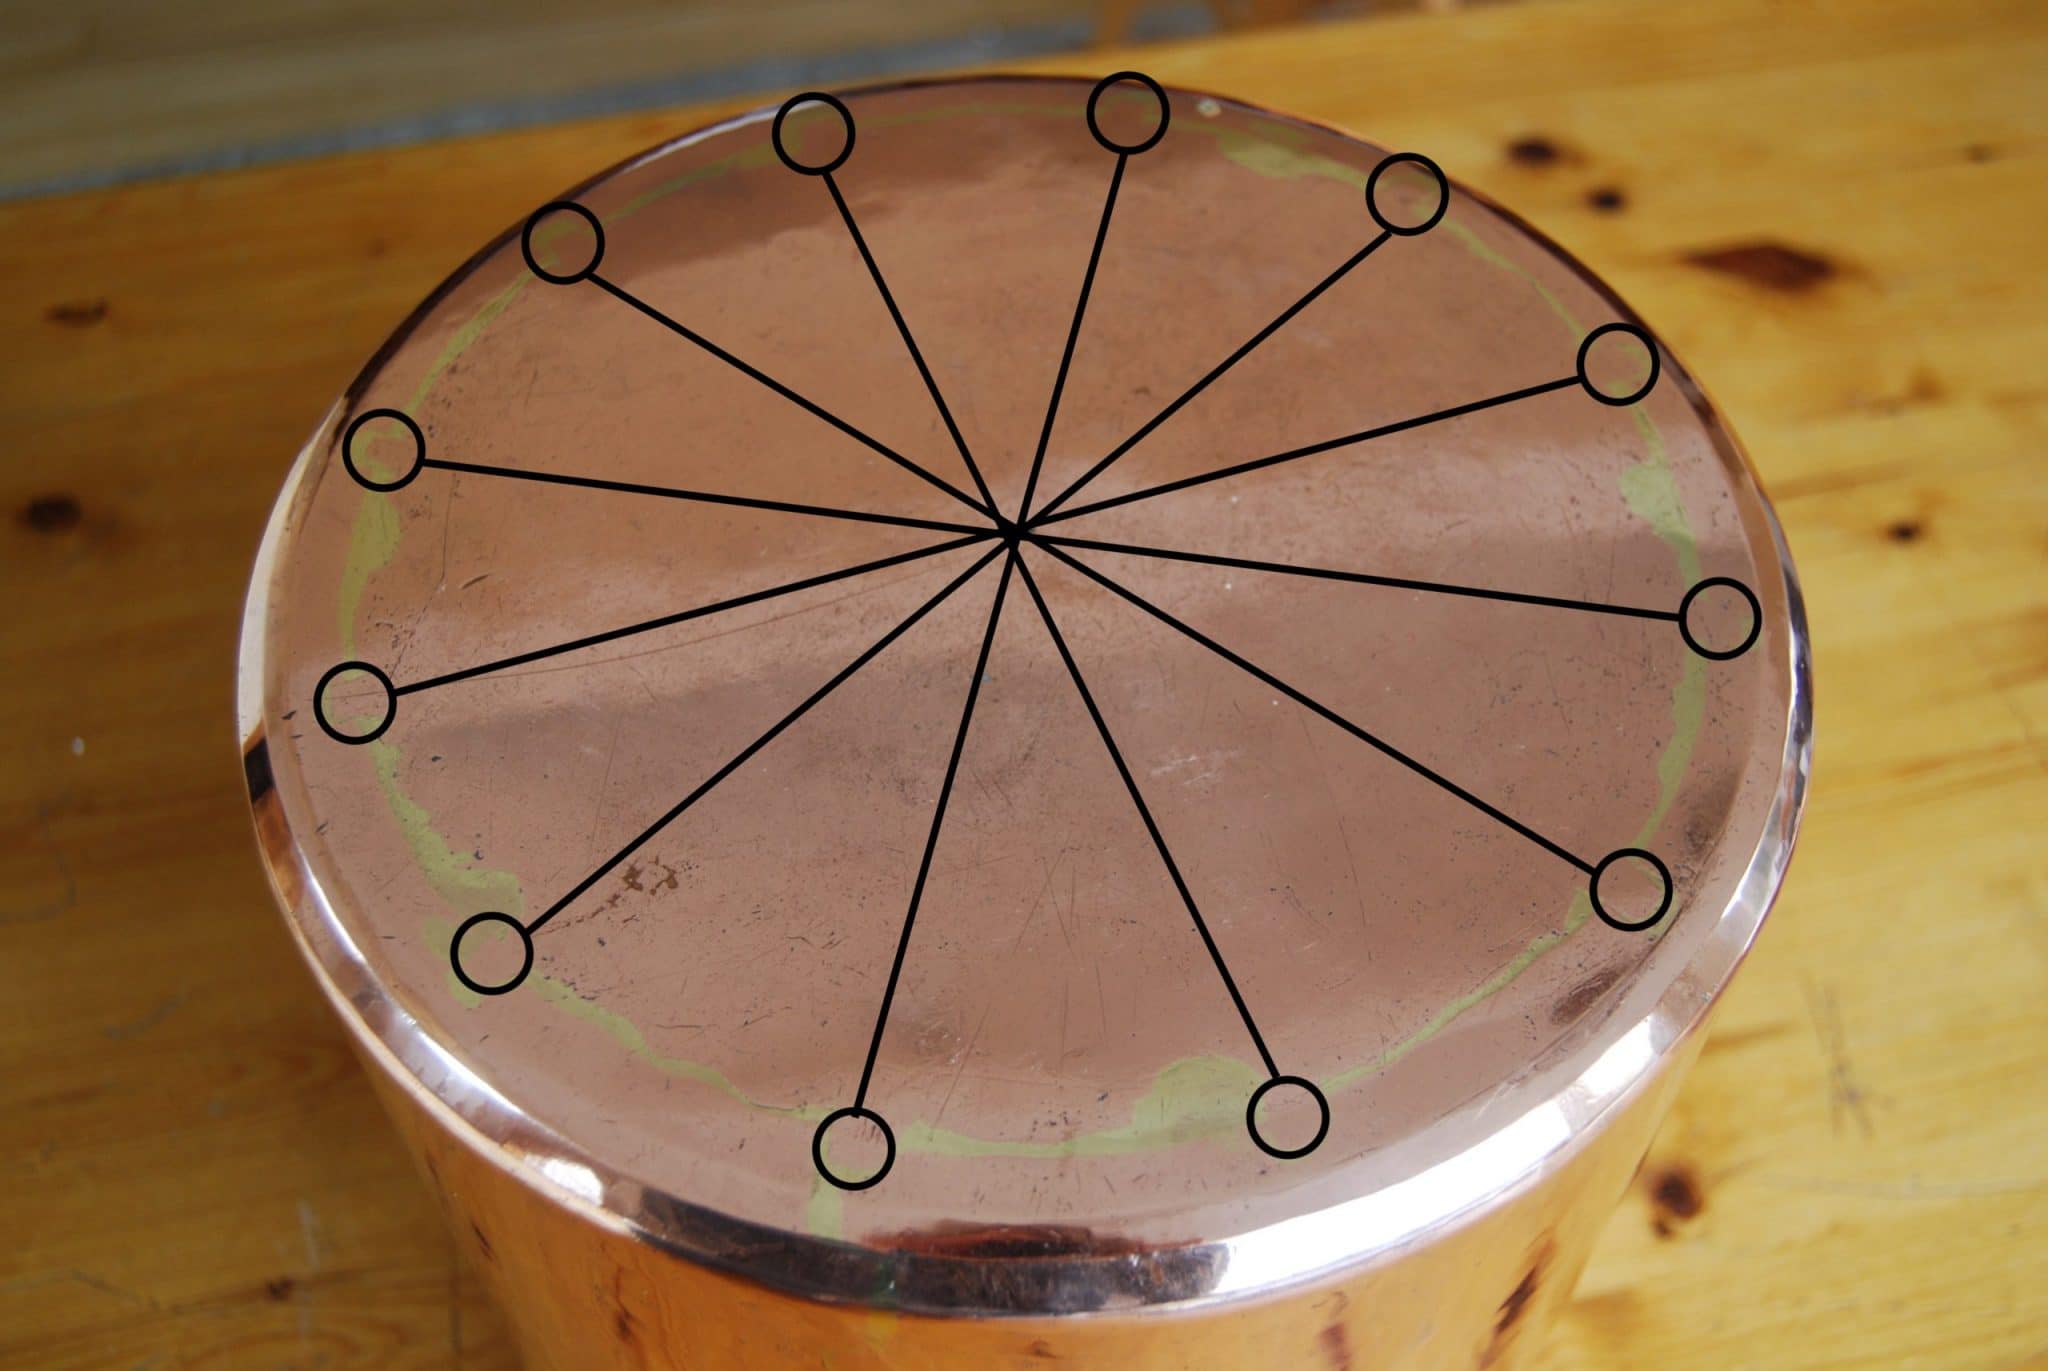
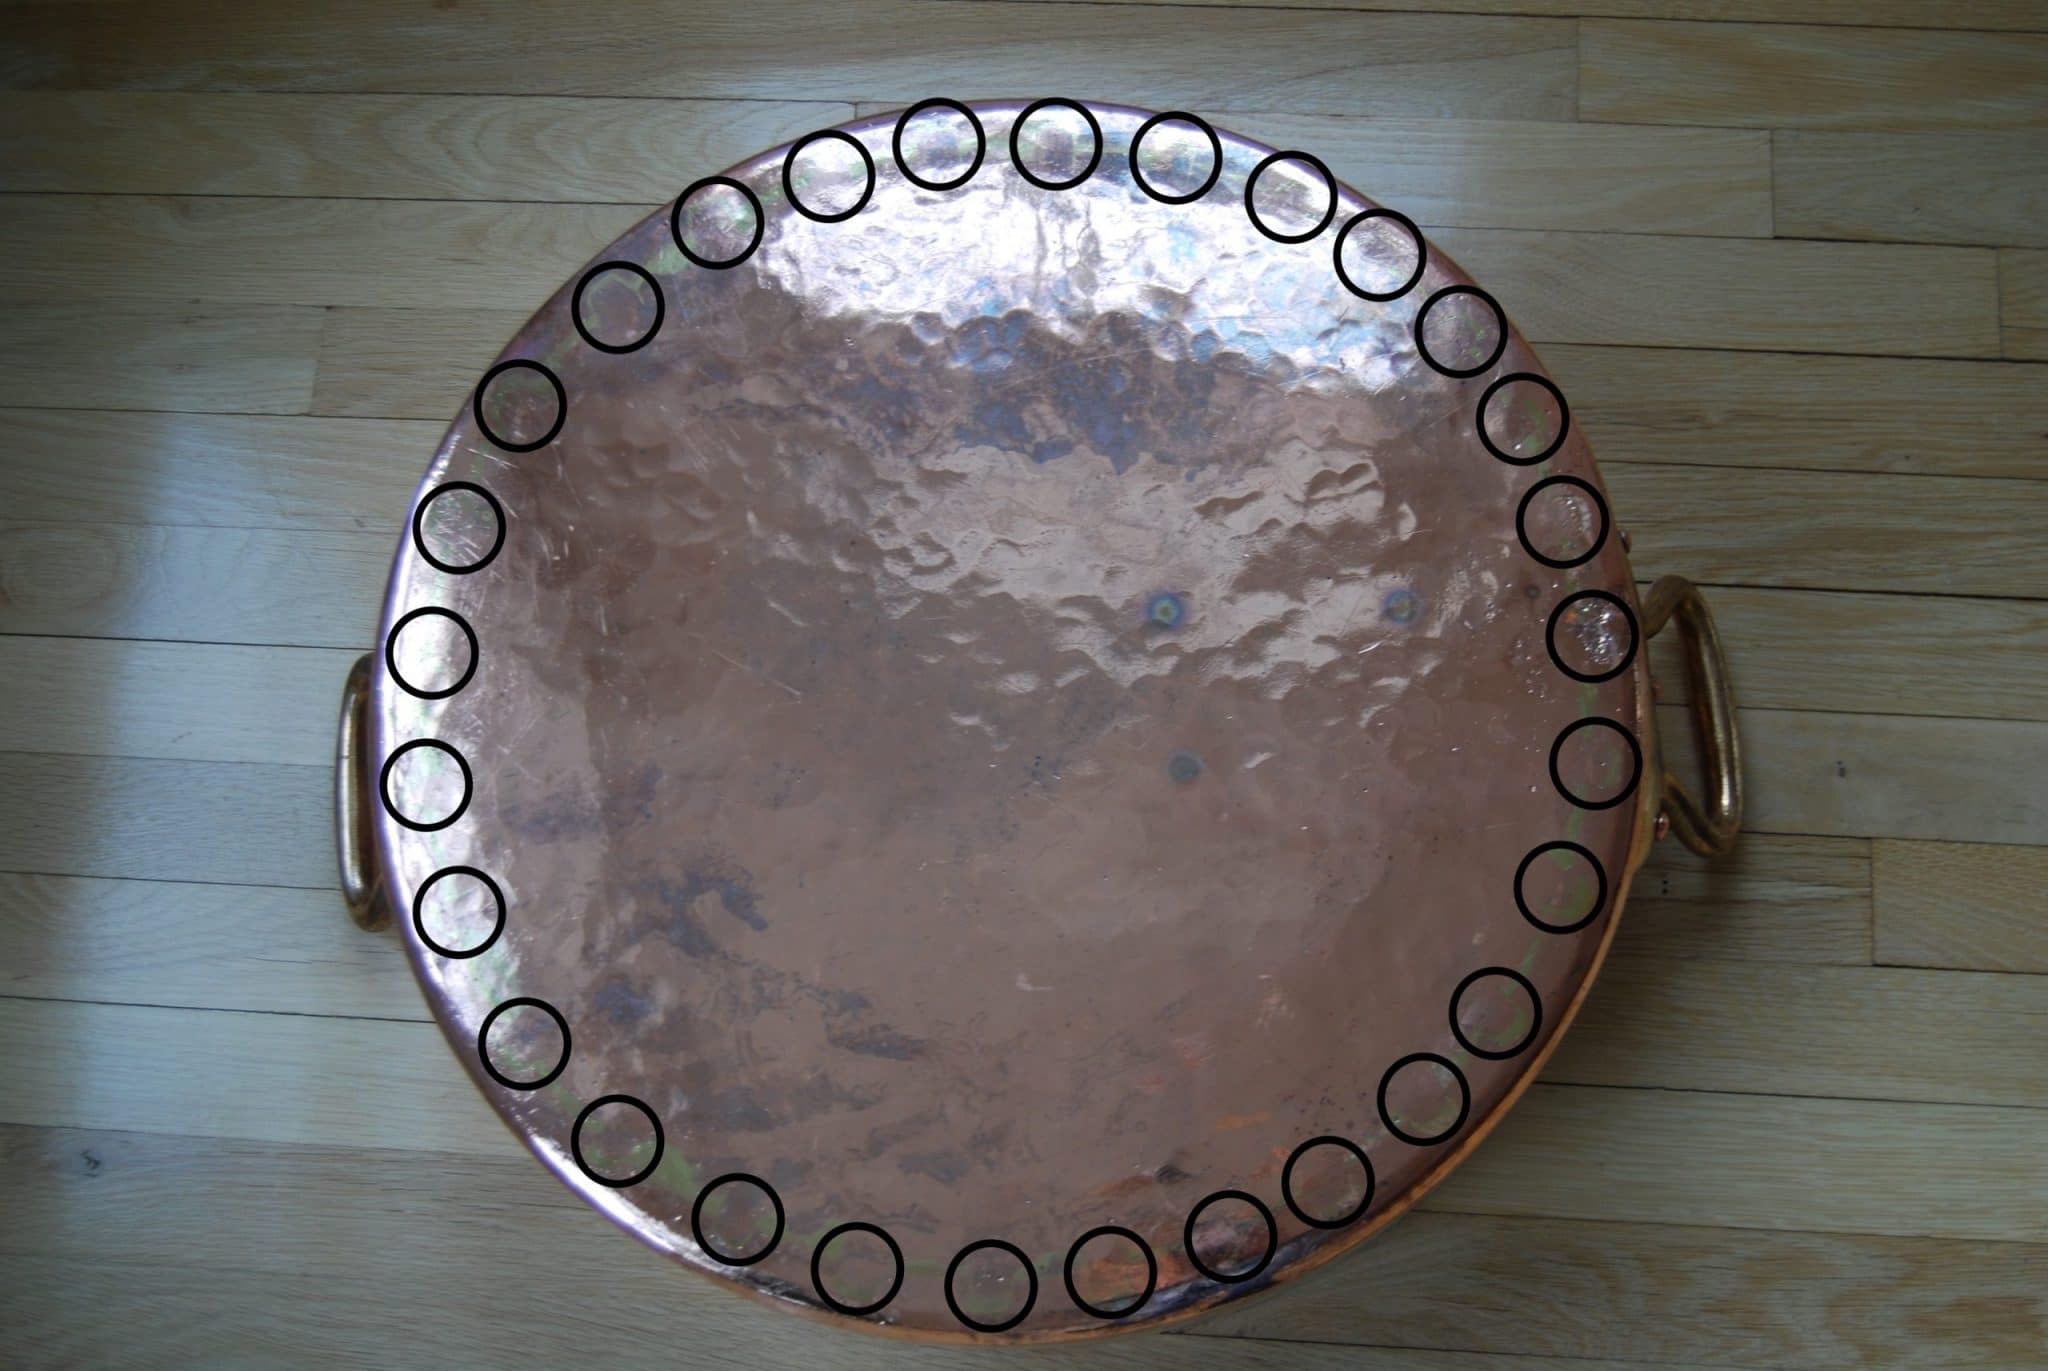
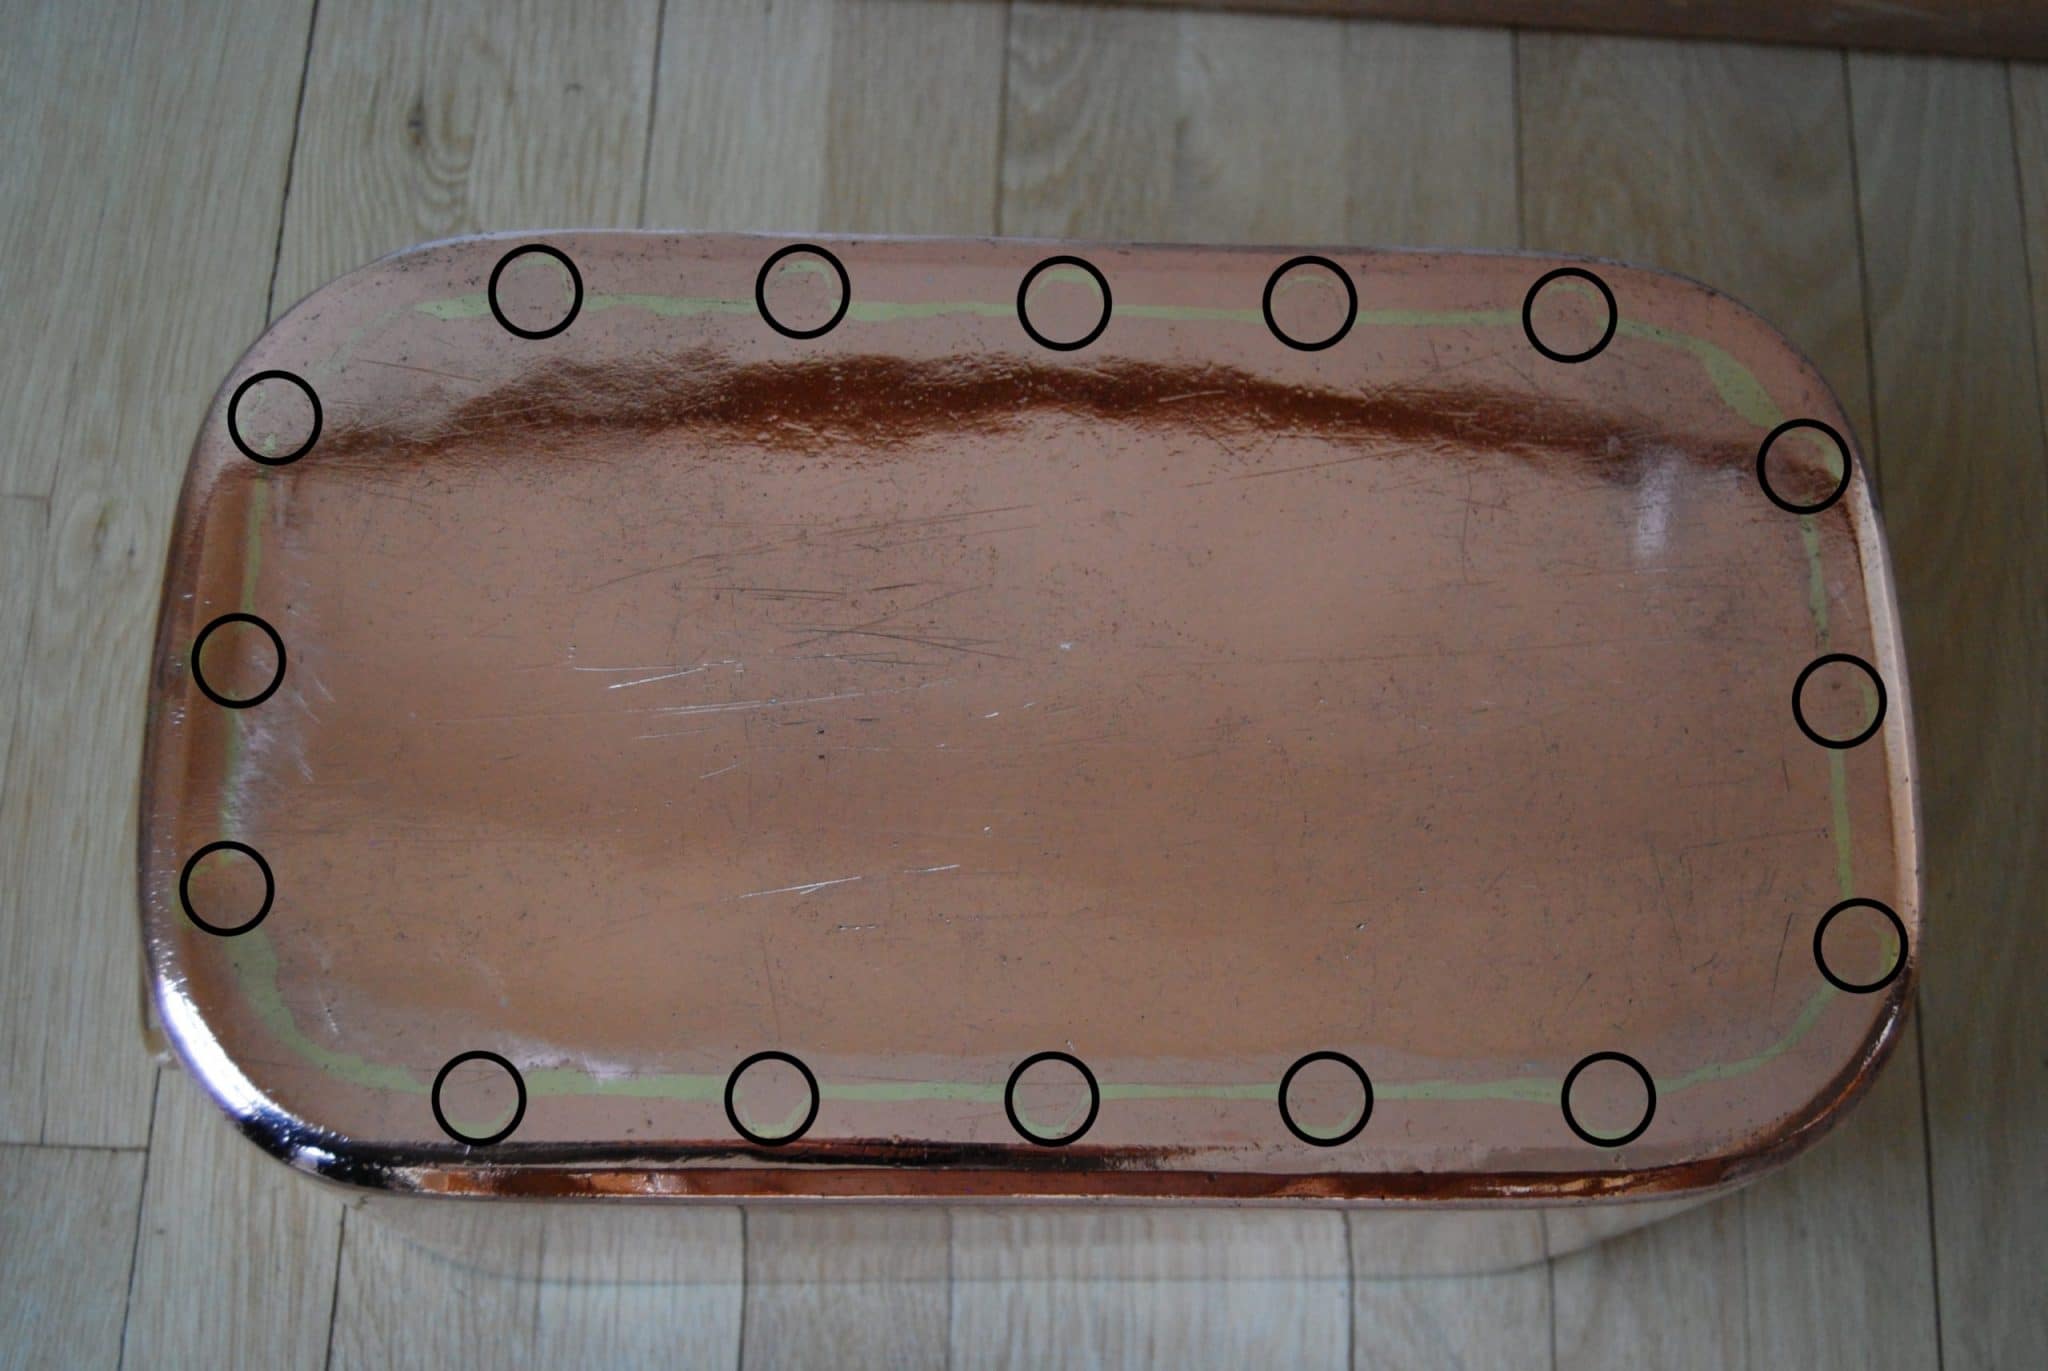
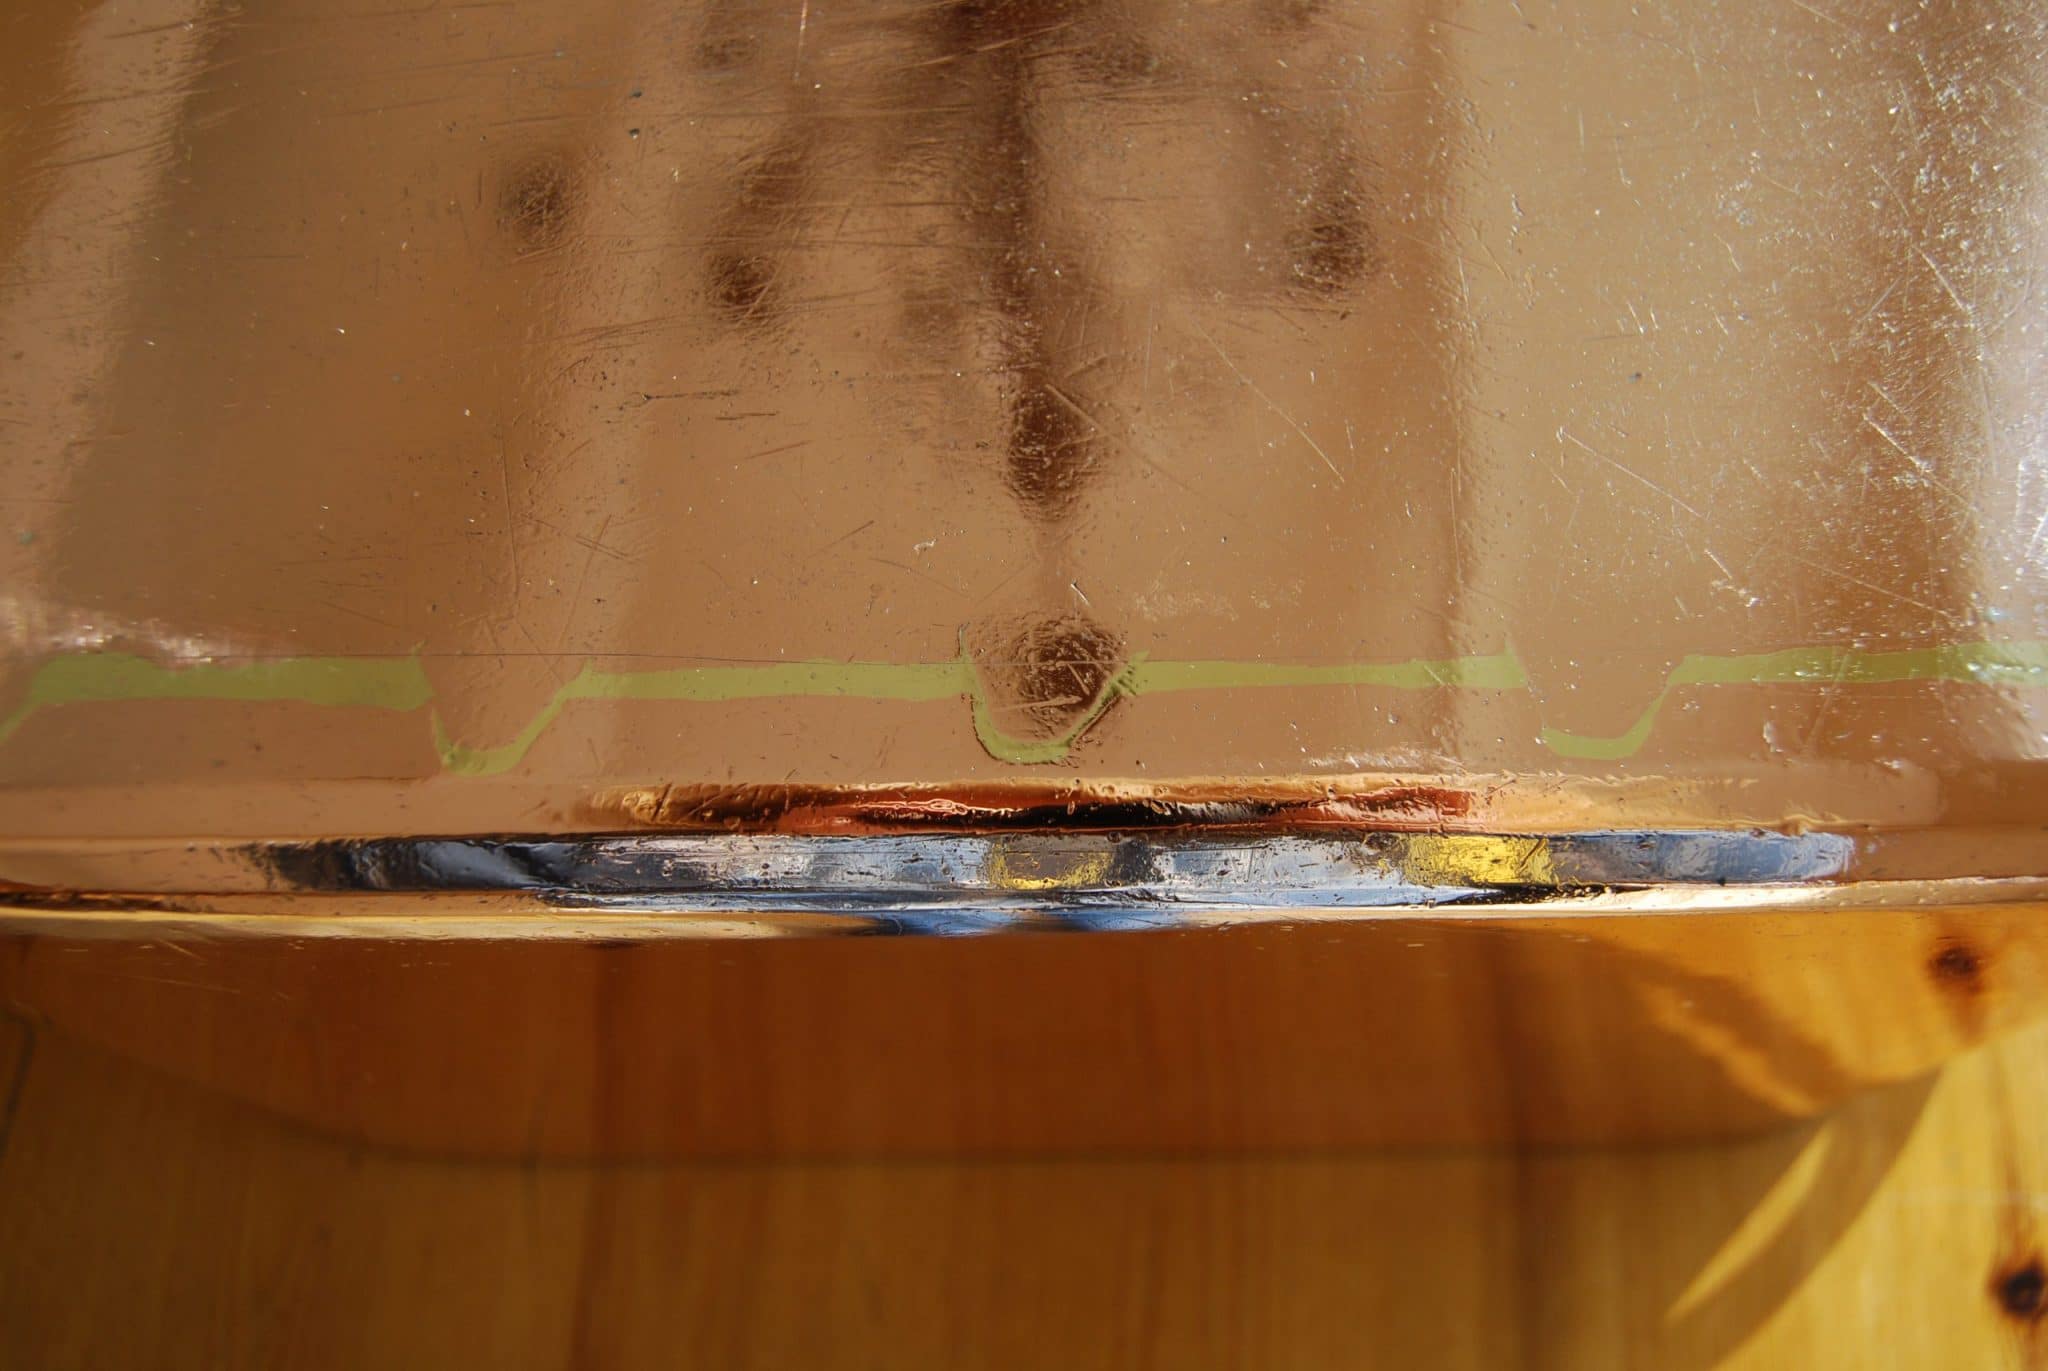
Irregularity: I see variations in the size and shape of each crenellation relative to the others, and/or how evenly they are spaced along the length of the seam. These tend to show up on the base of round pots, which seem to me to be most likely to have the intervals between crenellations judged by eye. However, the base of the pot is more likely to be scuffed up or damaged, which can make the crenellations hard to see. If you can’t clearly see the crenellations on the base of a pot, try spreading your fingers to put one finger on the small crenellations and use your judgement as to whether they’re evenly spaced. Side seams can be easier to inspect because they are less likely to have been scuffed up, but on some short pots they may not provide enough crenellations to judge.
Let’s look at some examples.
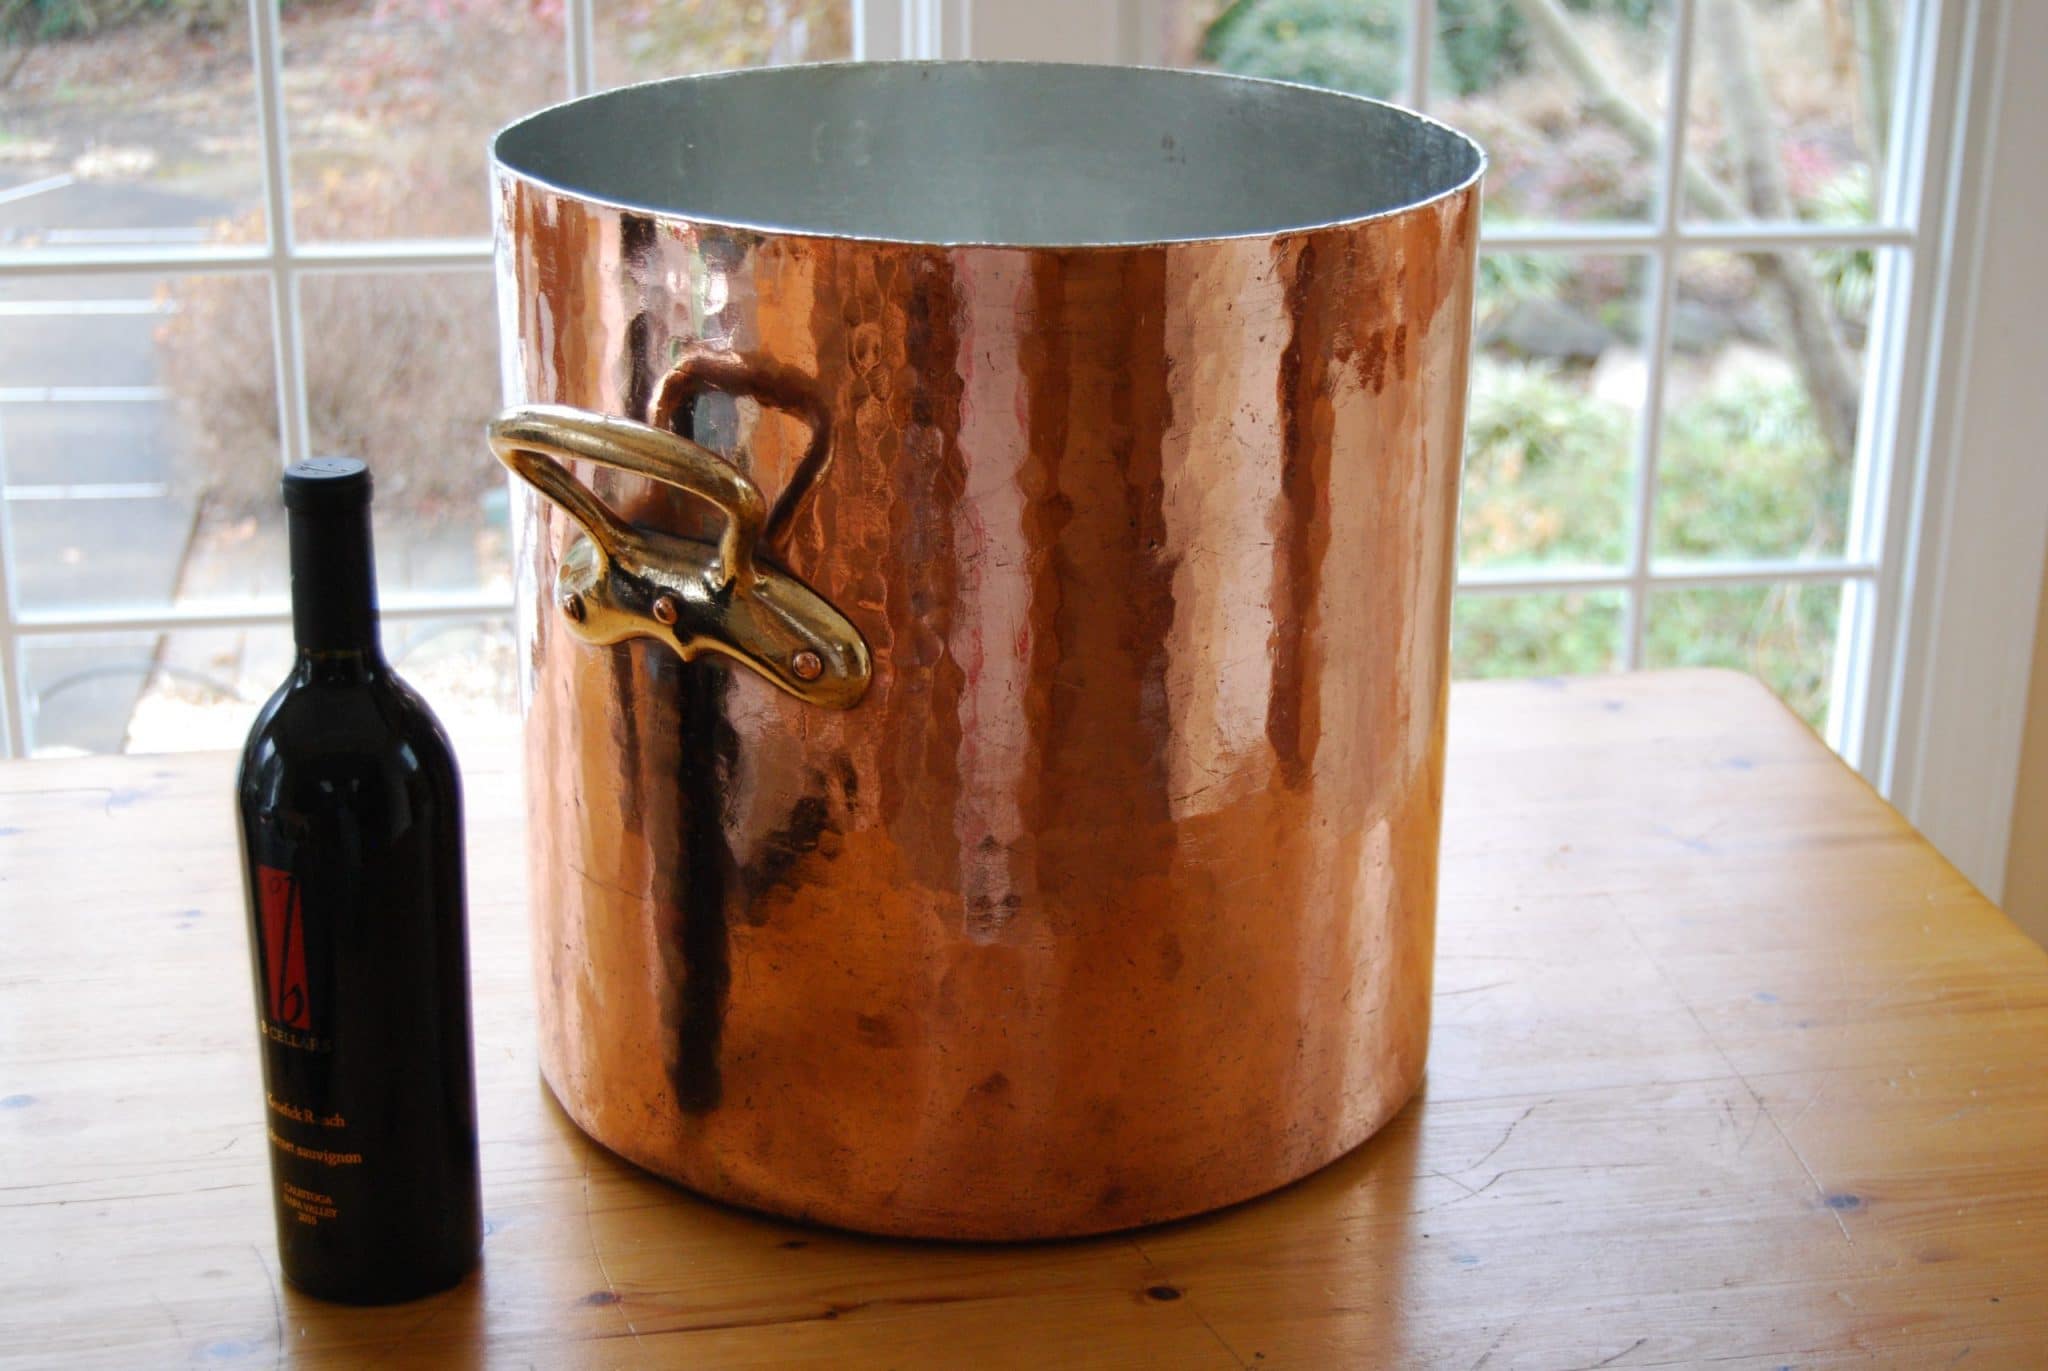
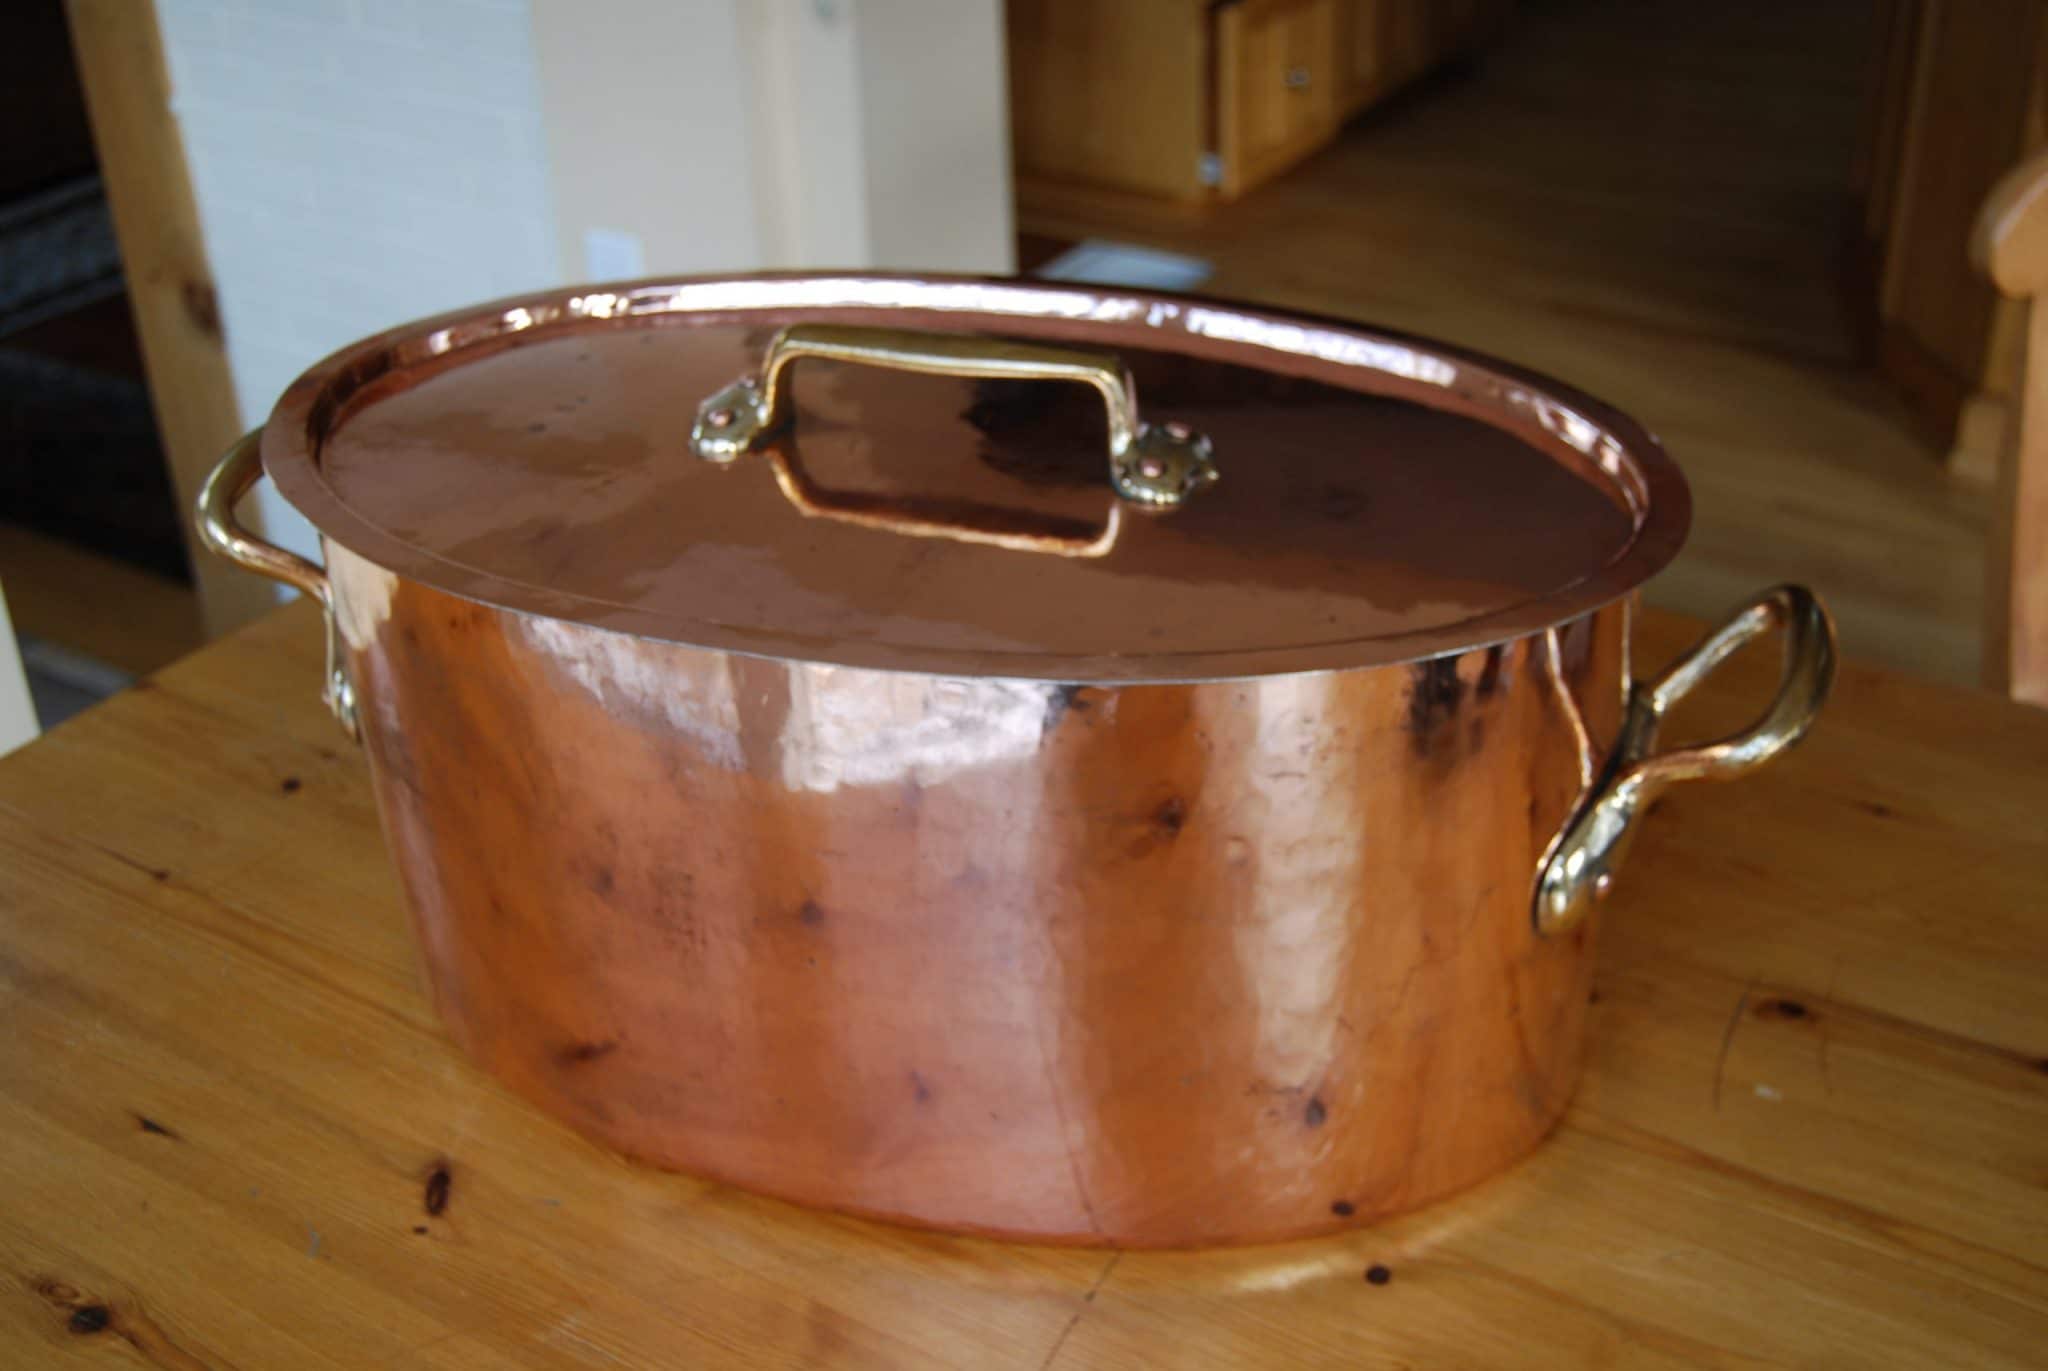
This big 50cm stewpot has very unusual dovetailing in its base: there are two rows of dovetails, and each row has an odd number of crenellations. The crenellations are irregularly cut, and there are also over-cuts. To my eye, this looks like a hand-cut pan.
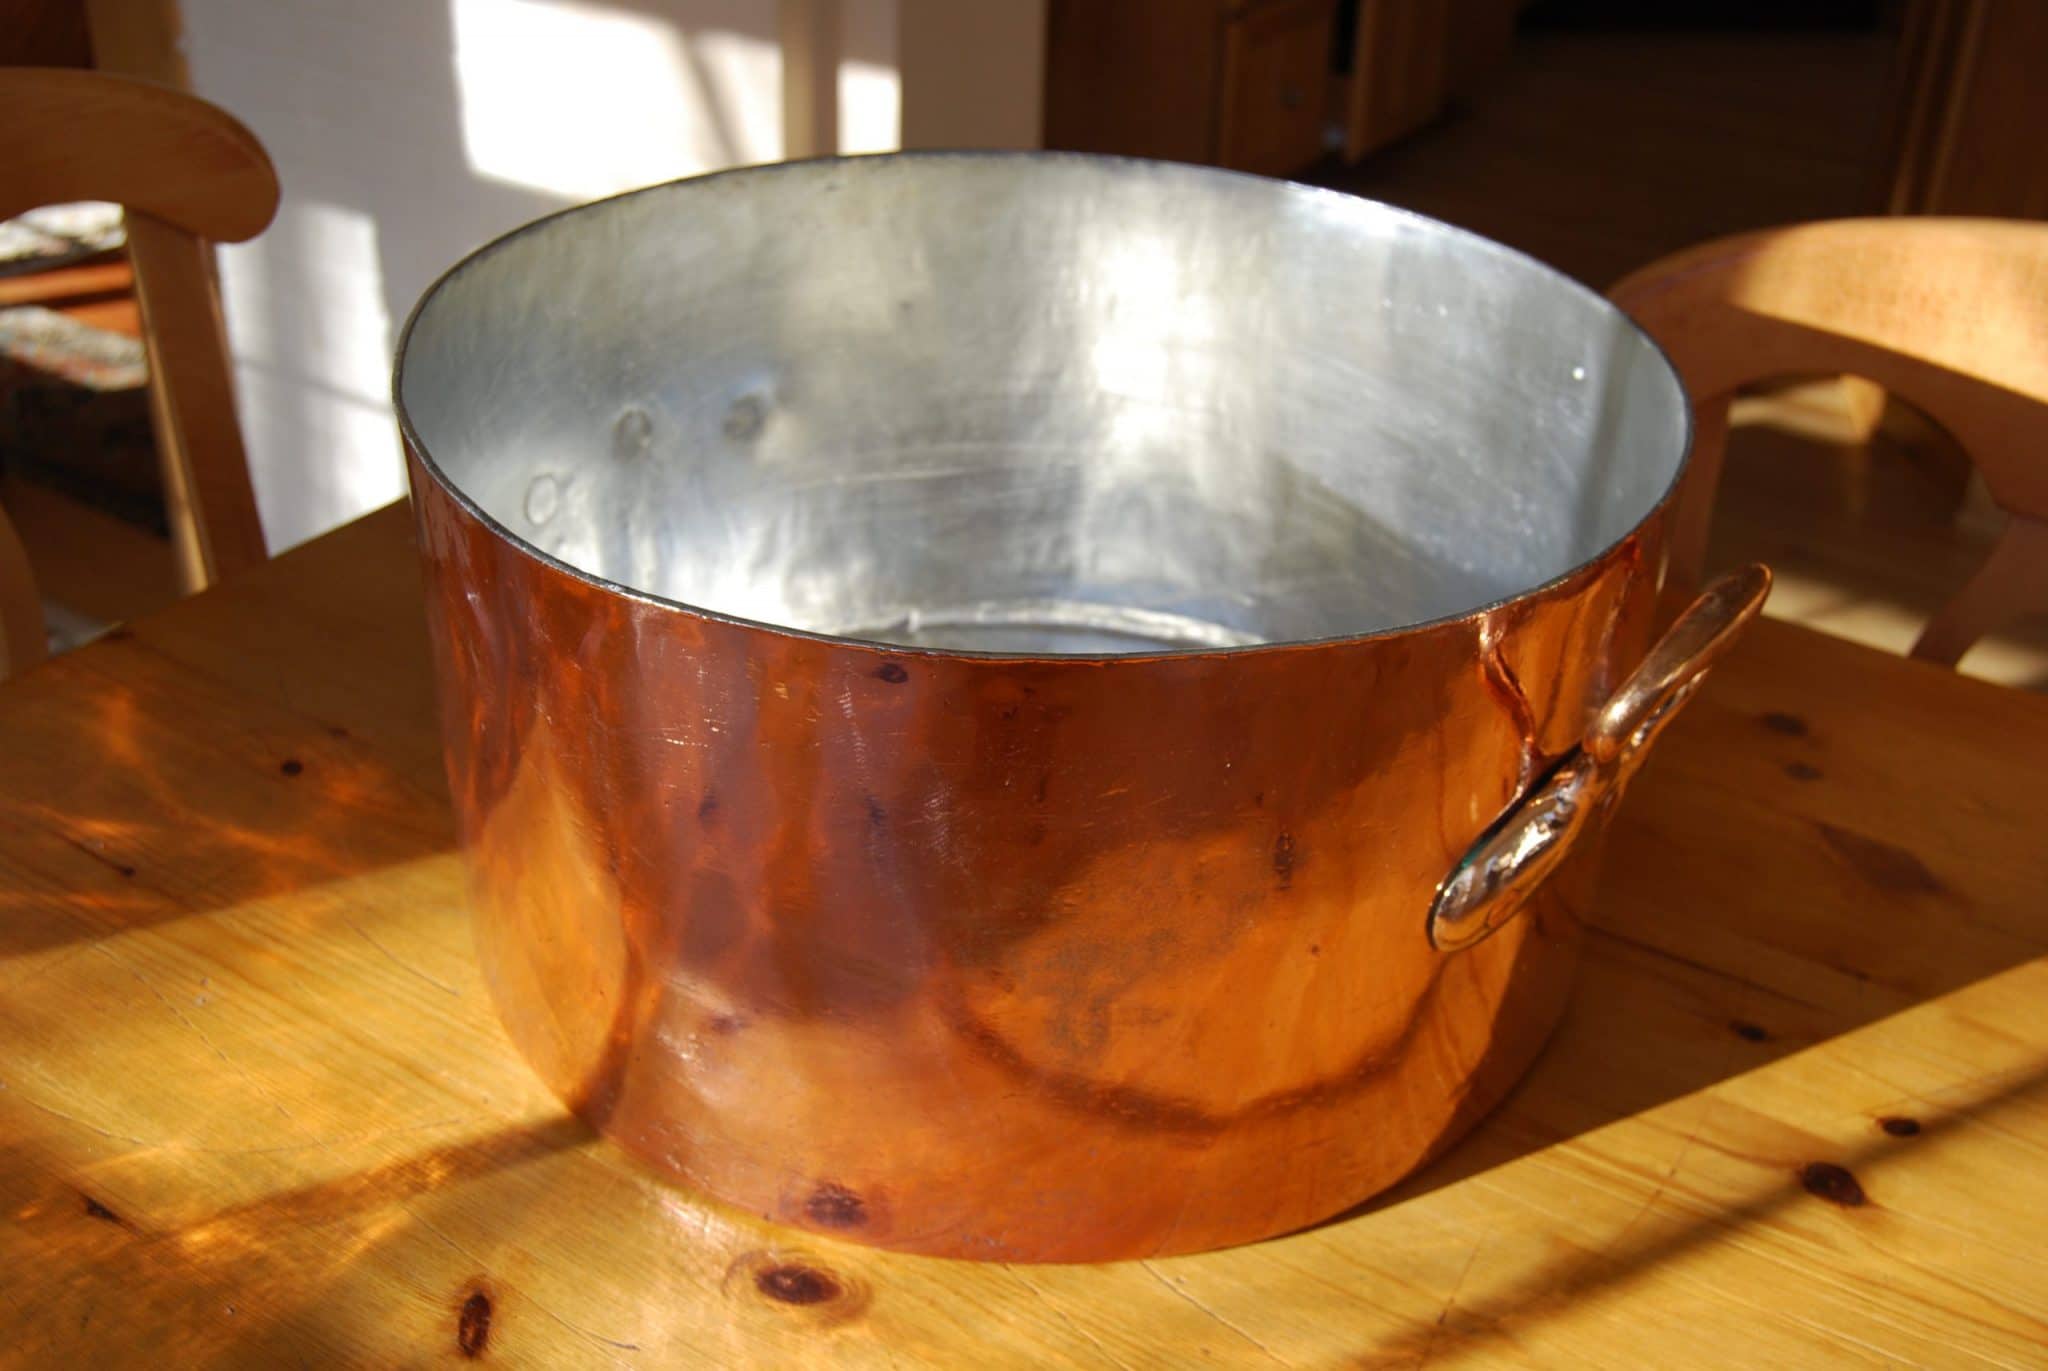
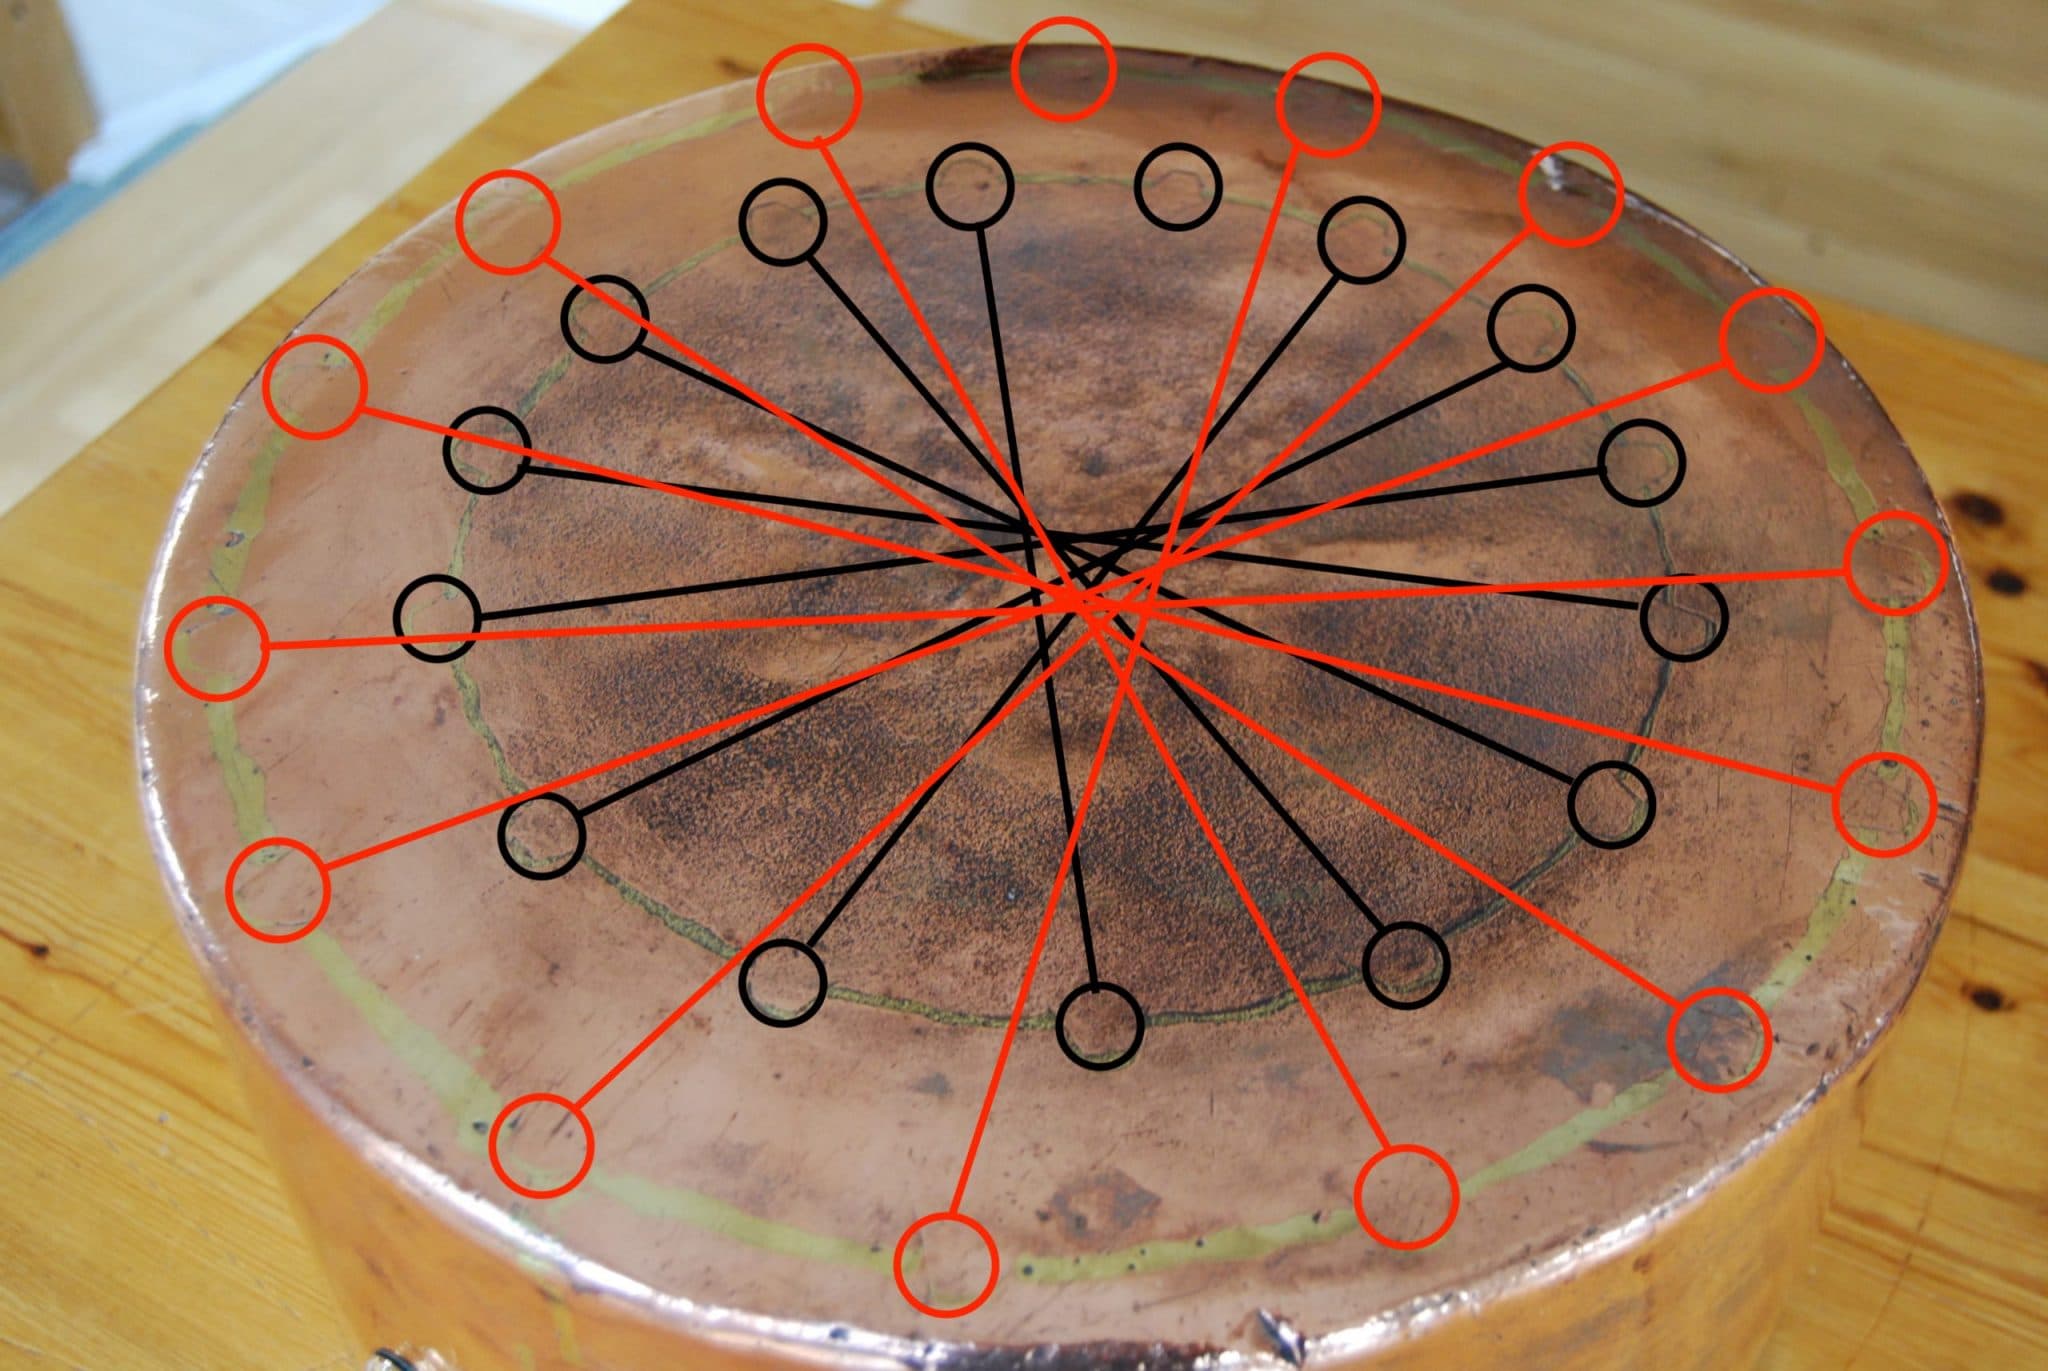
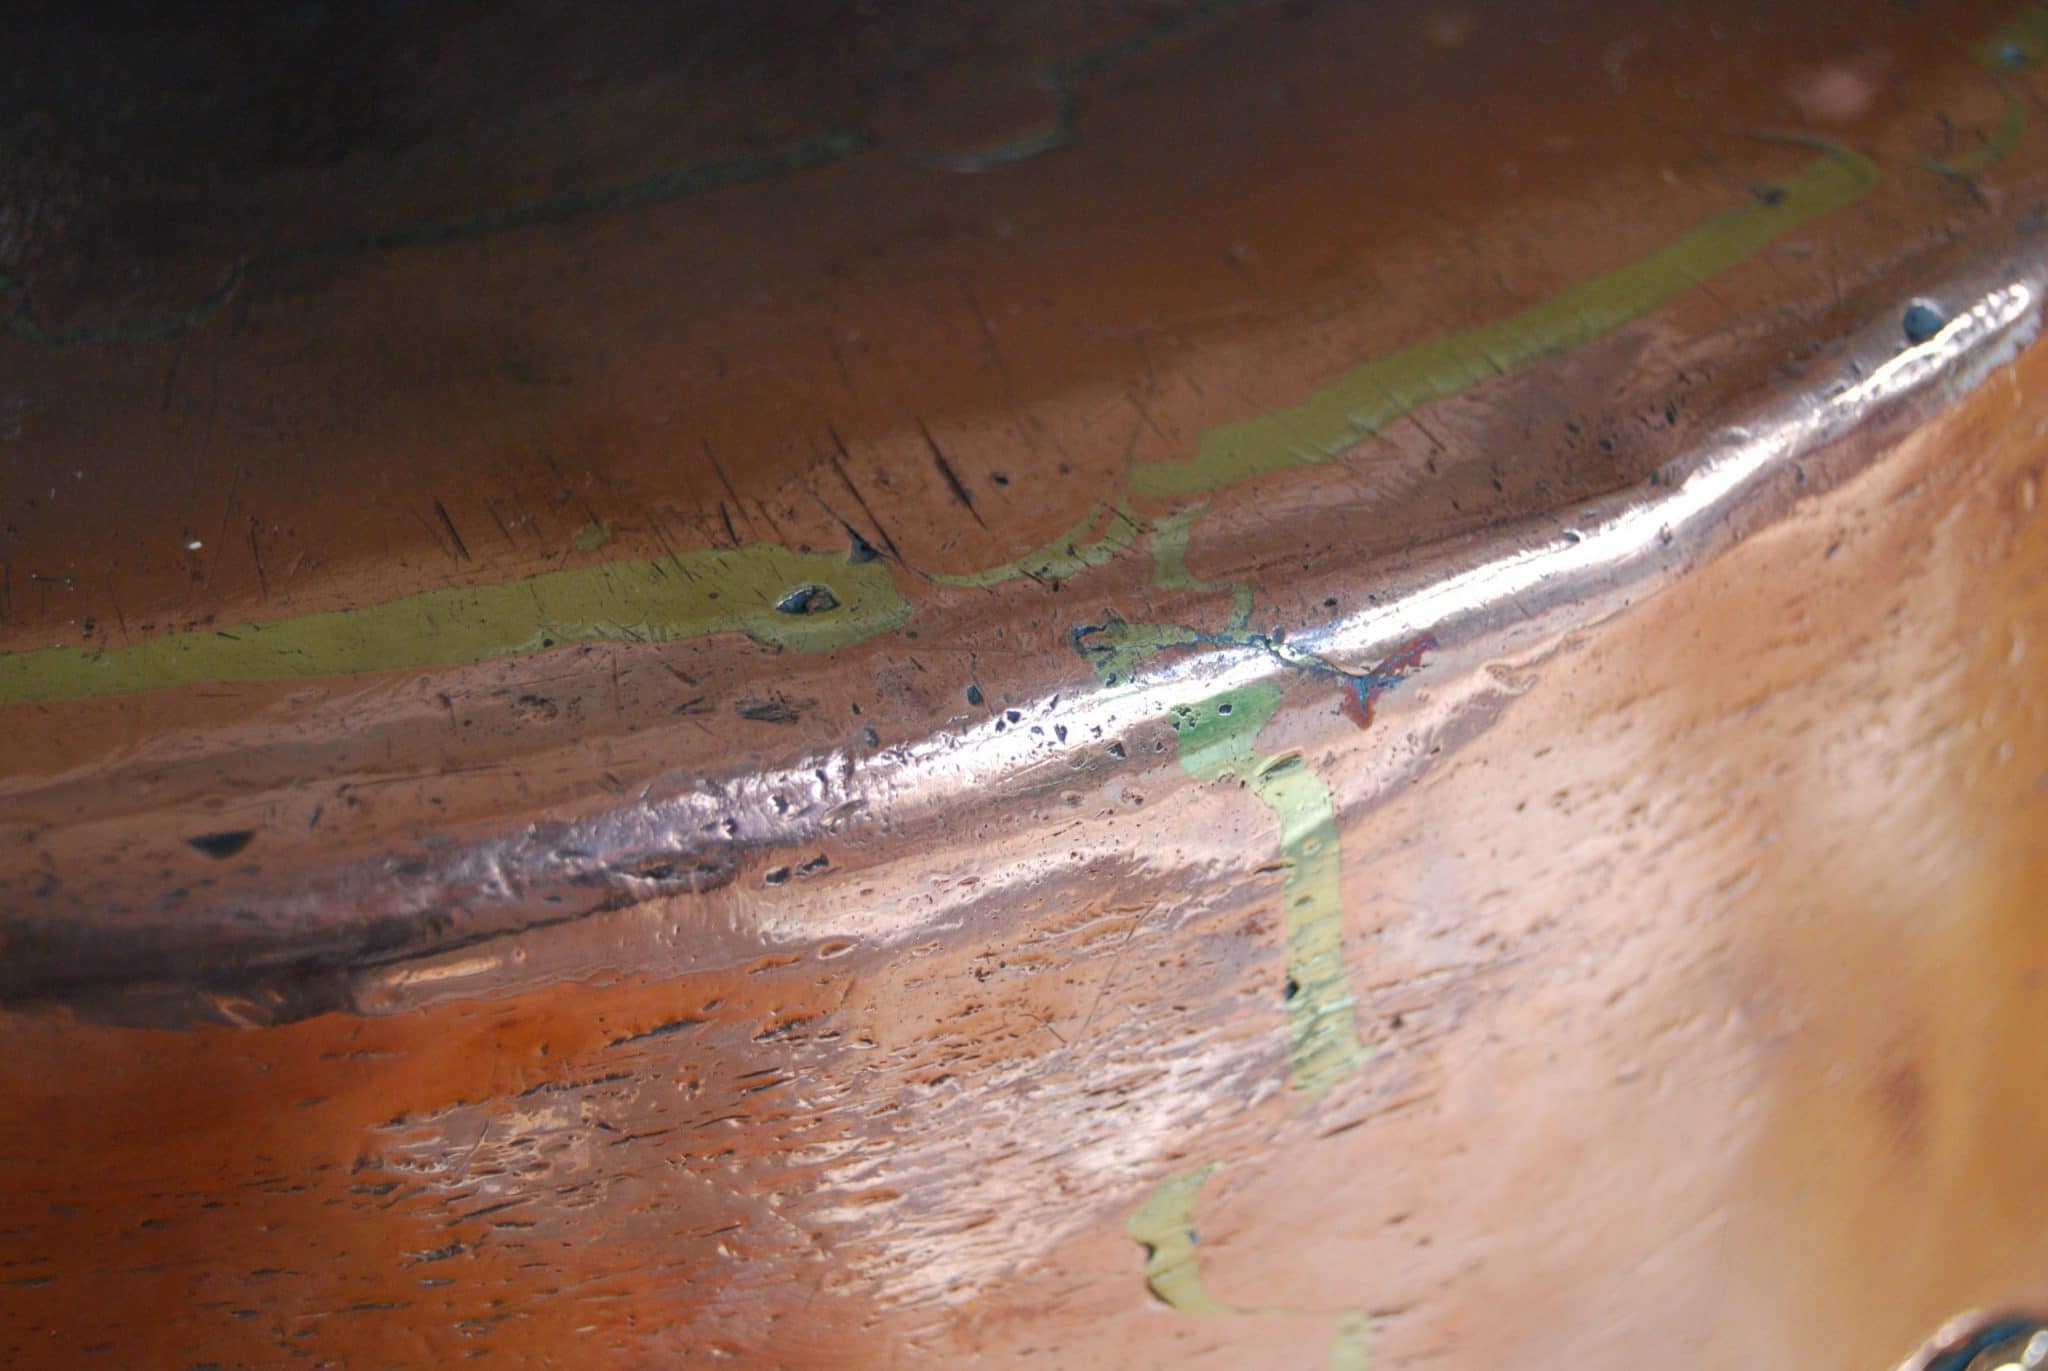
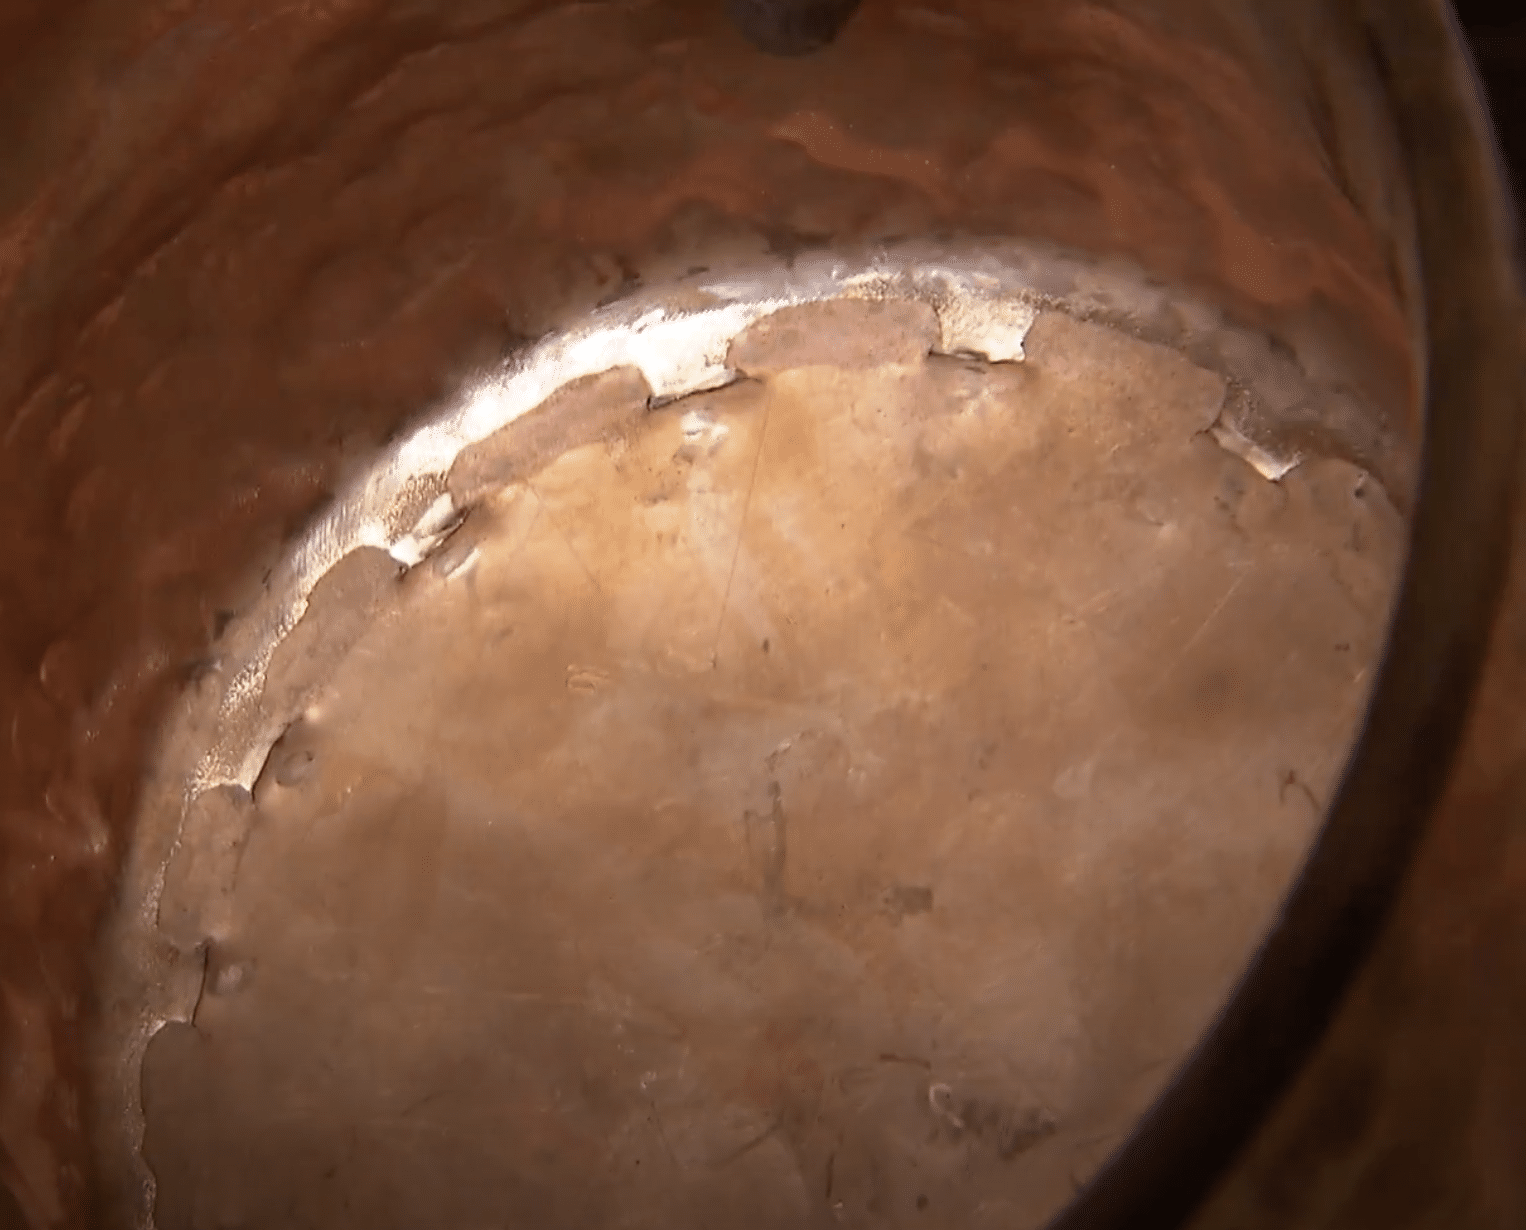
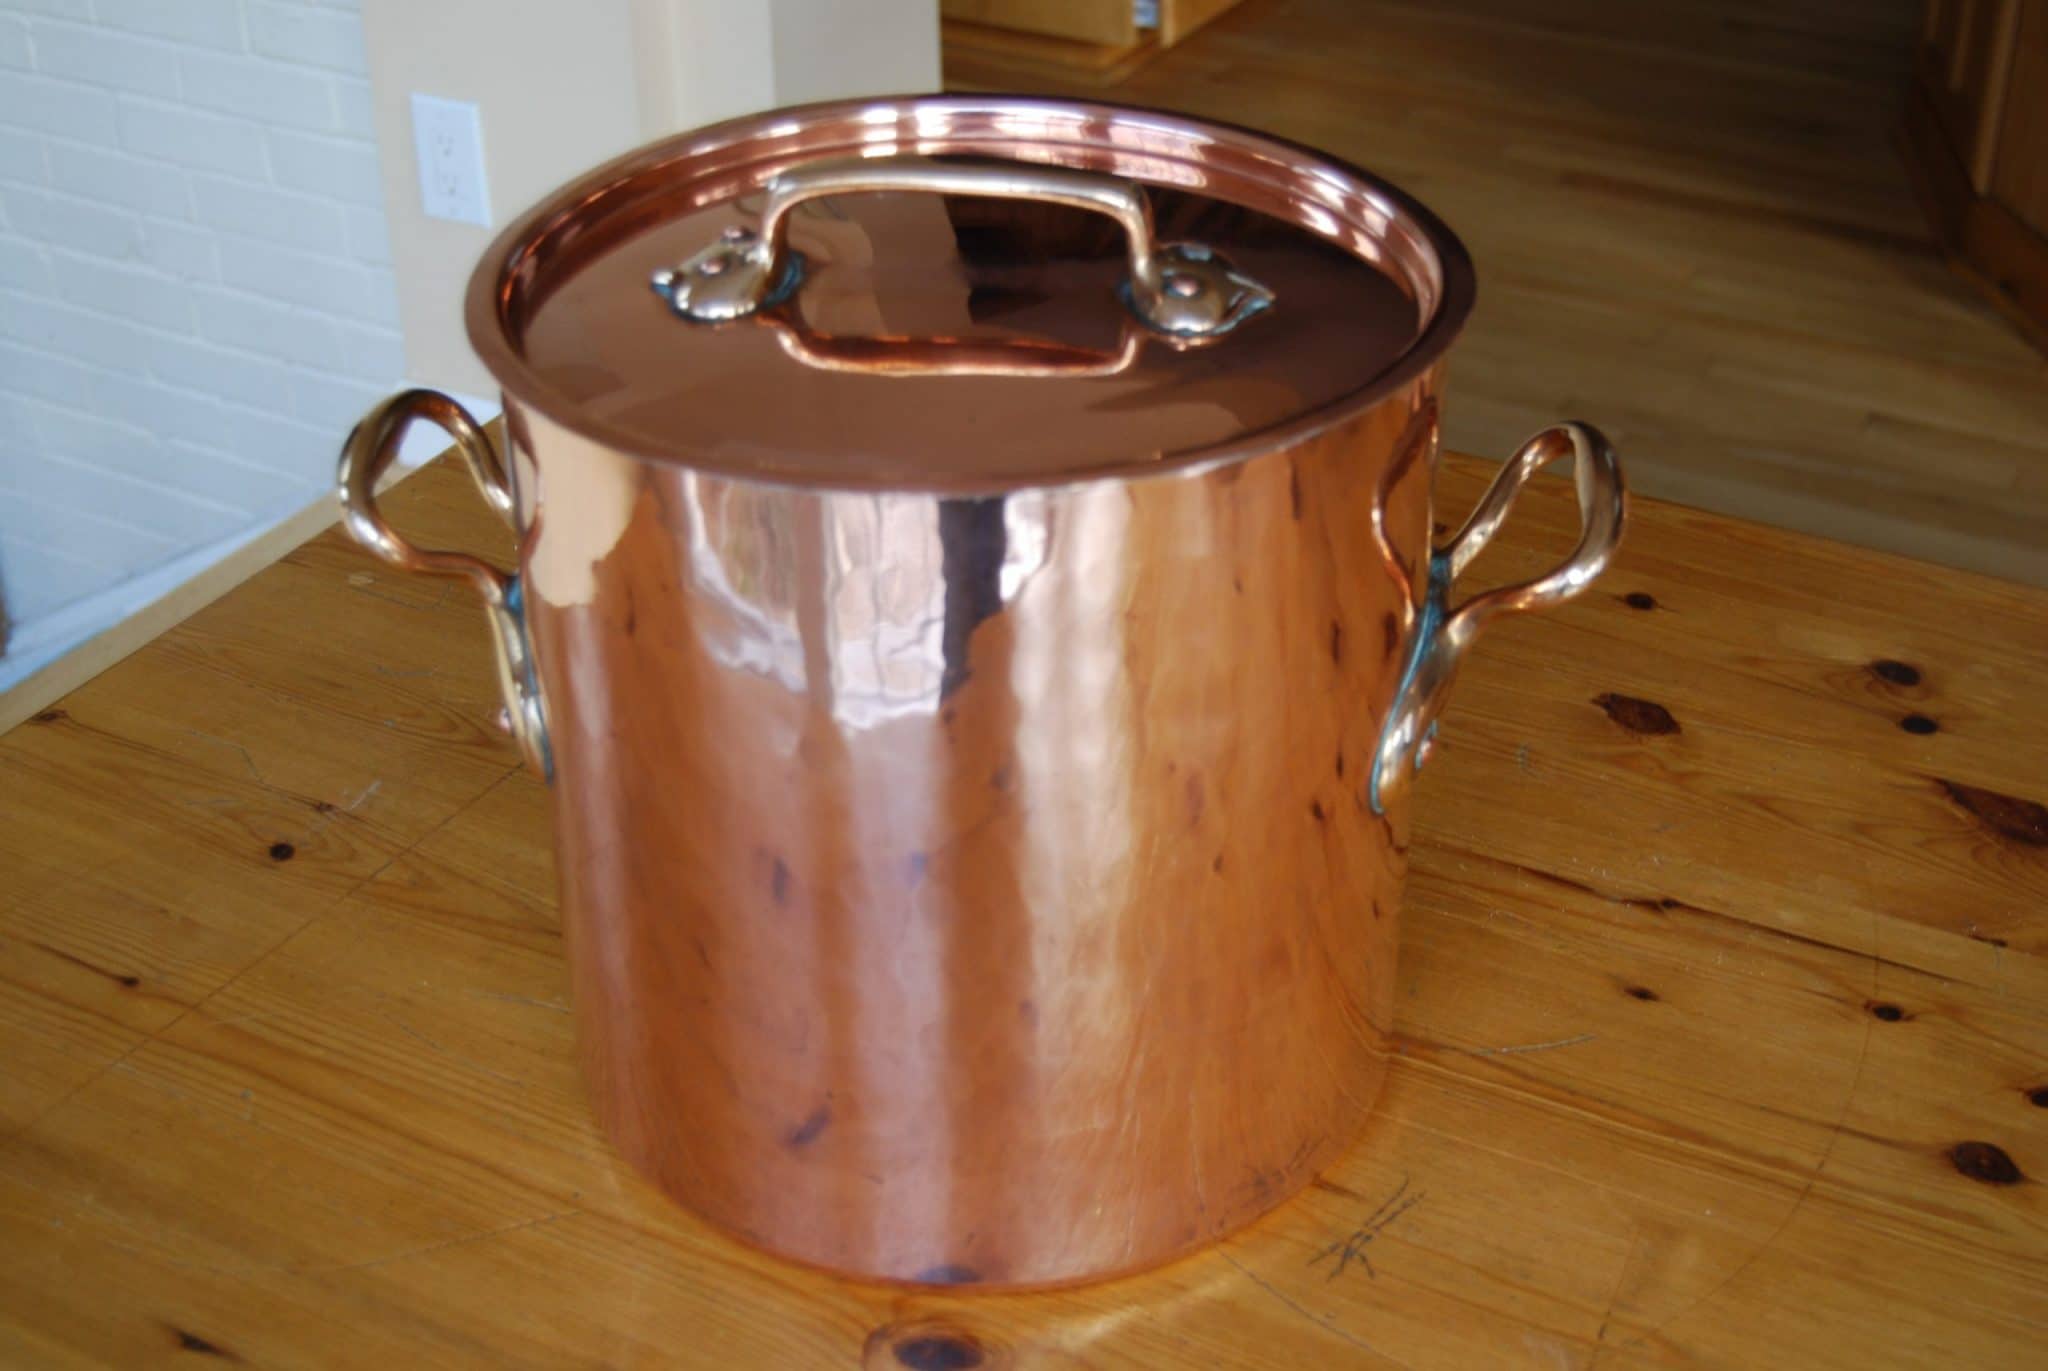
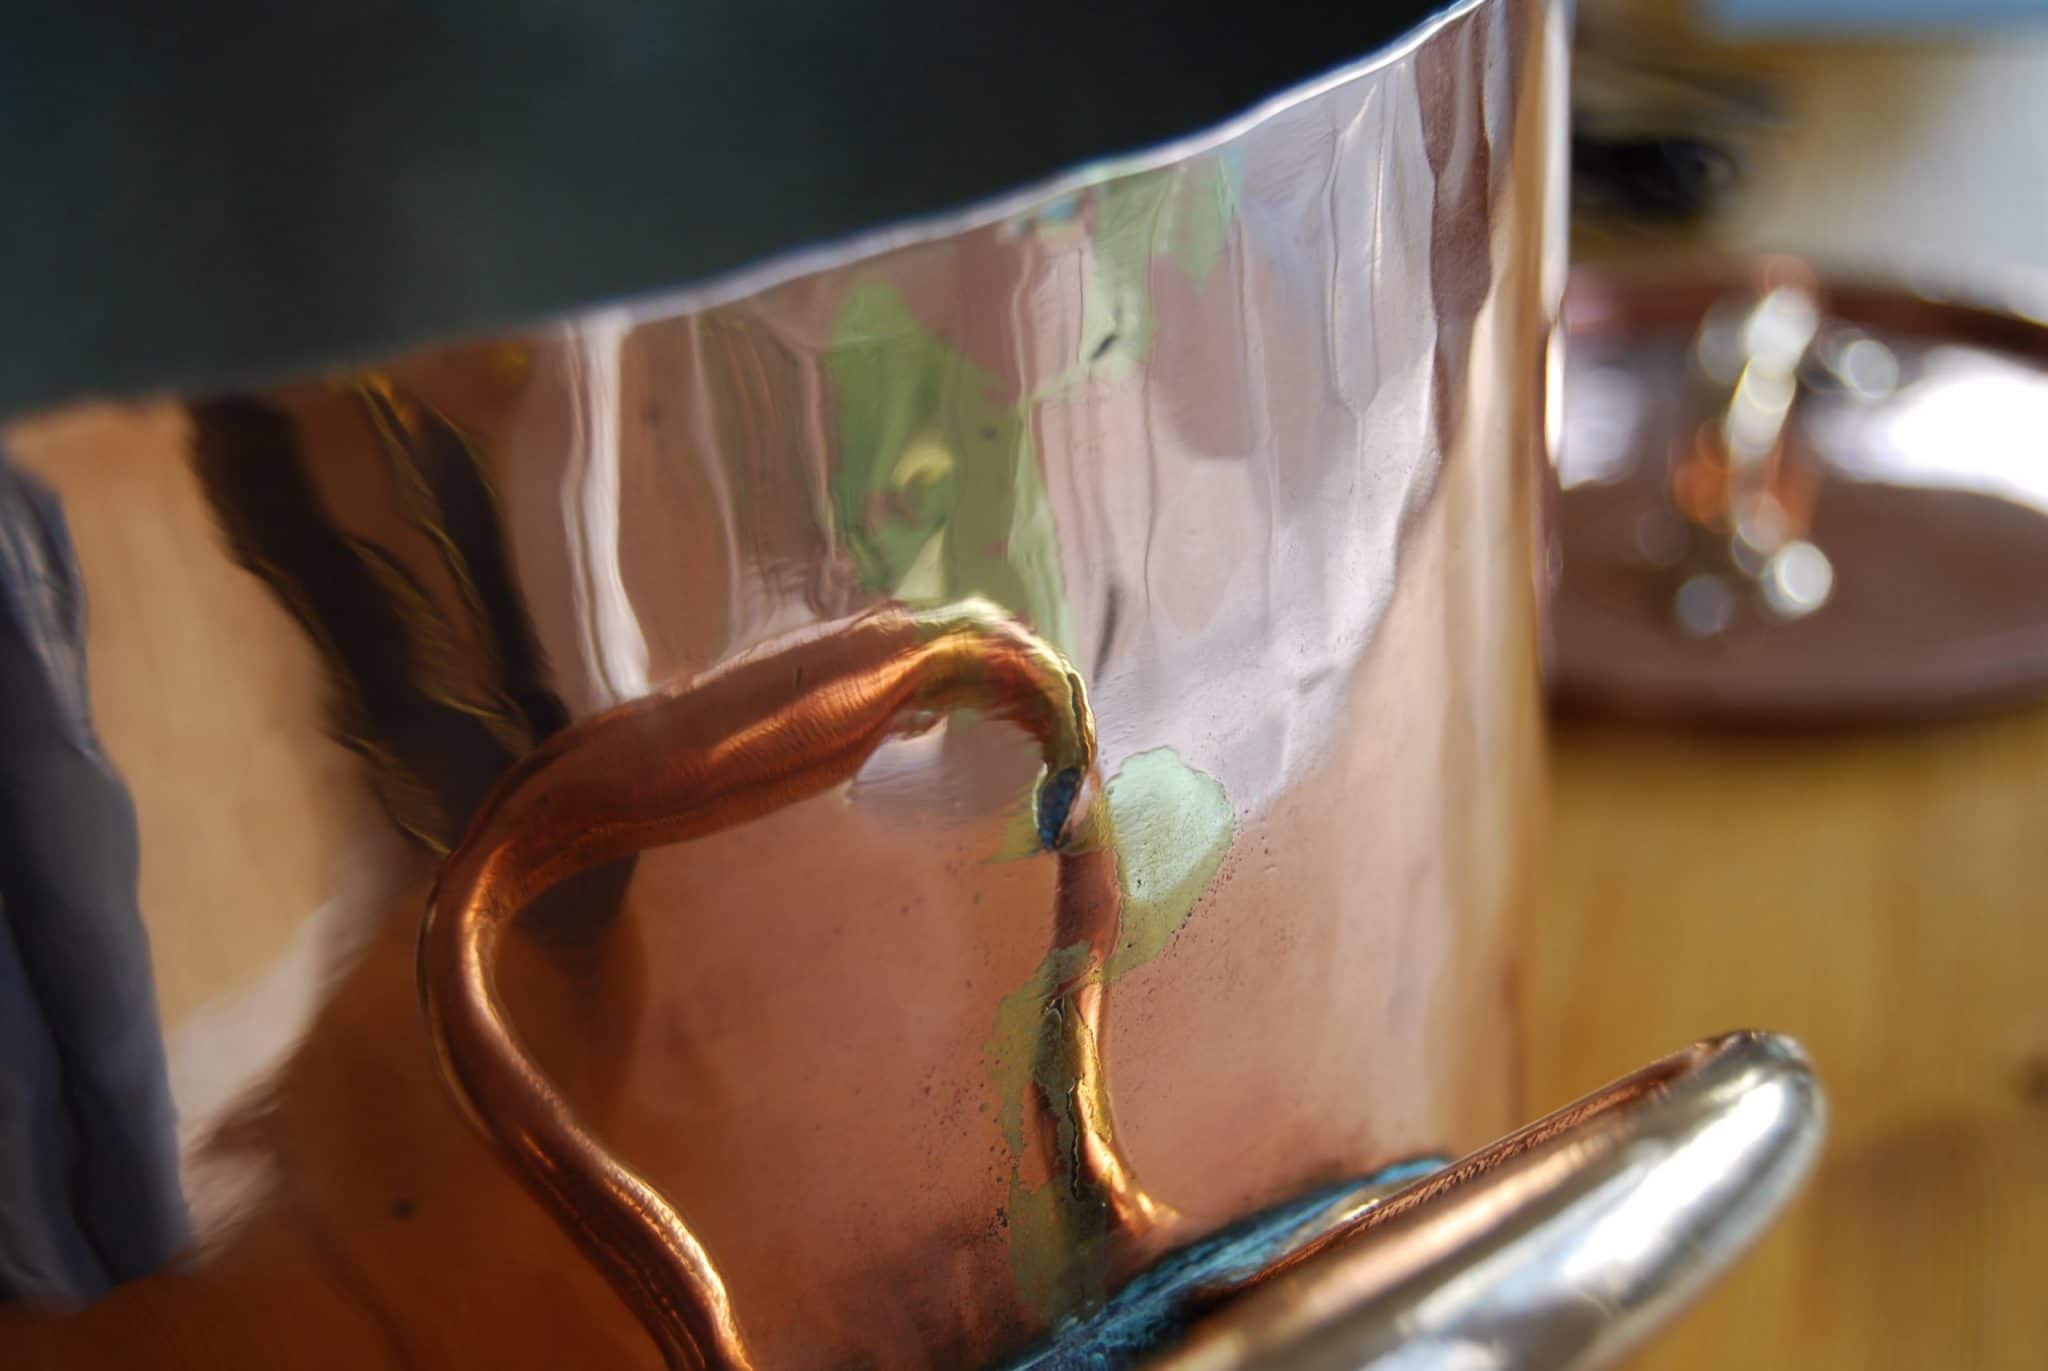
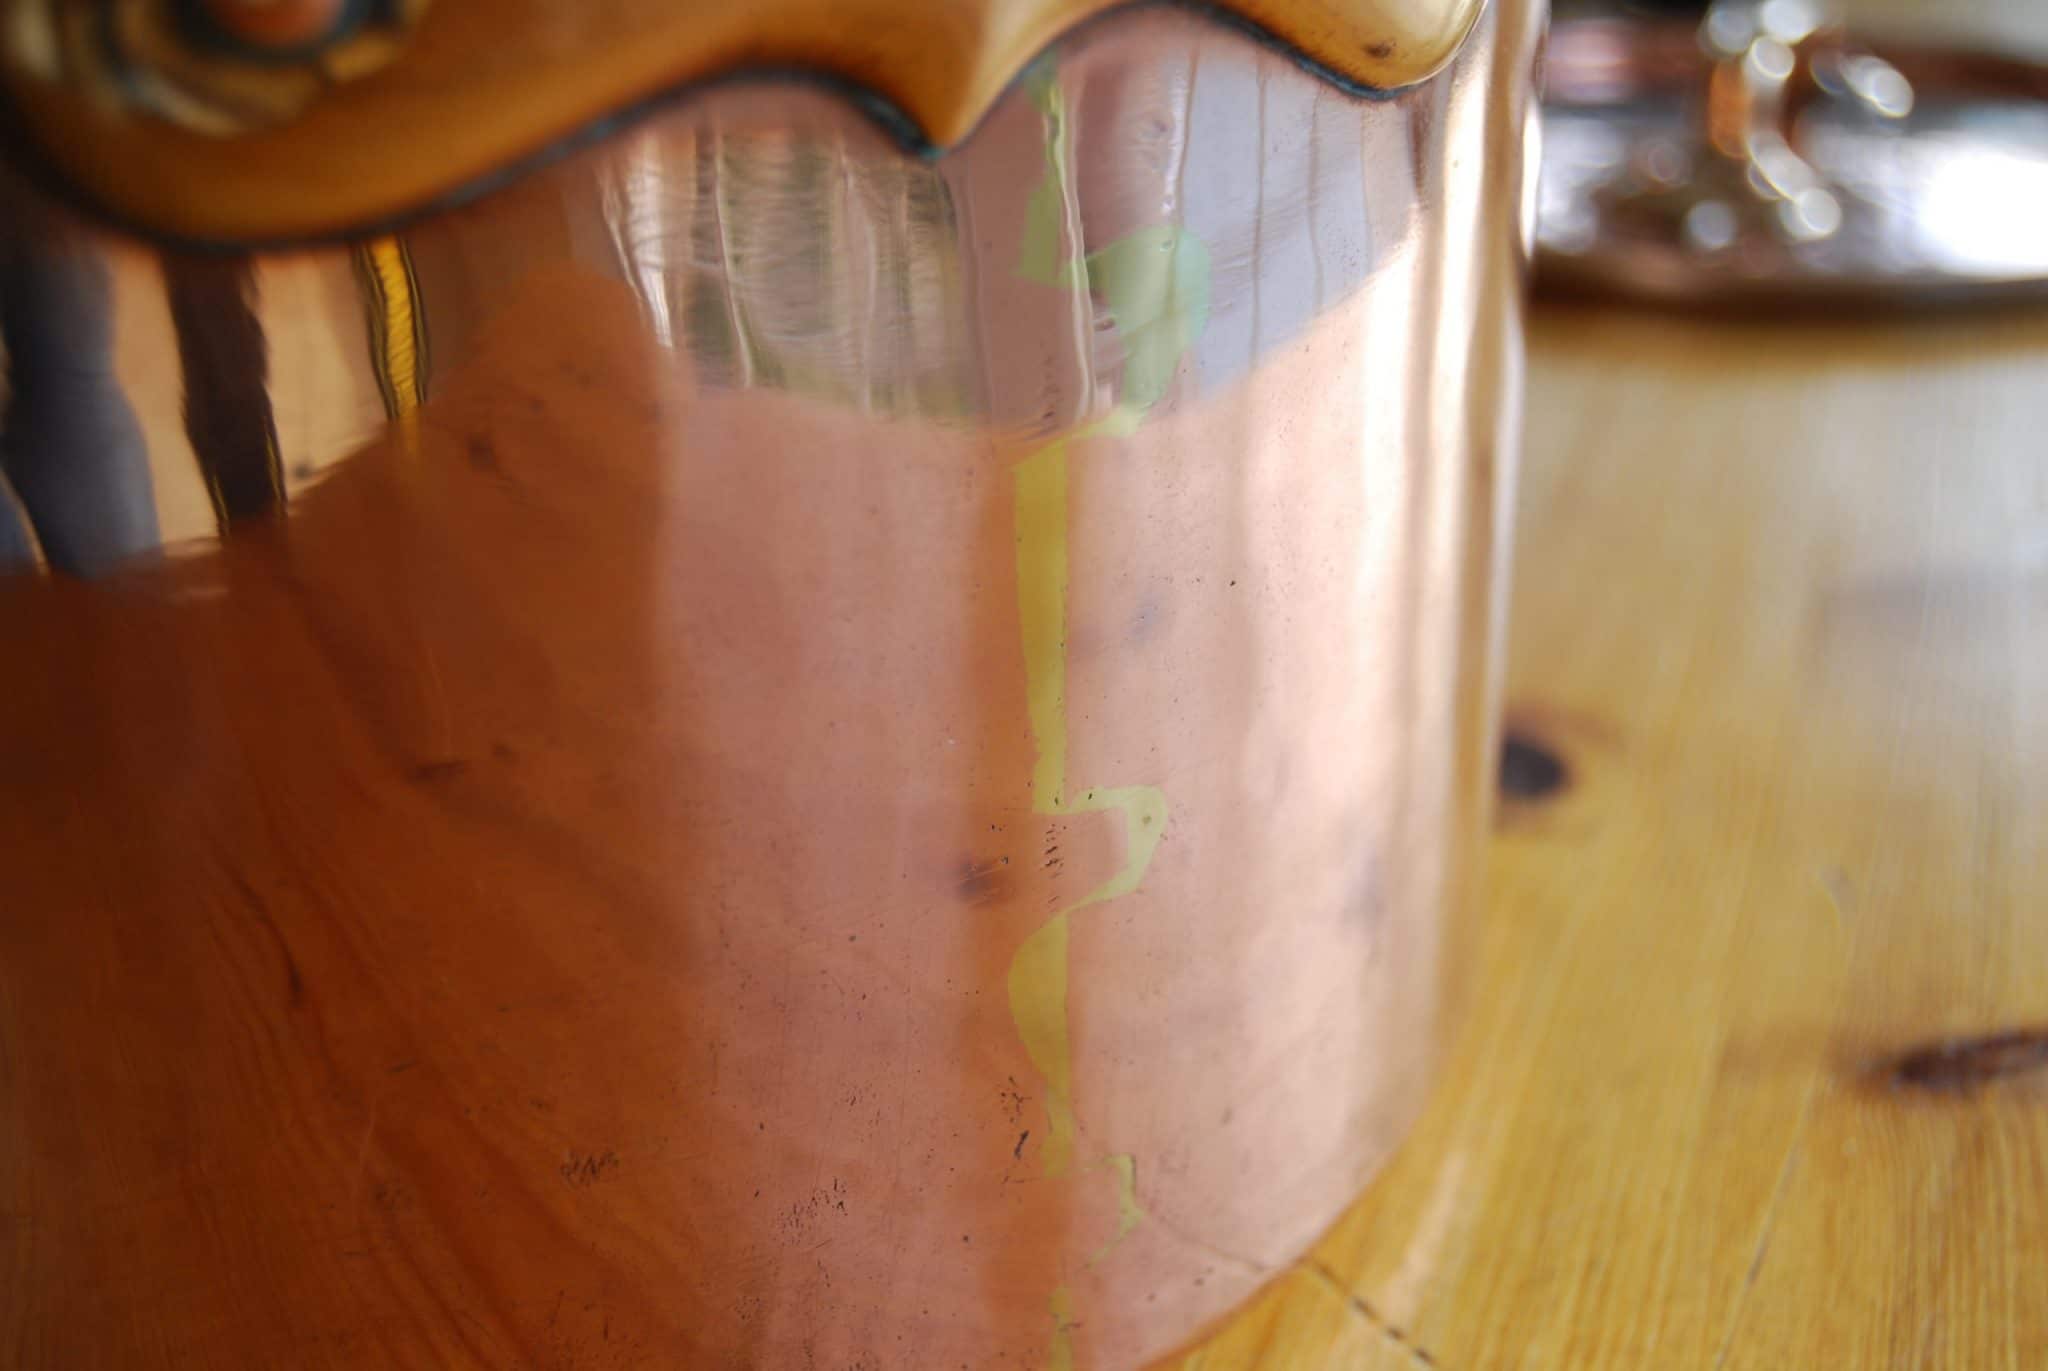
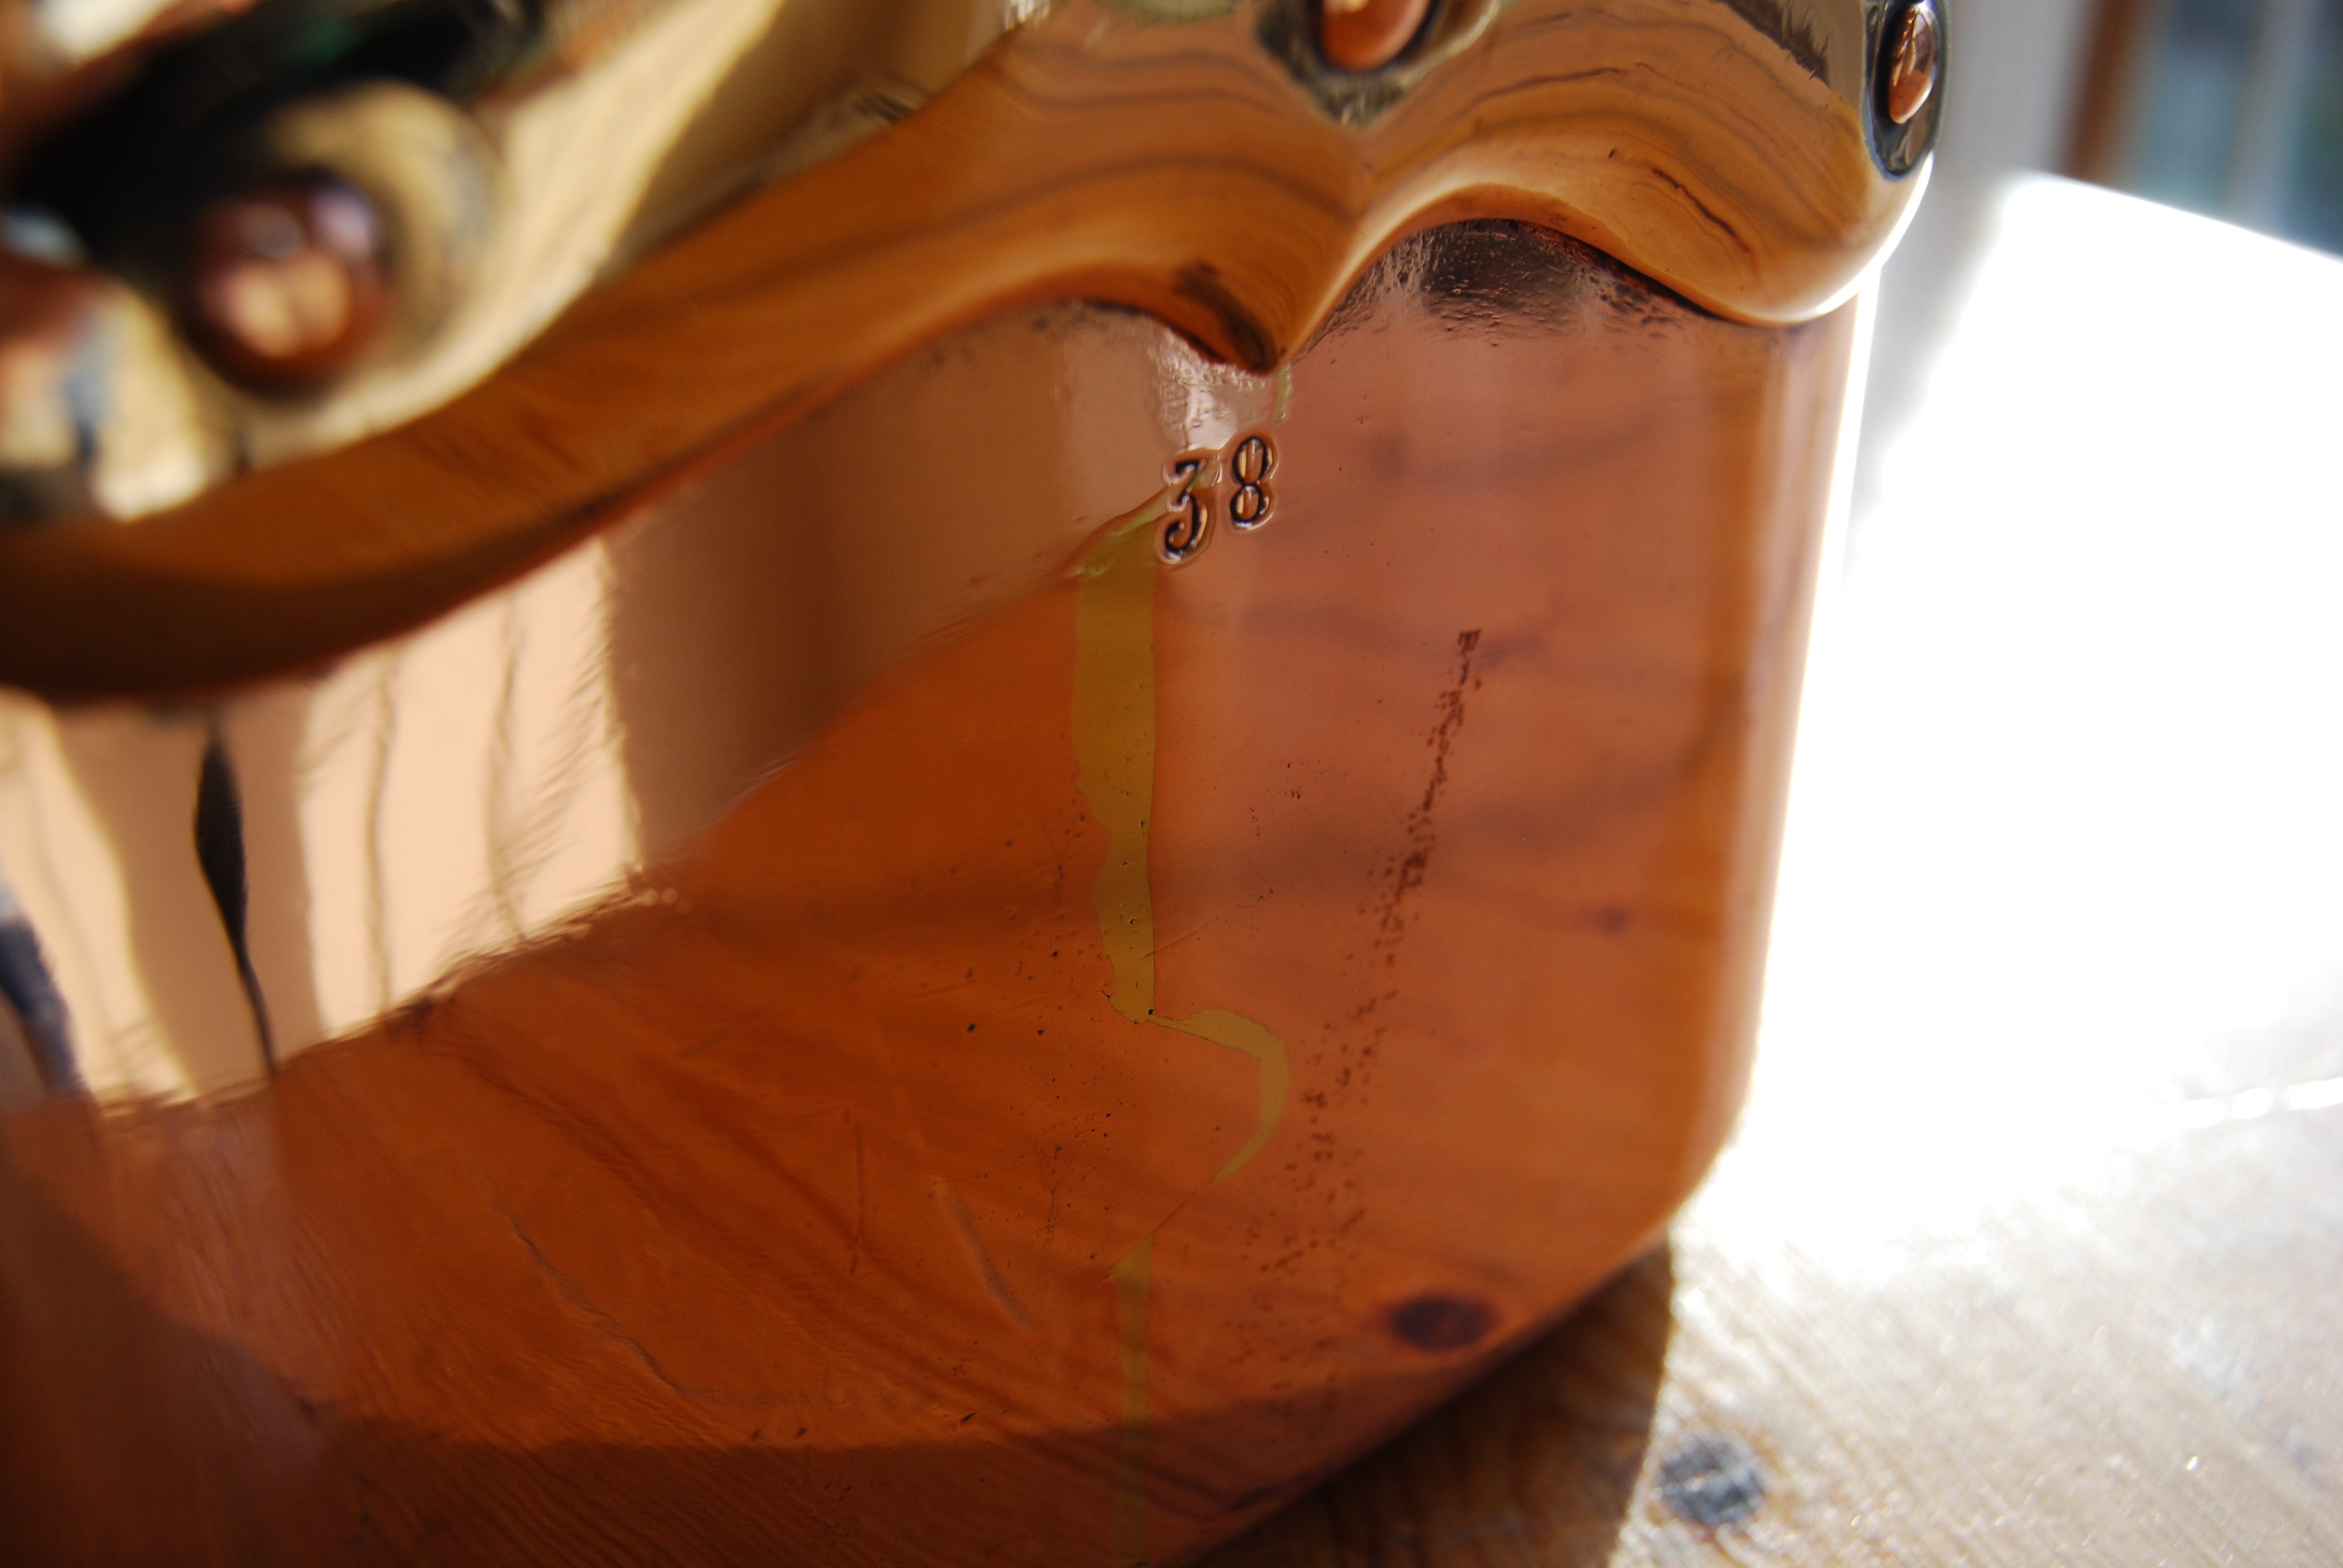
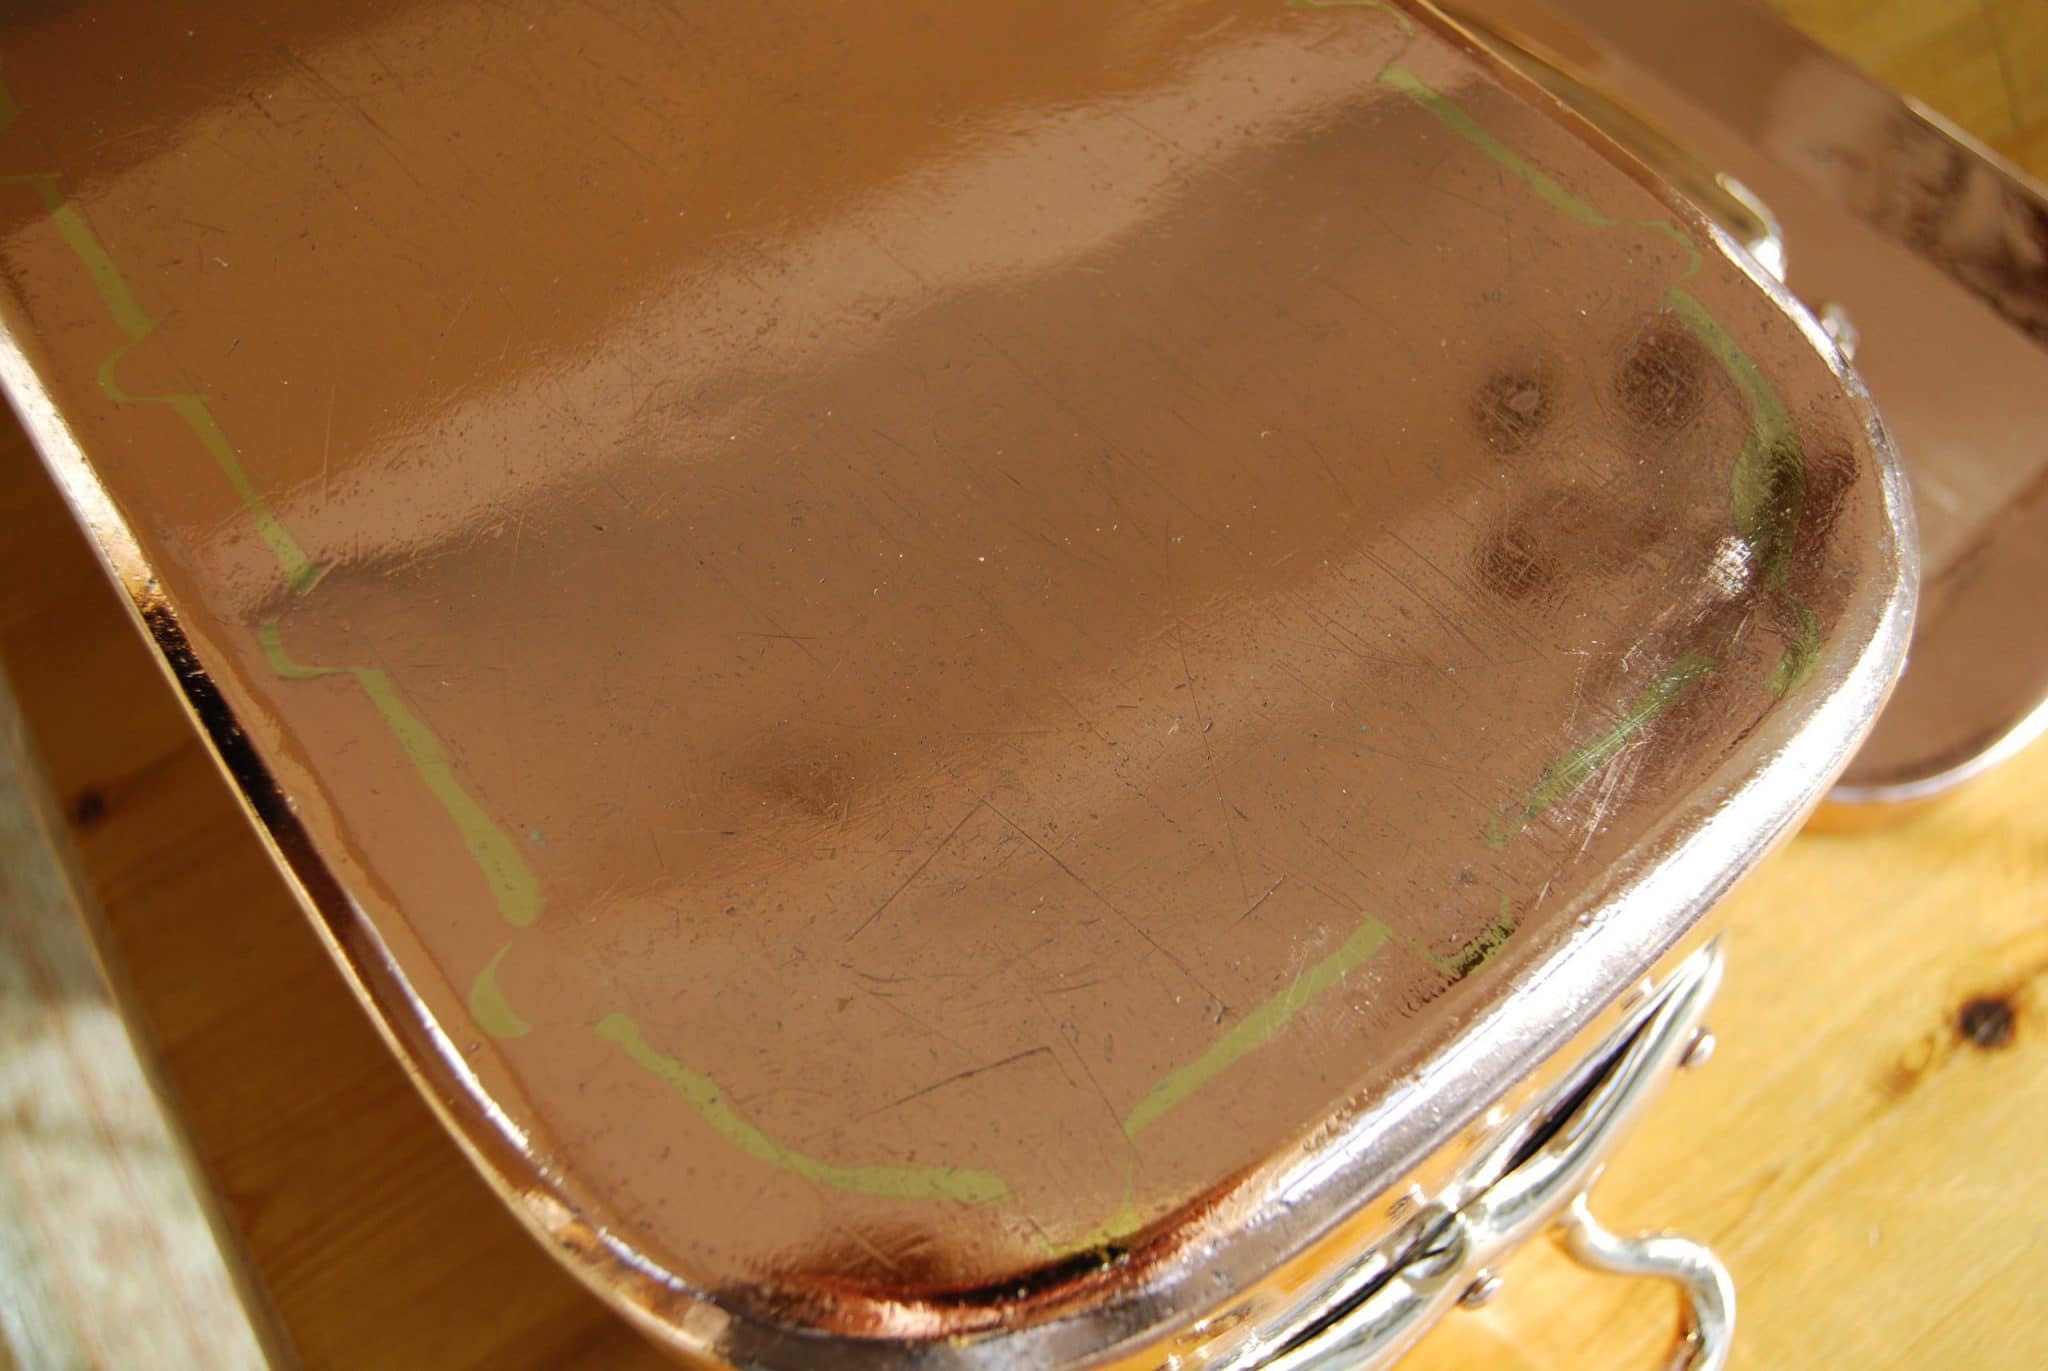
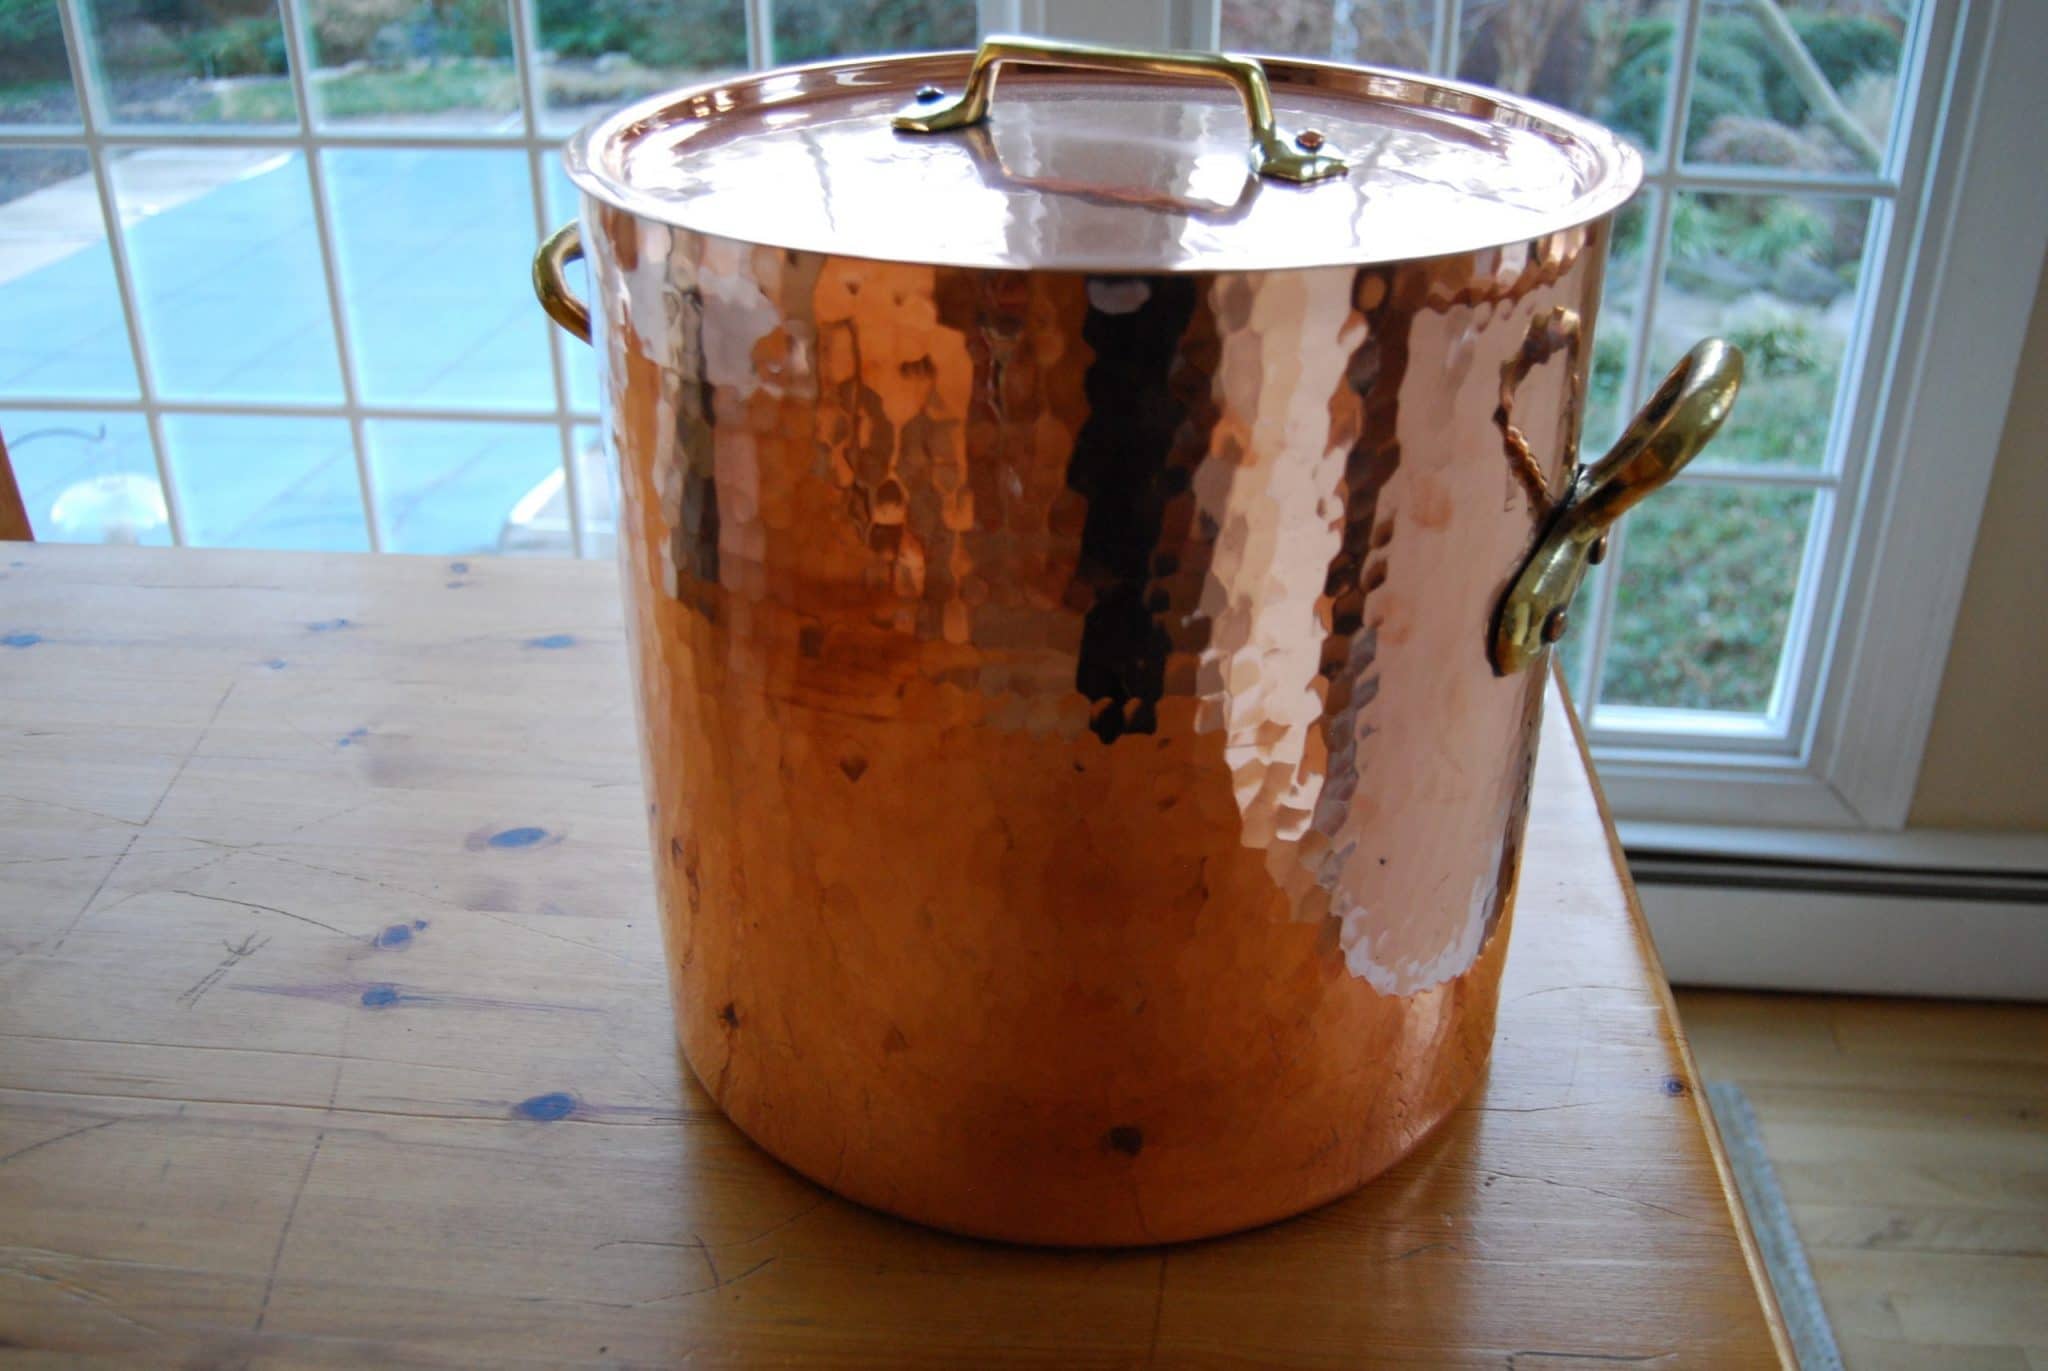
This 38cm stockpot also shows irregularity around the base and over-cuts on the sides. (It’s hard to see the cuts on the base because it’s so scuffed up — I had to use my fingertips for this one.)

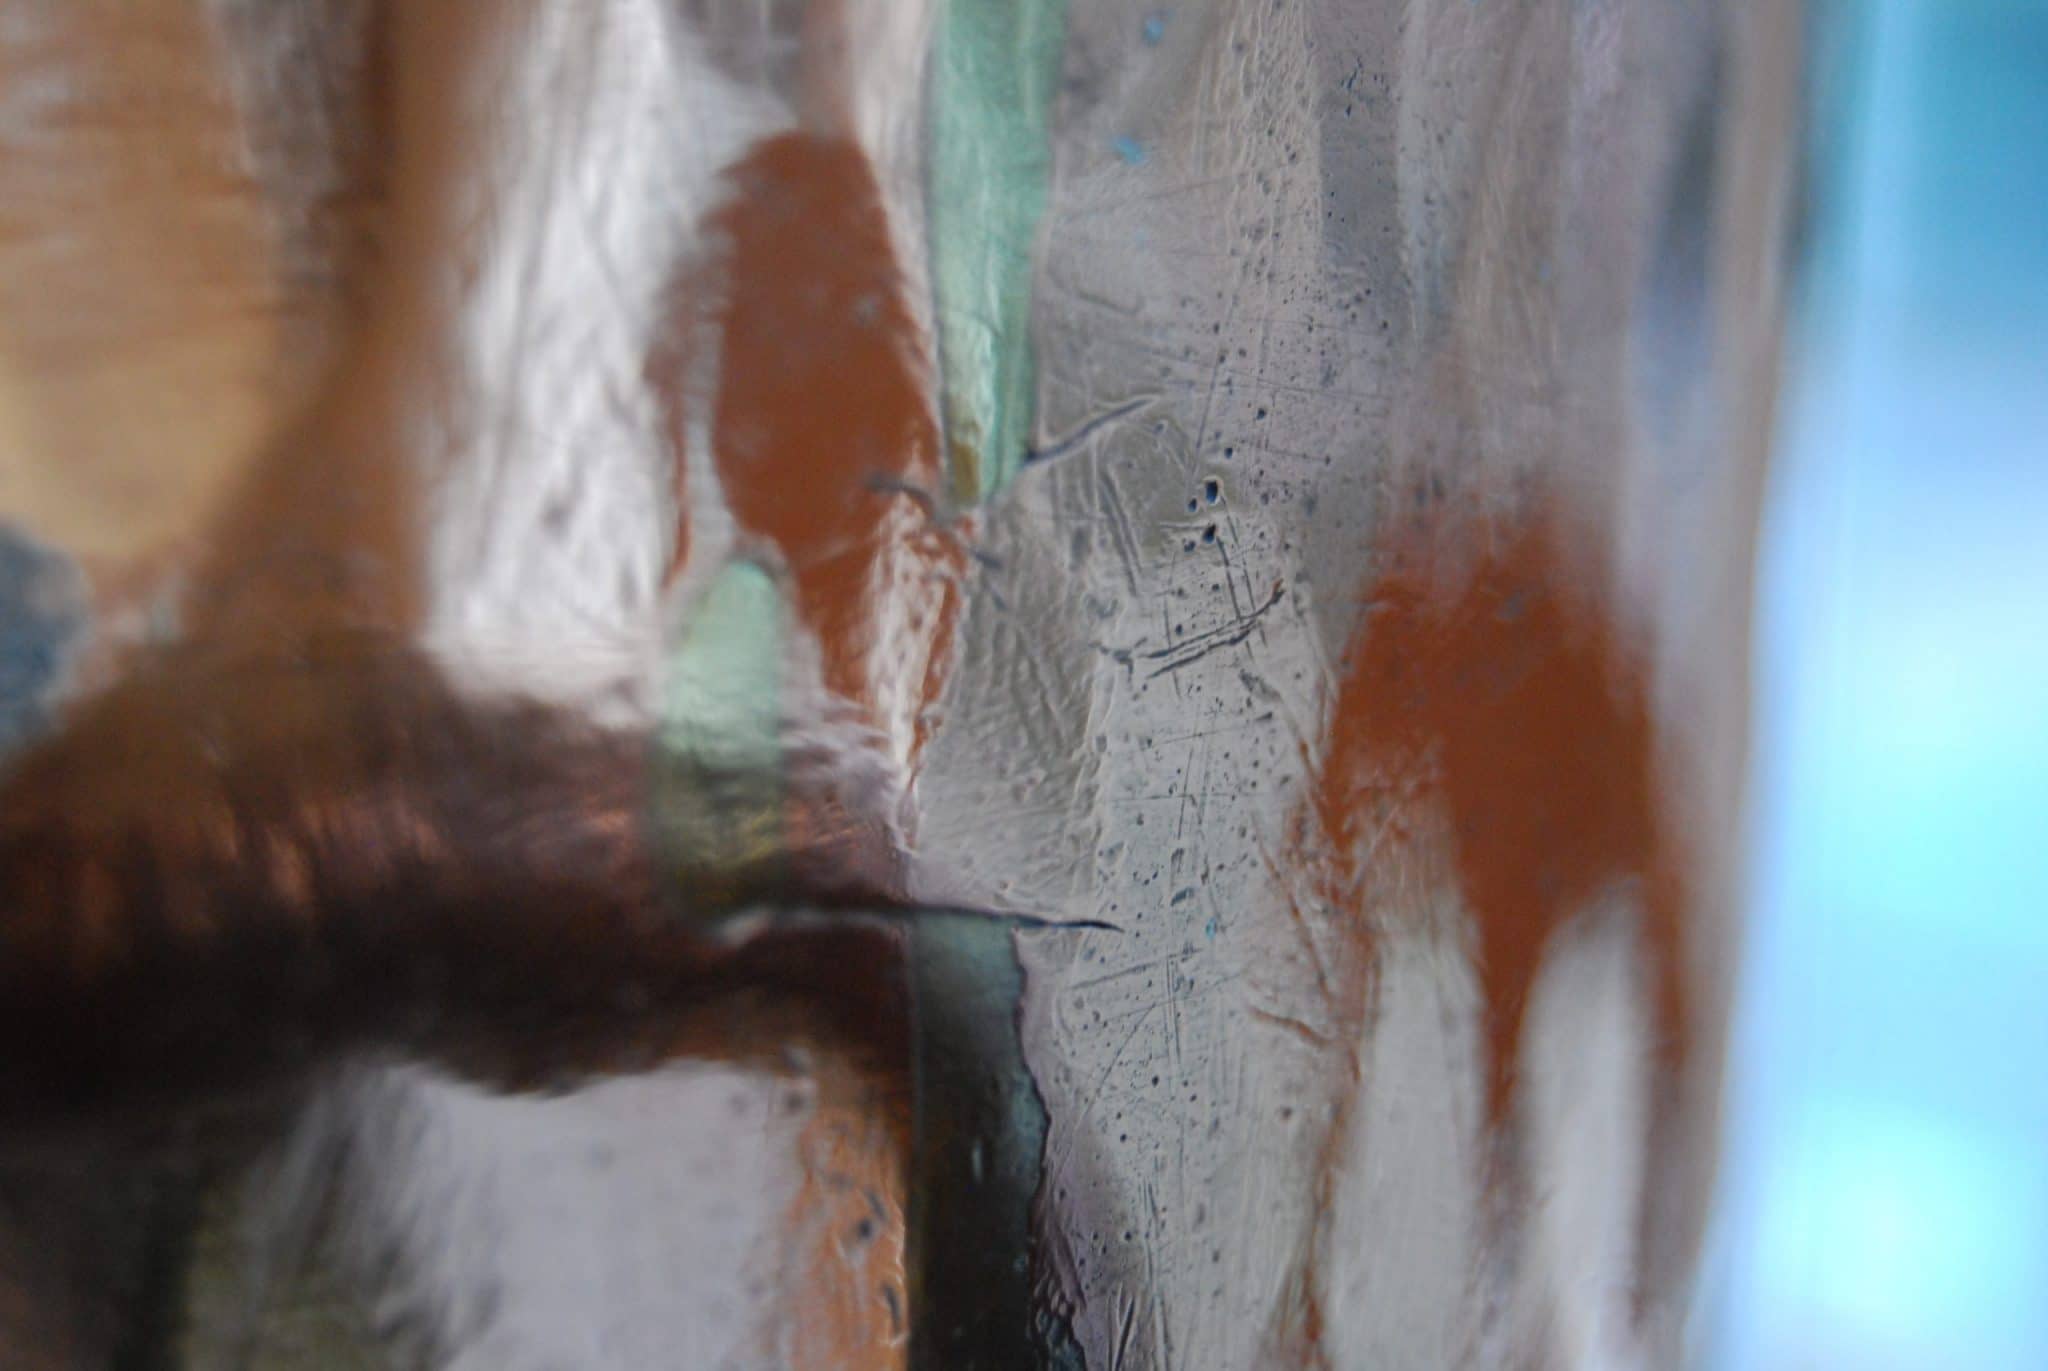
For the smaller 26cm stockpot below, you can see irregularity in the seams on the sides and base. The base also has over-cuts — you can see where the yellow brass has flowed into them.
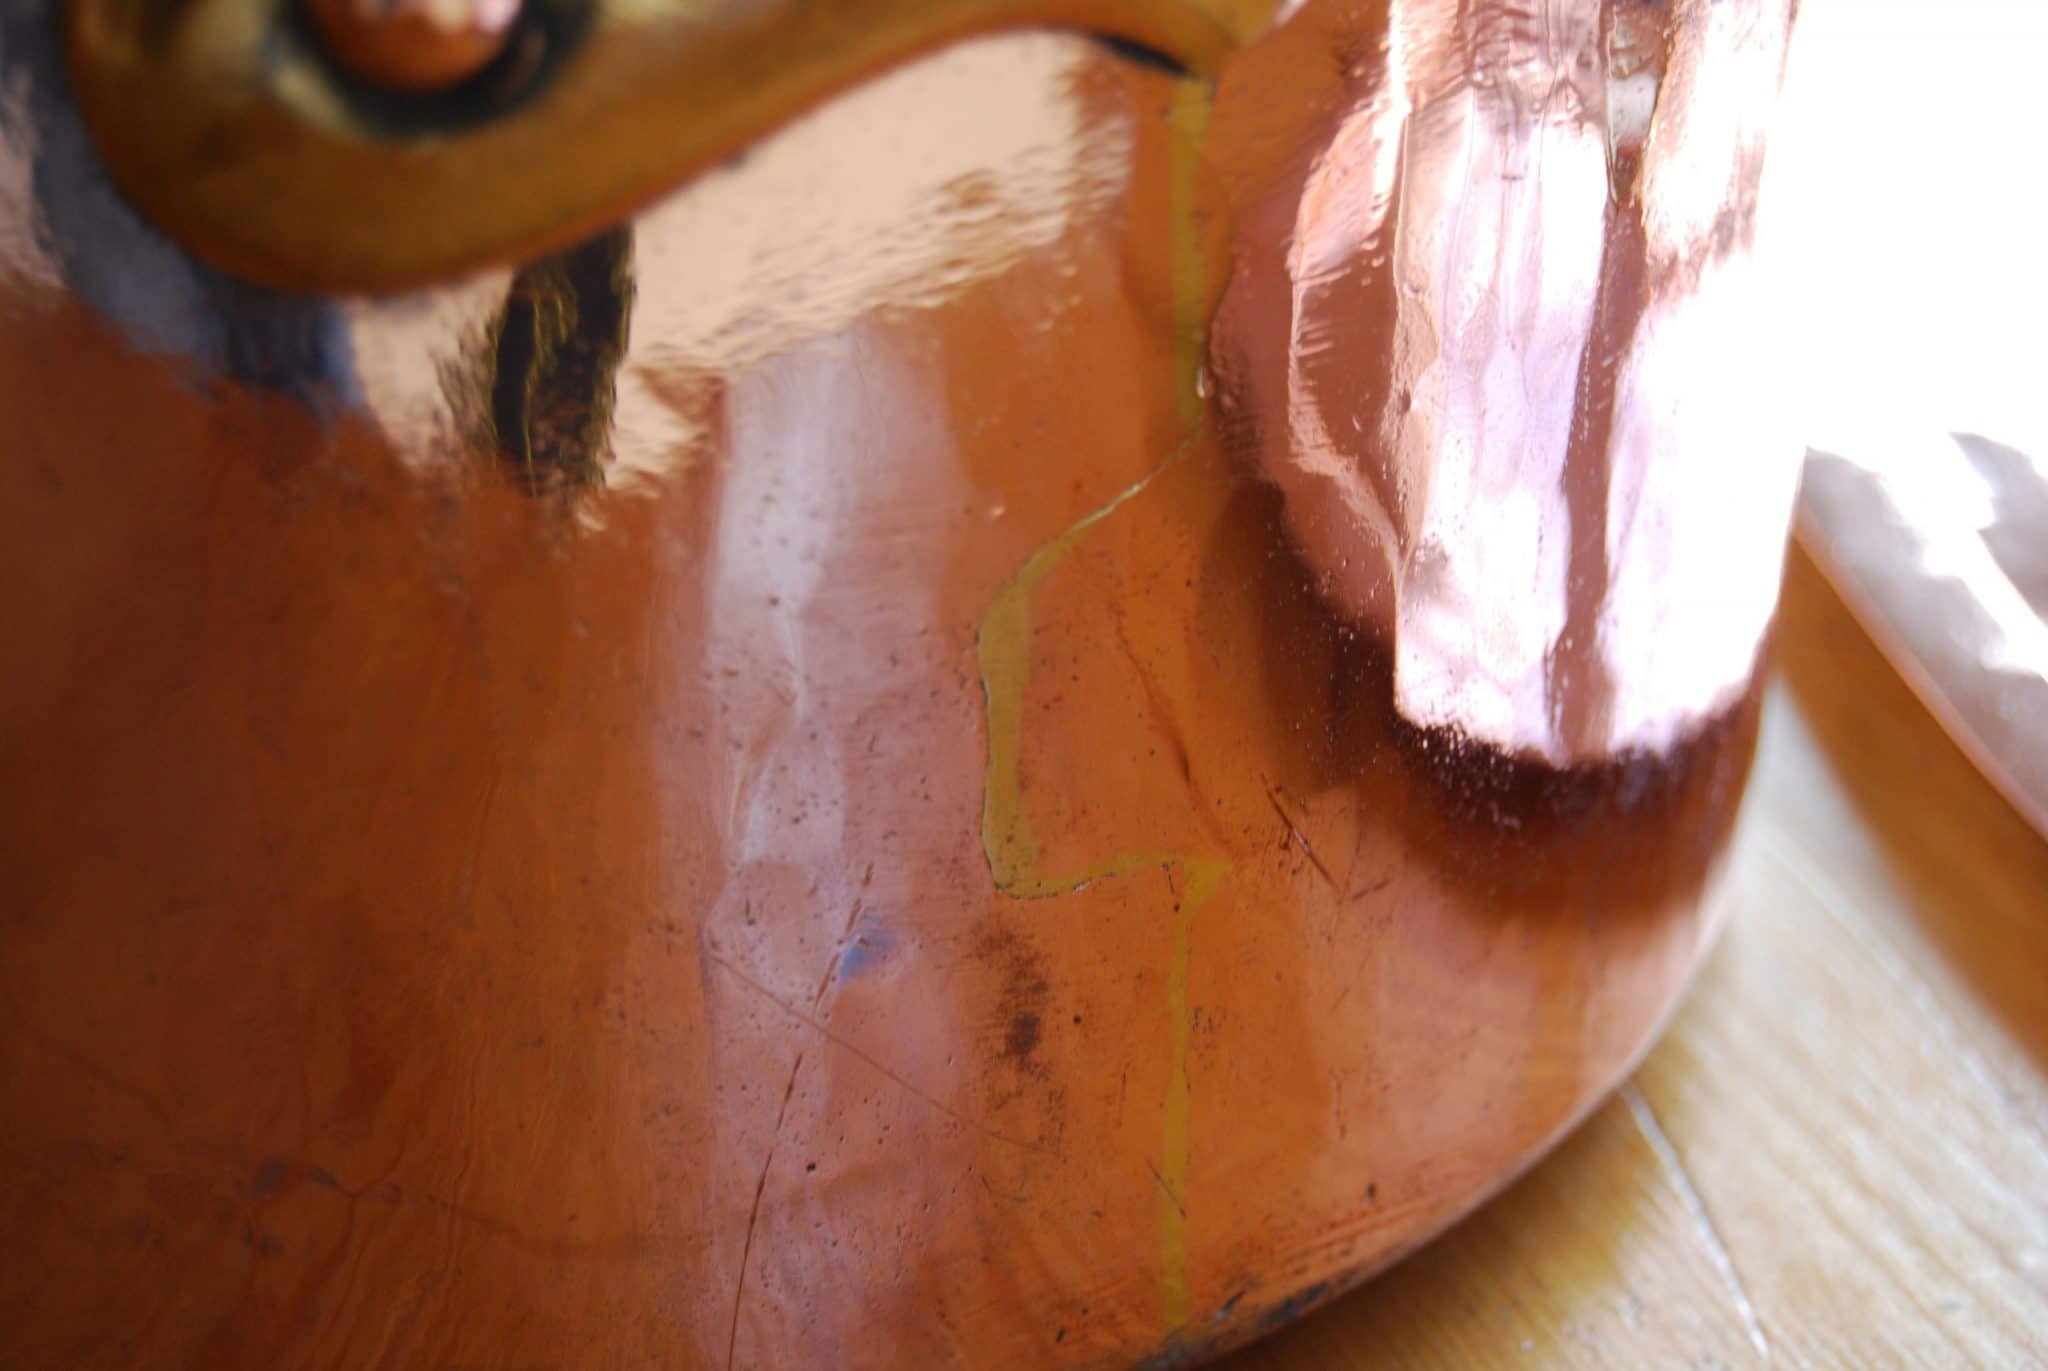
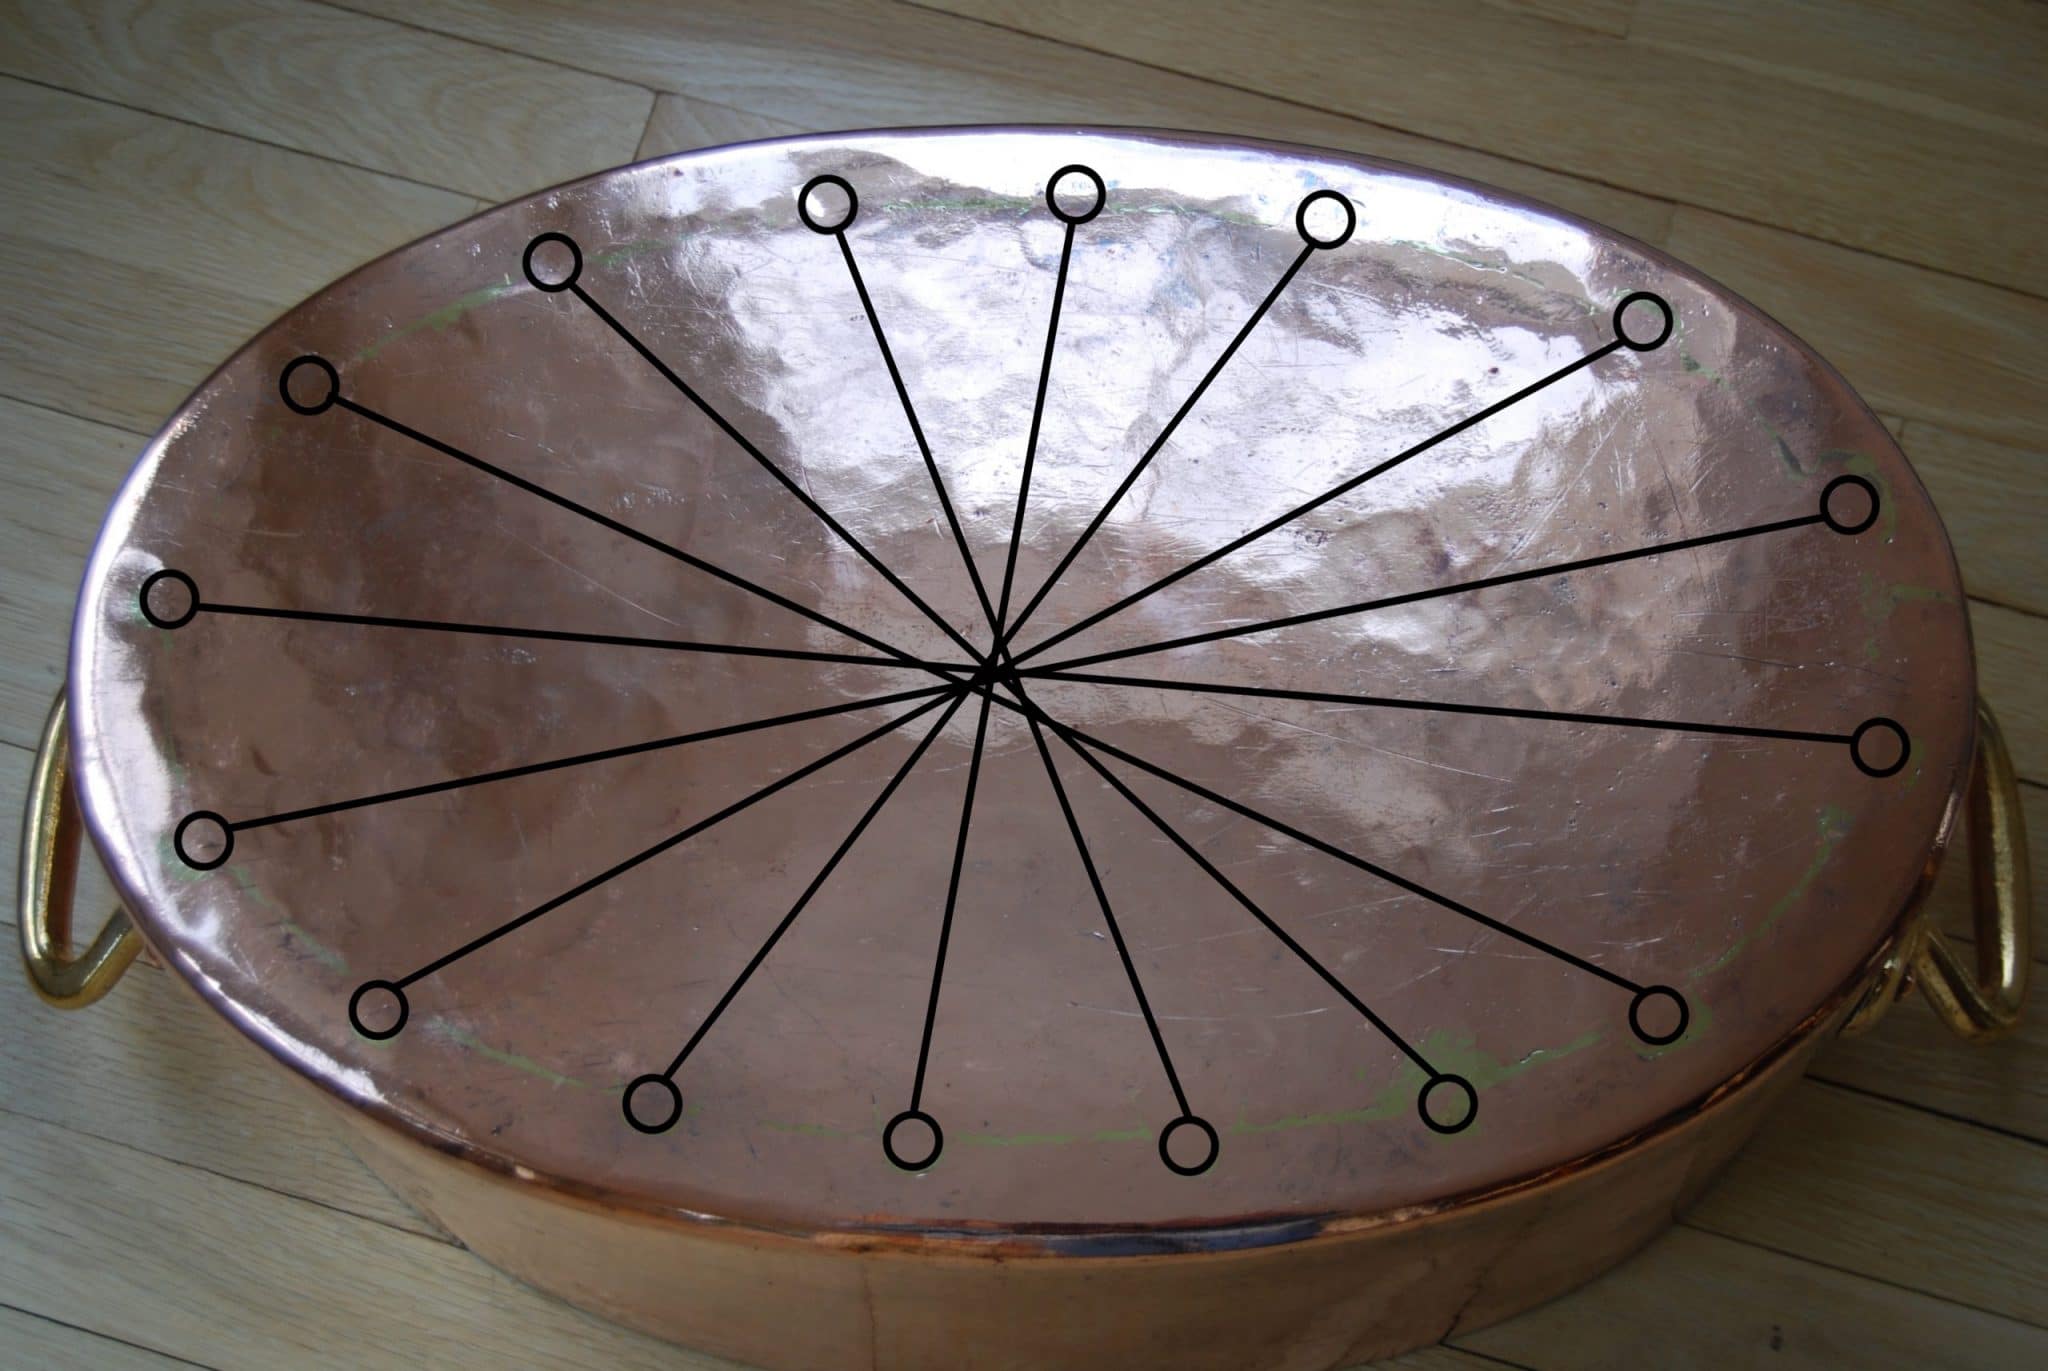
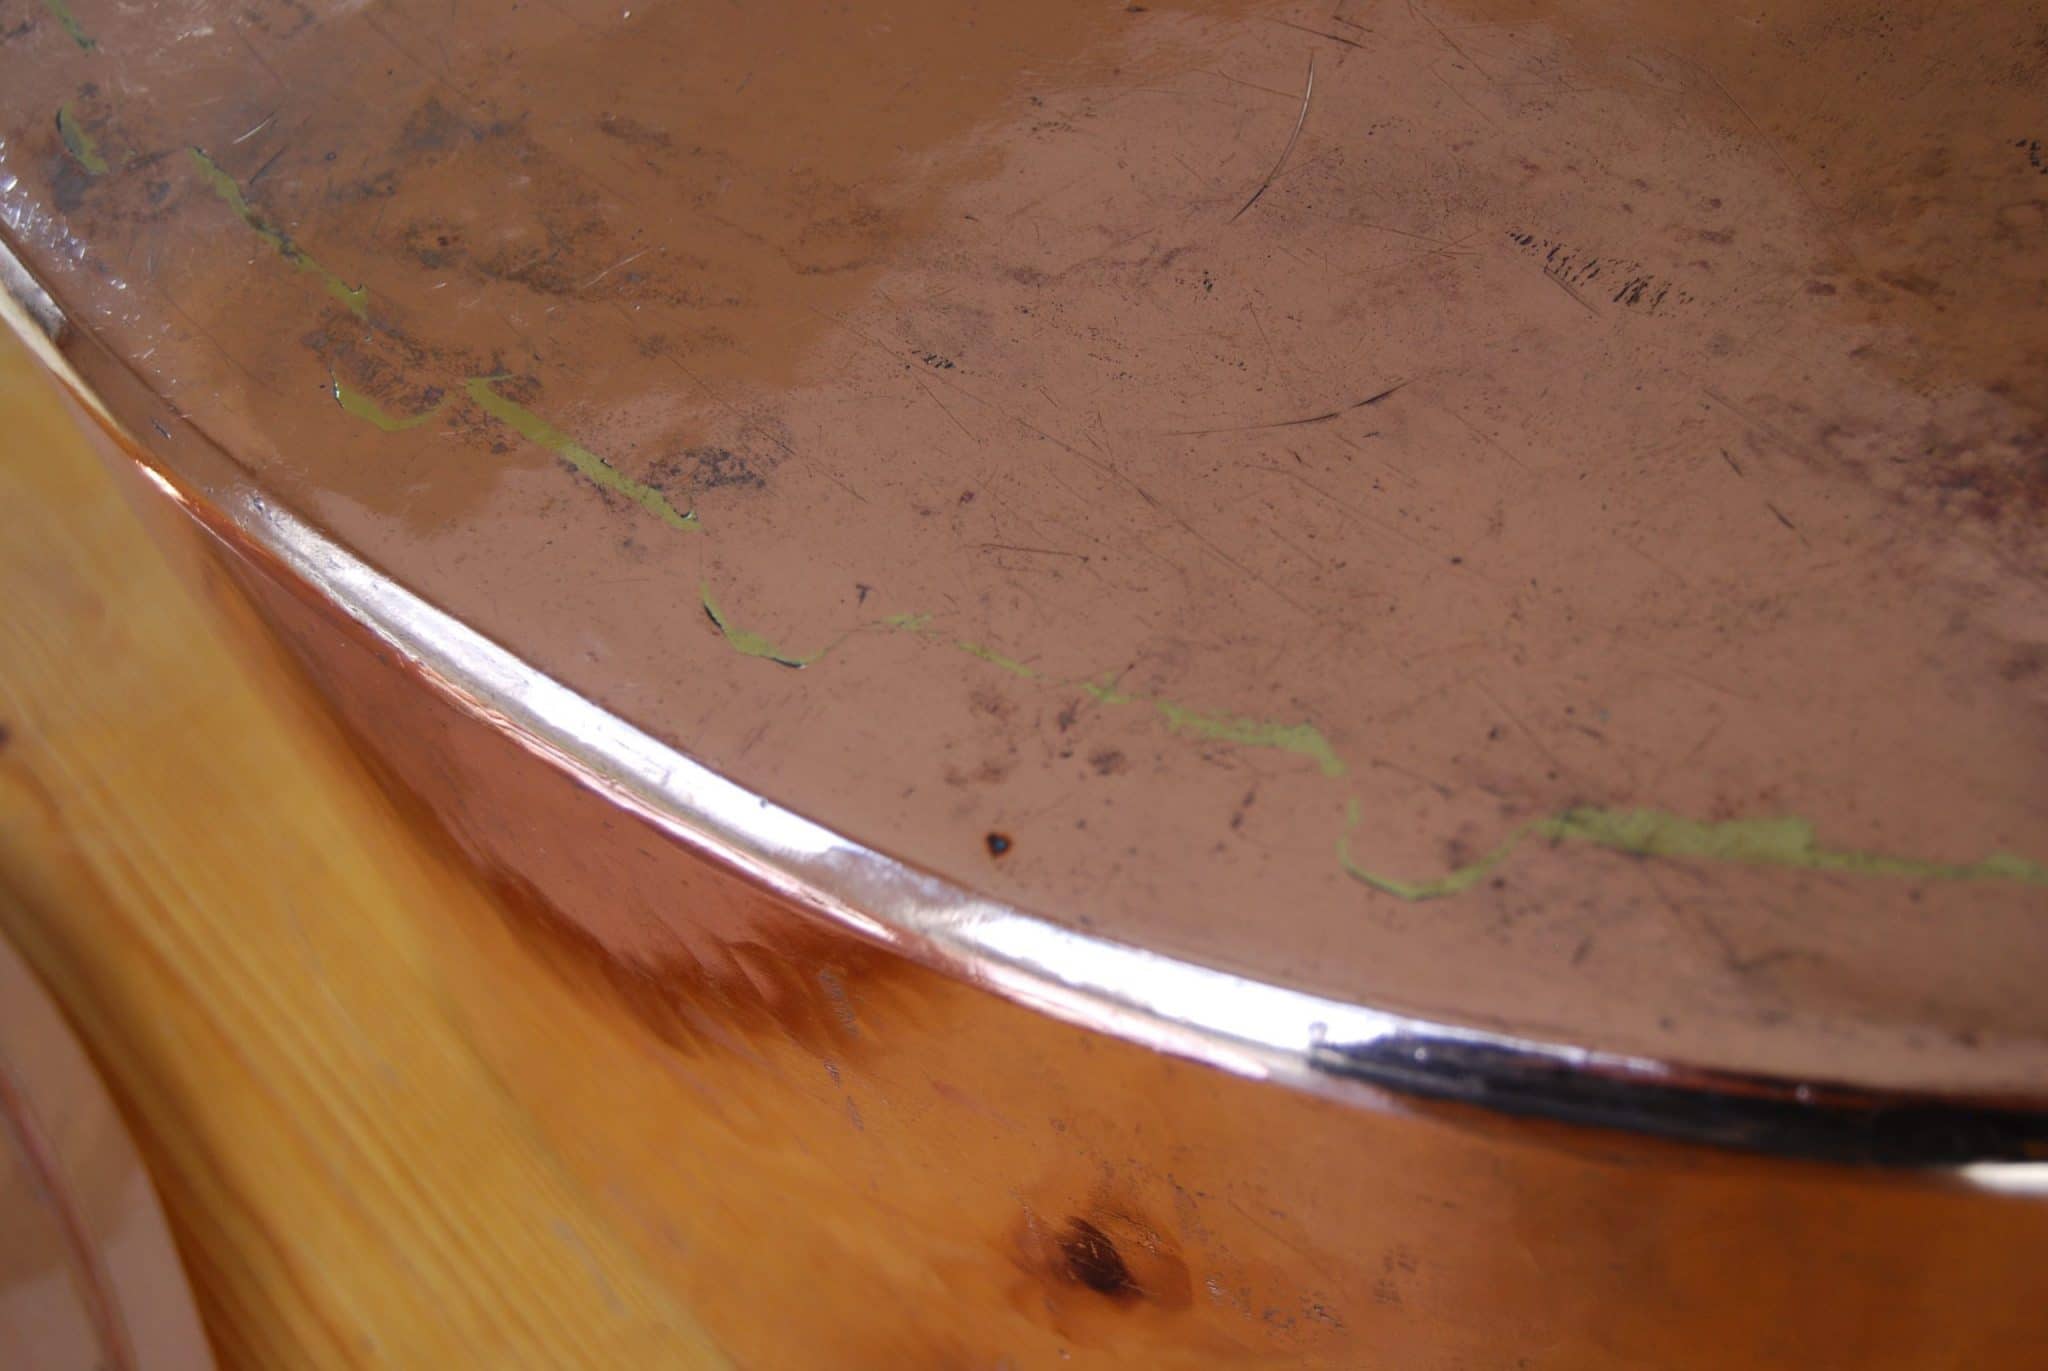
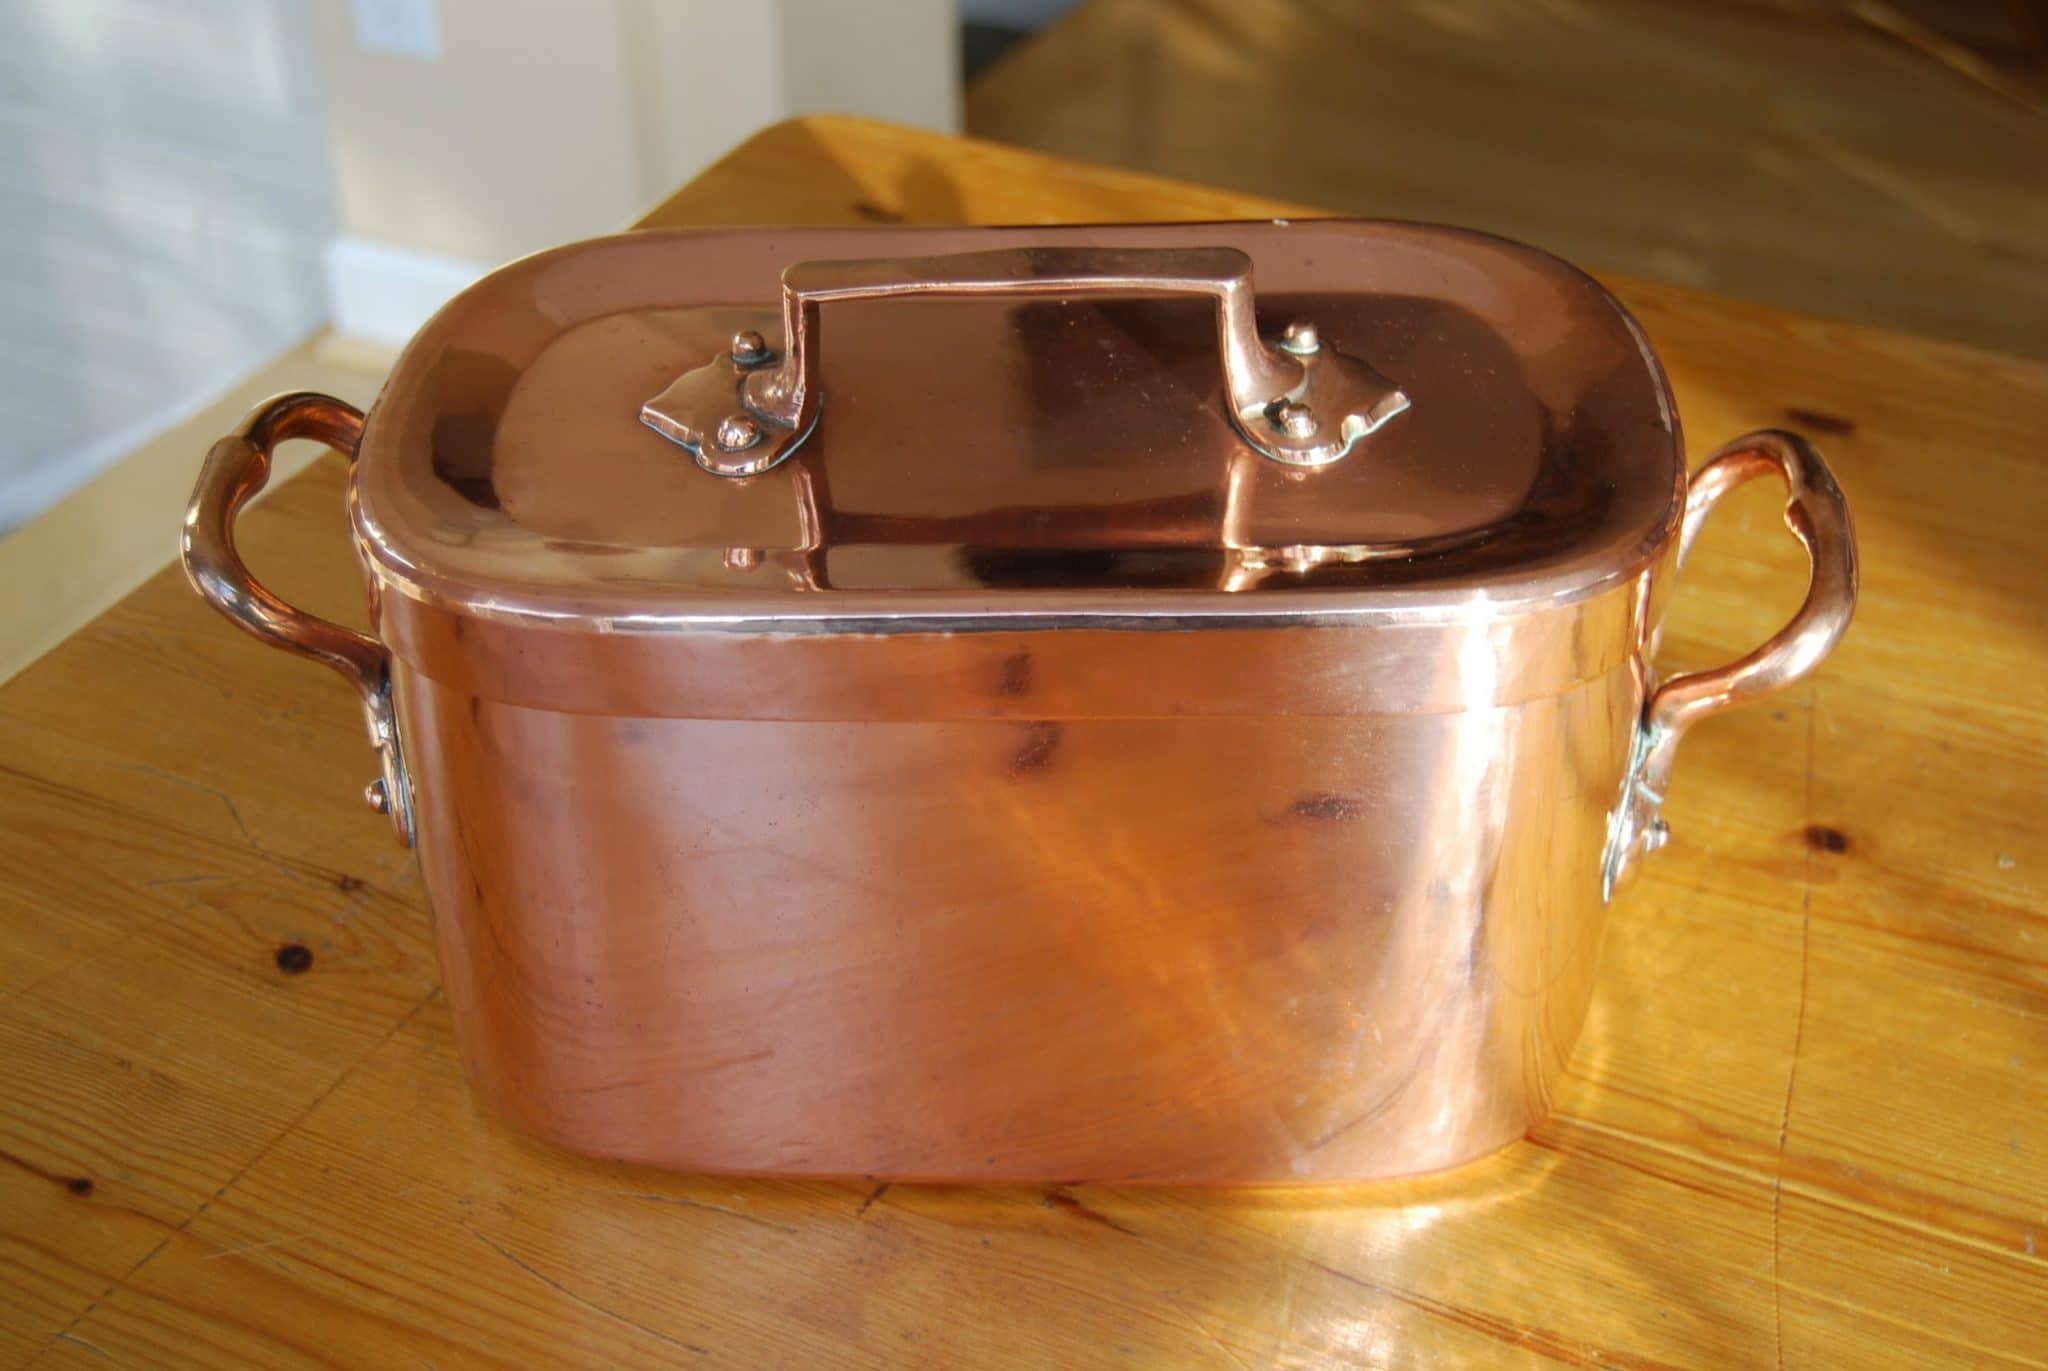
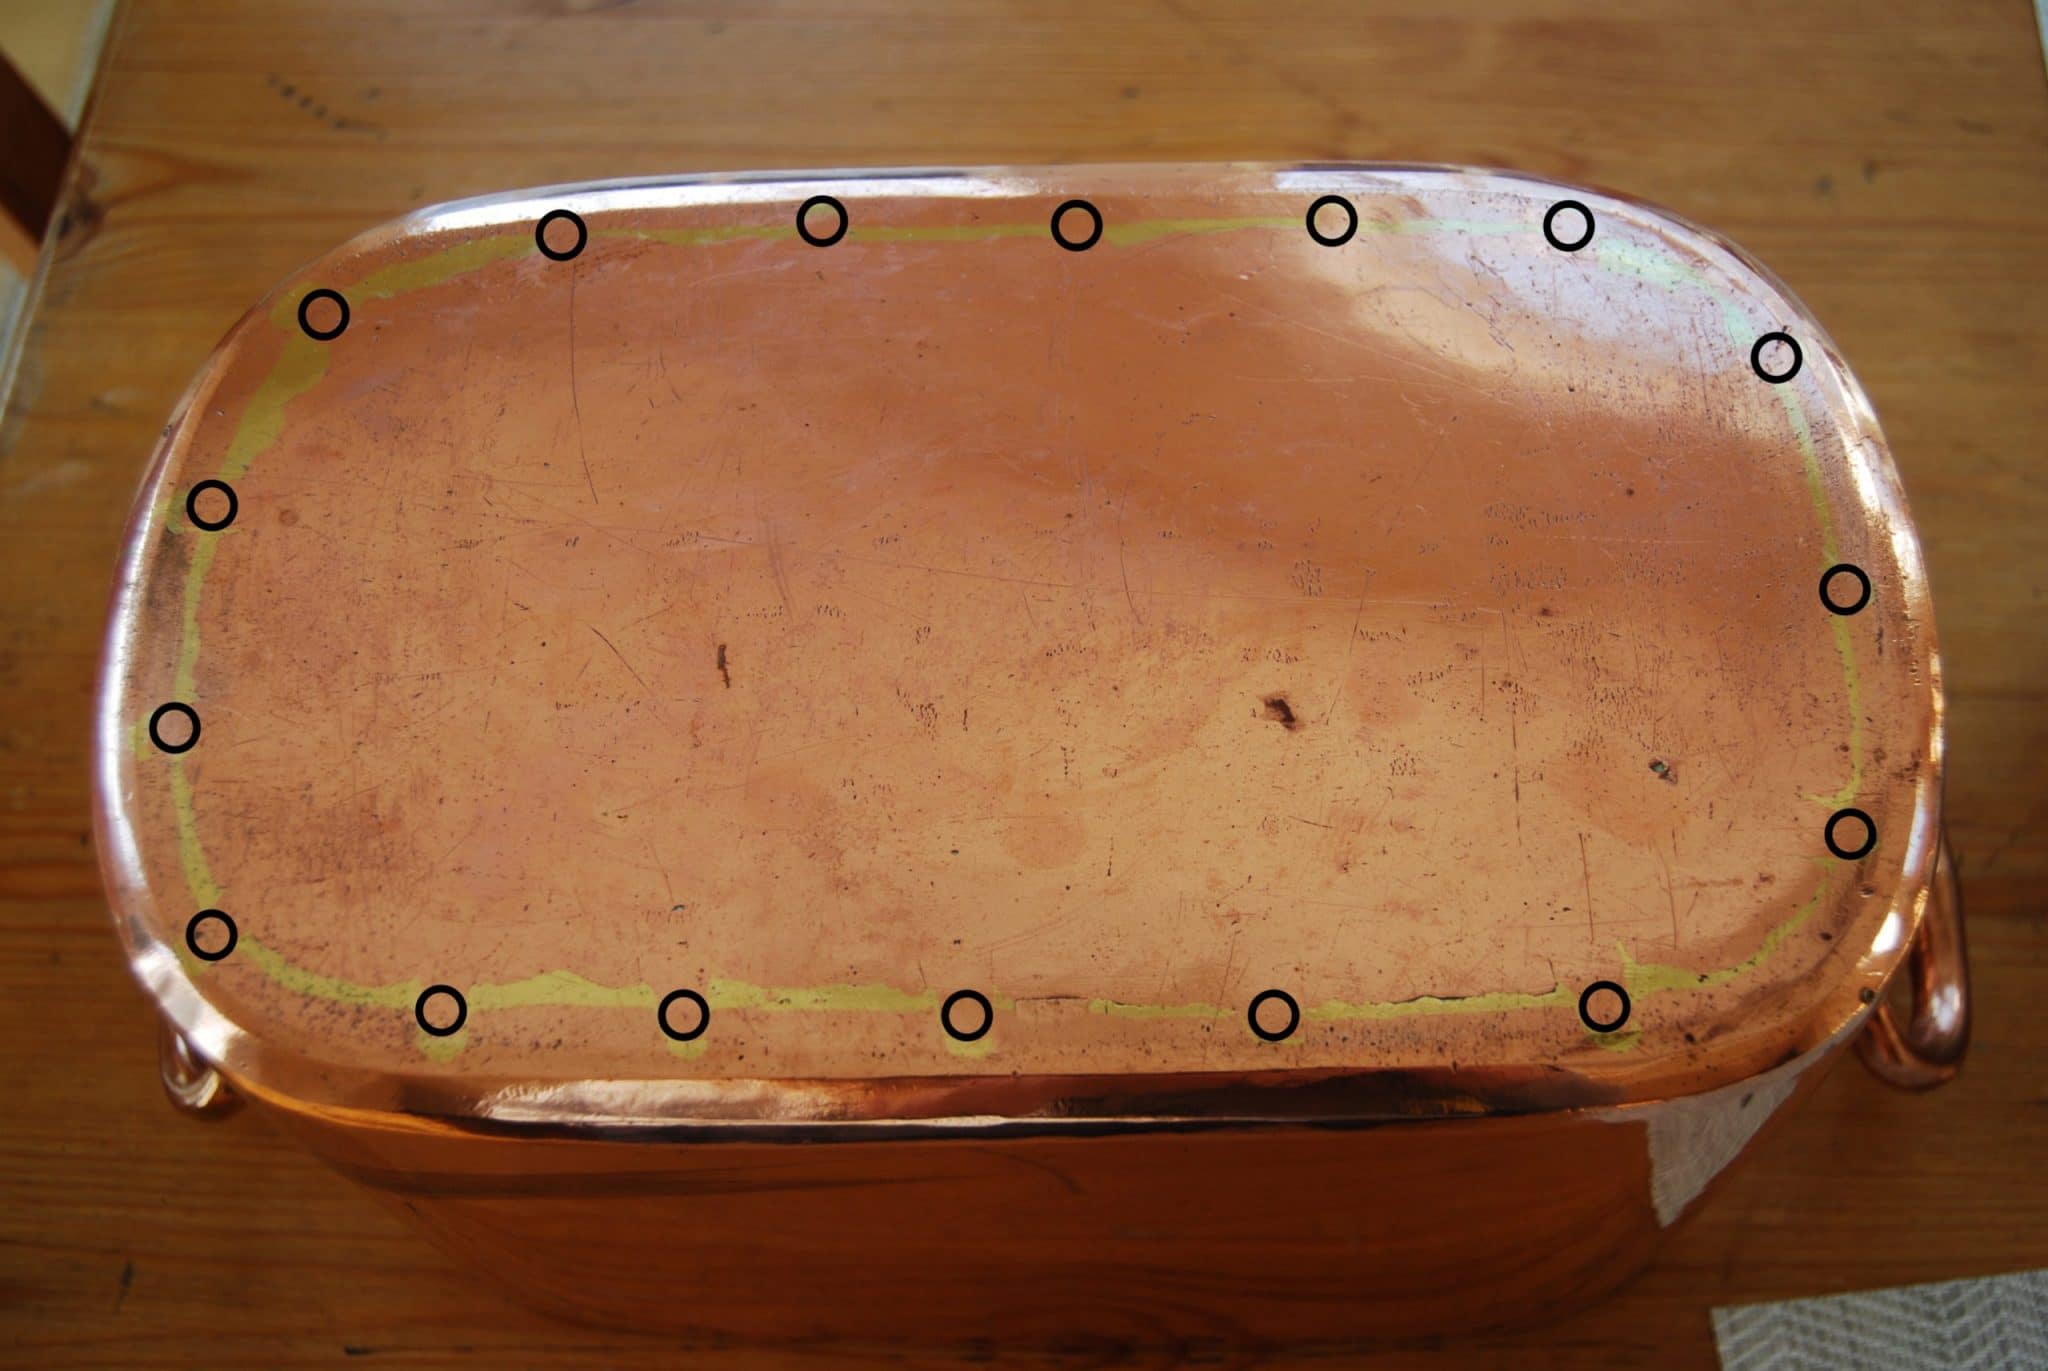
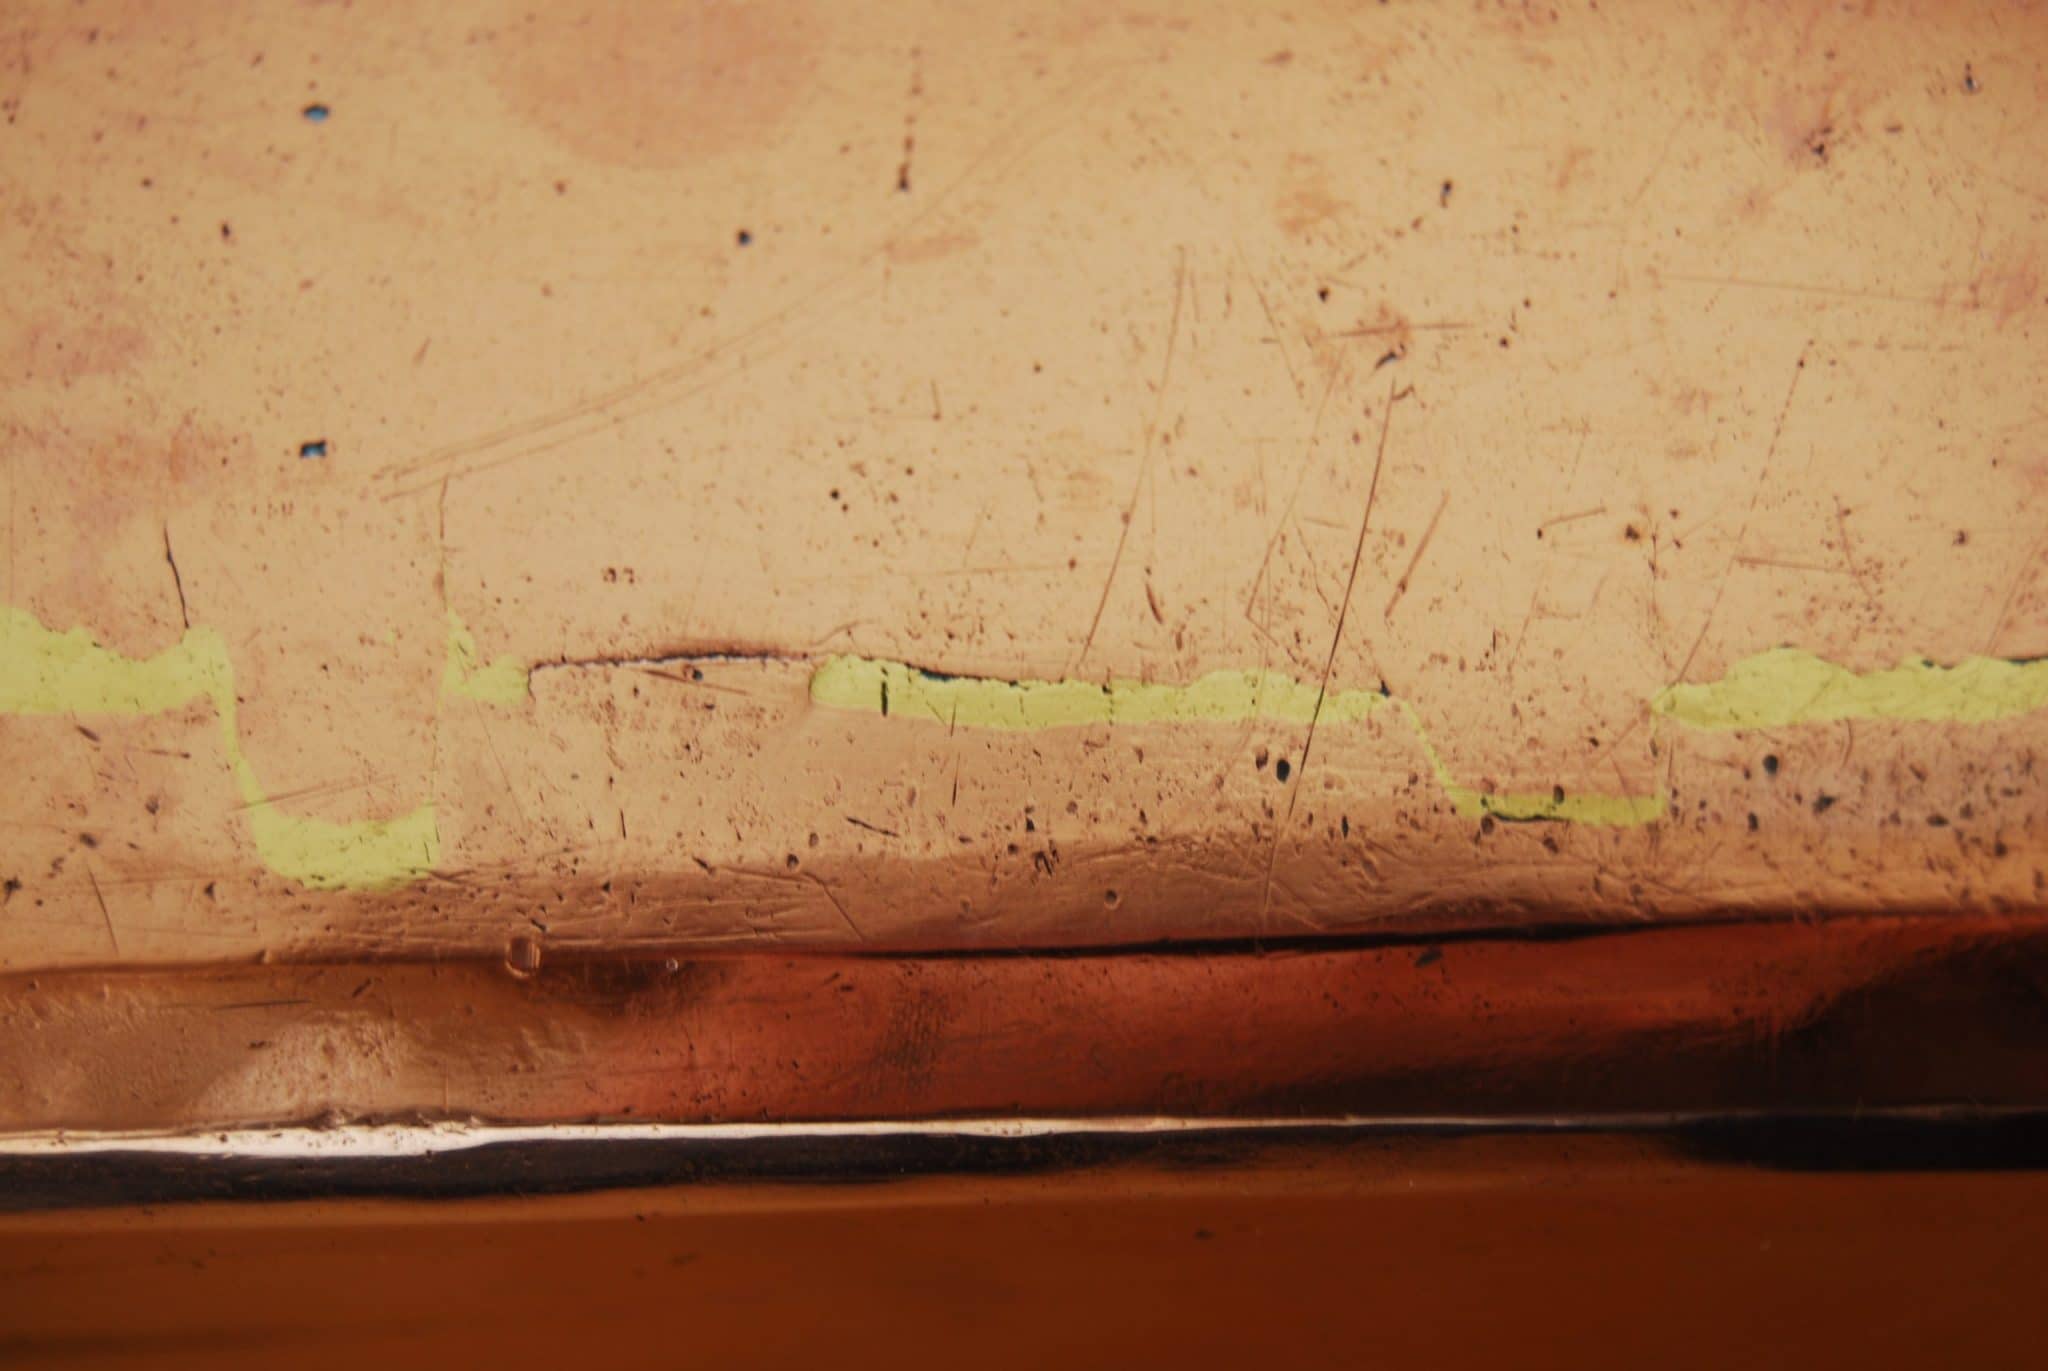
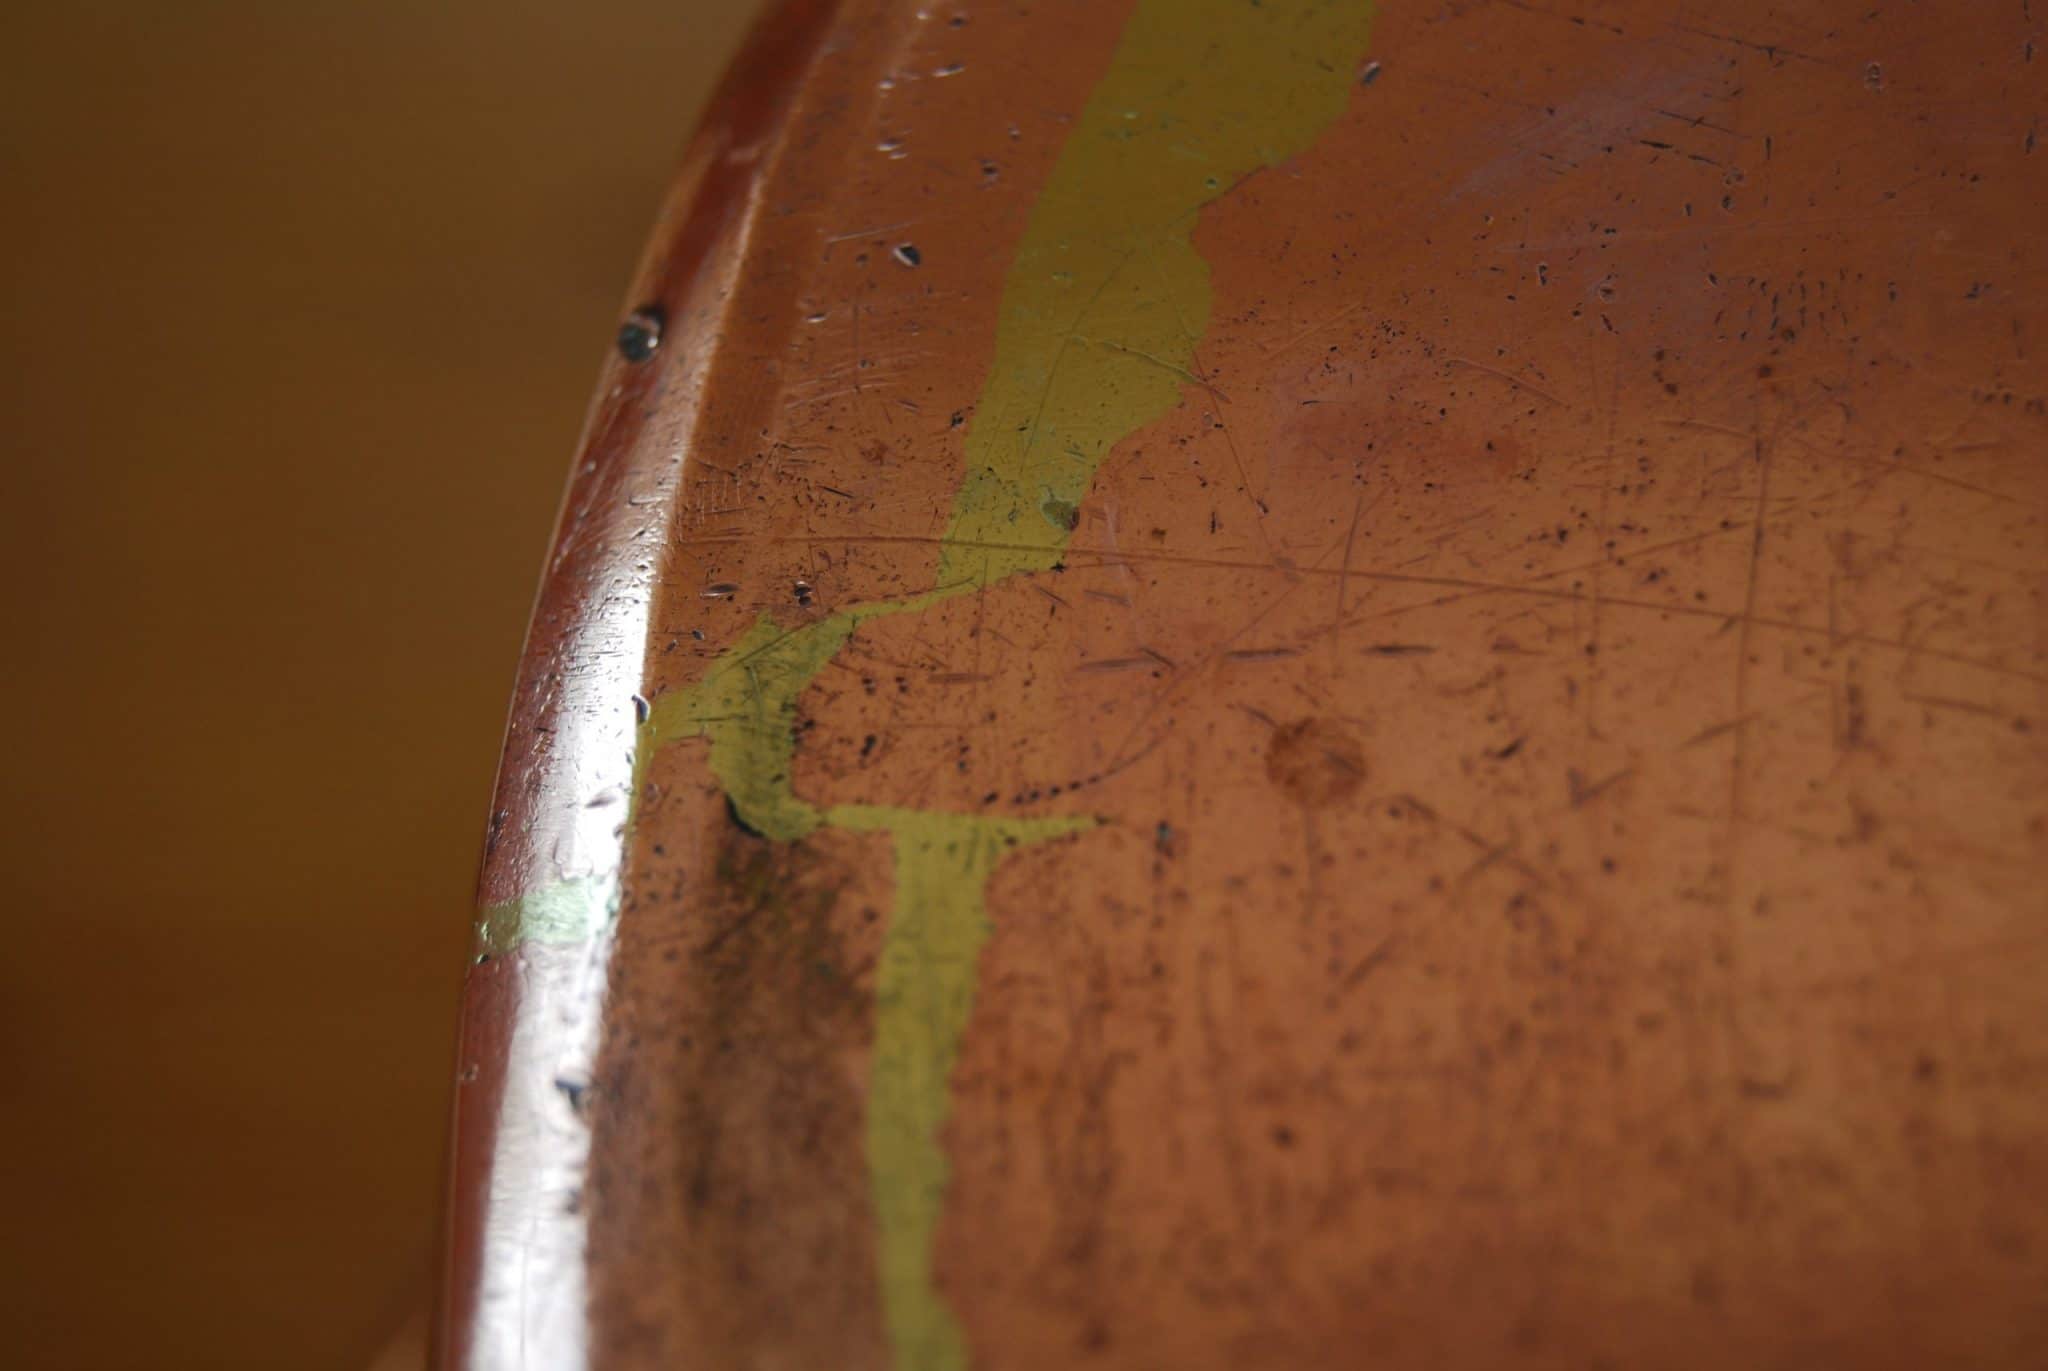
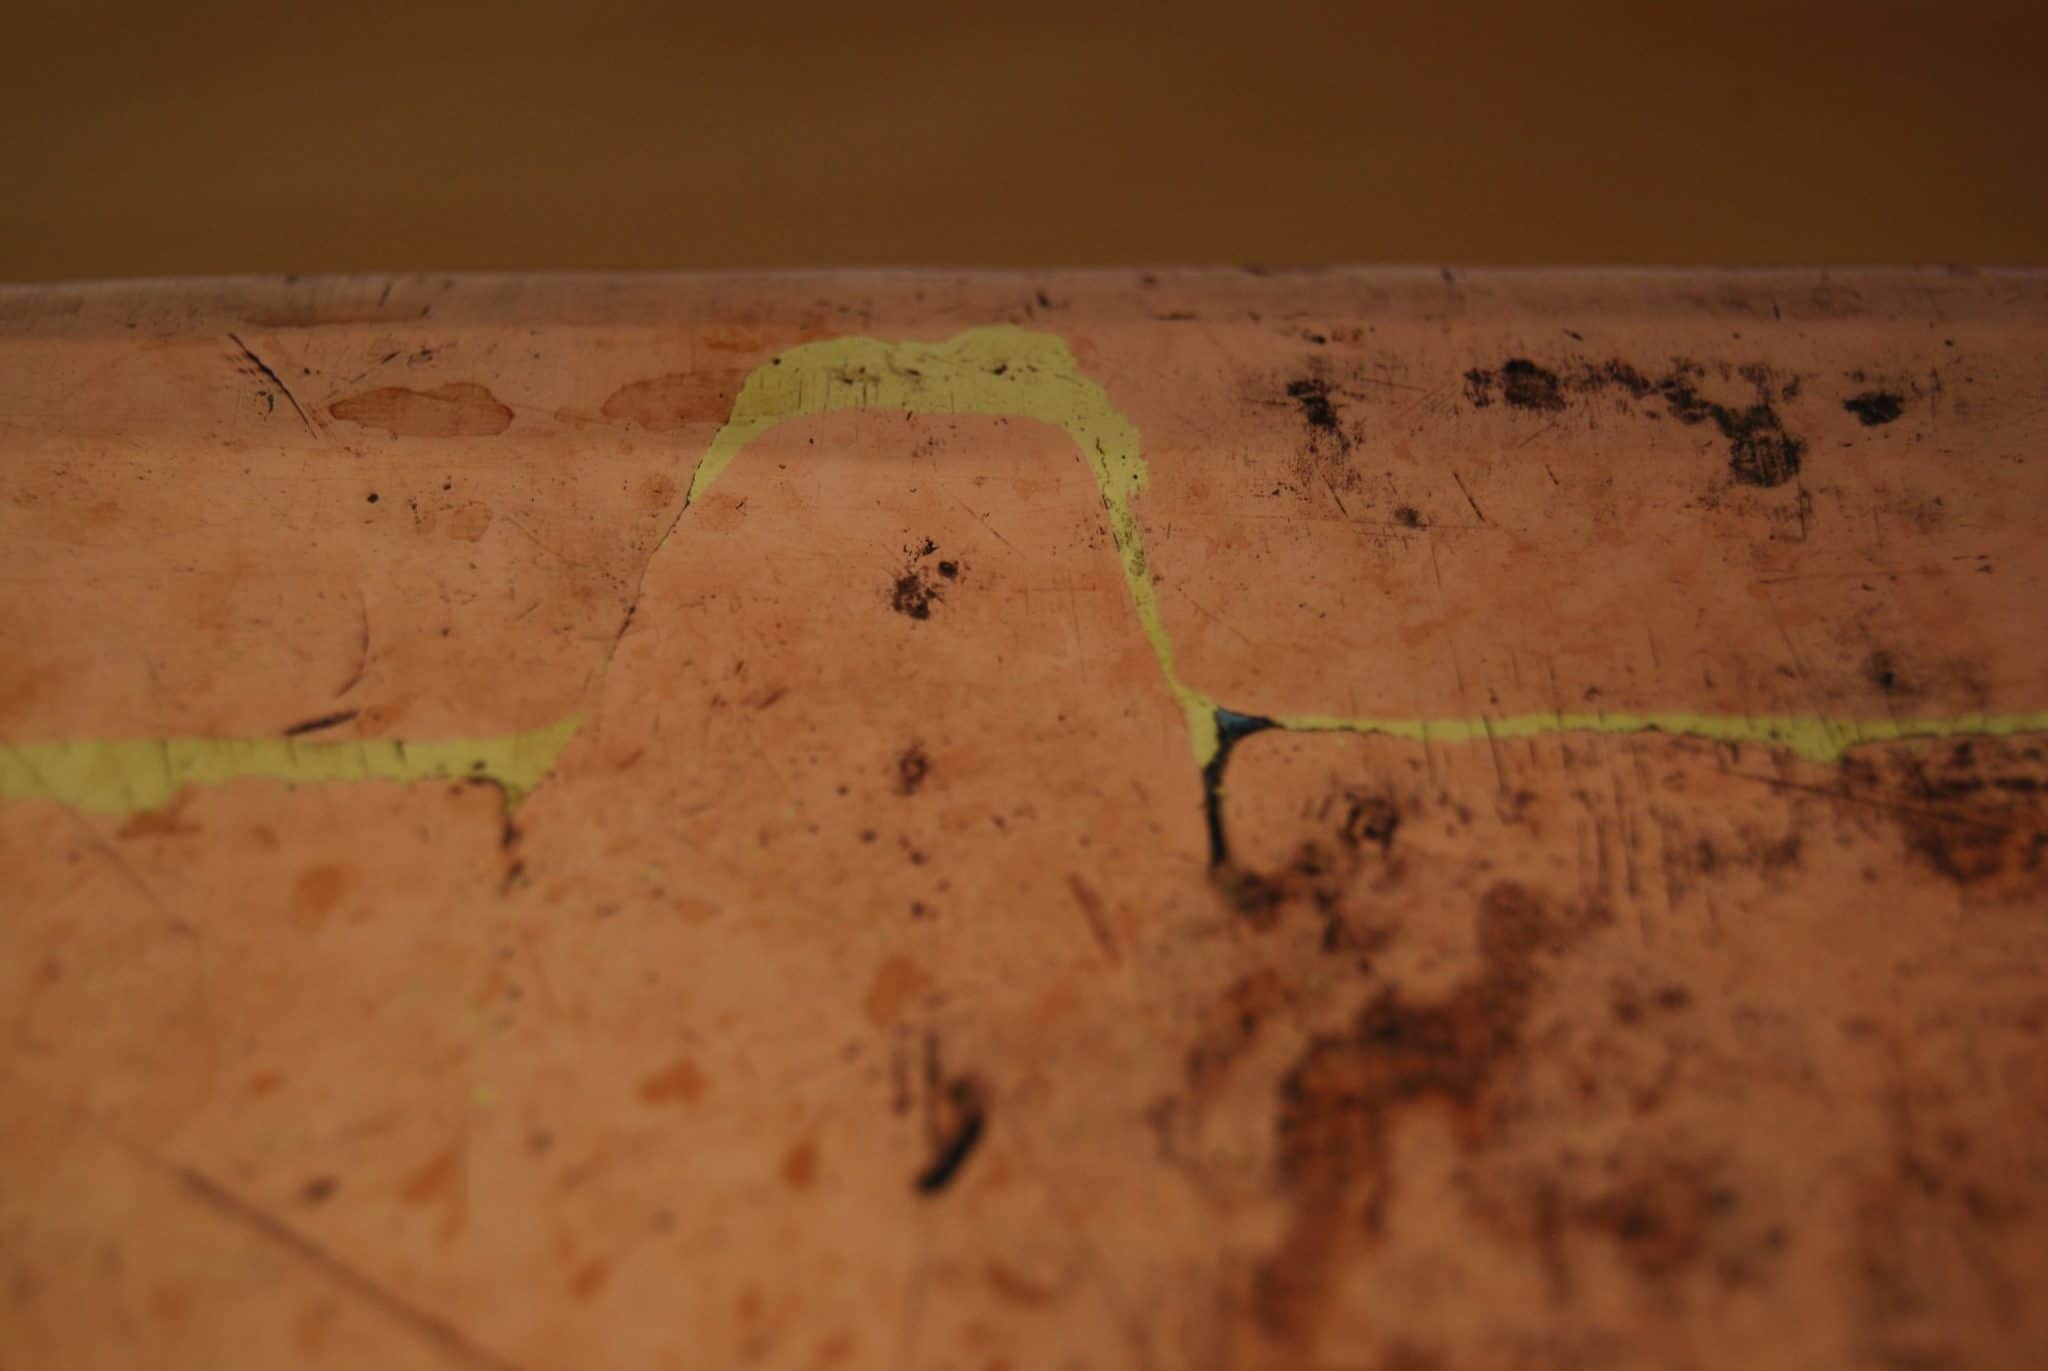
An oval cocotte like this is definitely hand-made, and its dovetails show both irregularity and over-cuts. The over-cuts are minor, though, and the only way you can see them is by looking at the tell-tale flow of the yellow brass into the cut.
This 50cm rondeau has irregularity and over-cuts in the dovetails in its base.
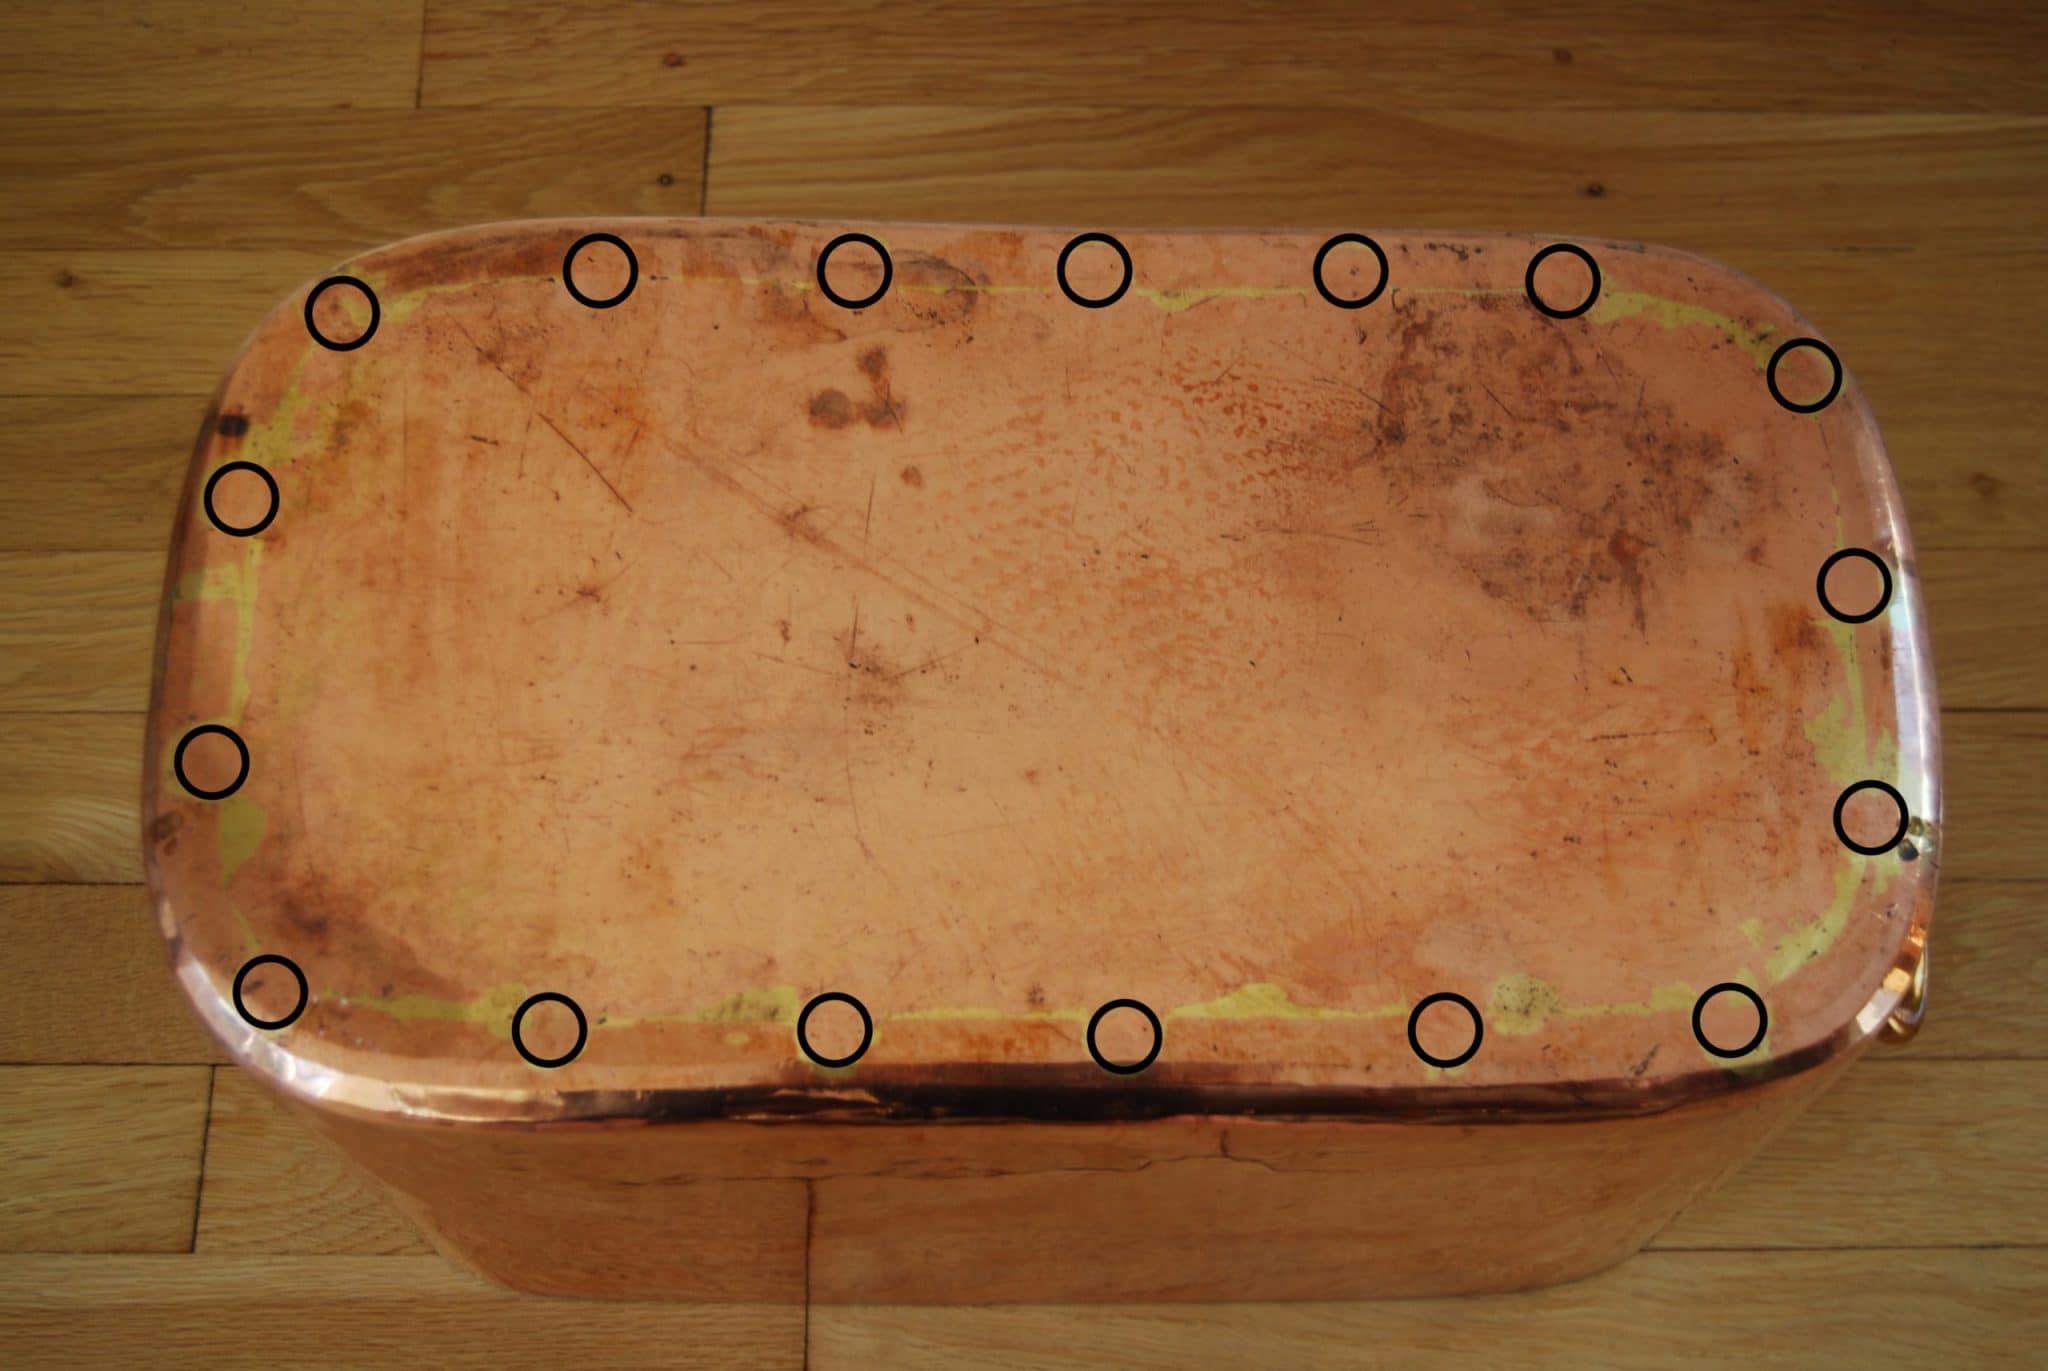
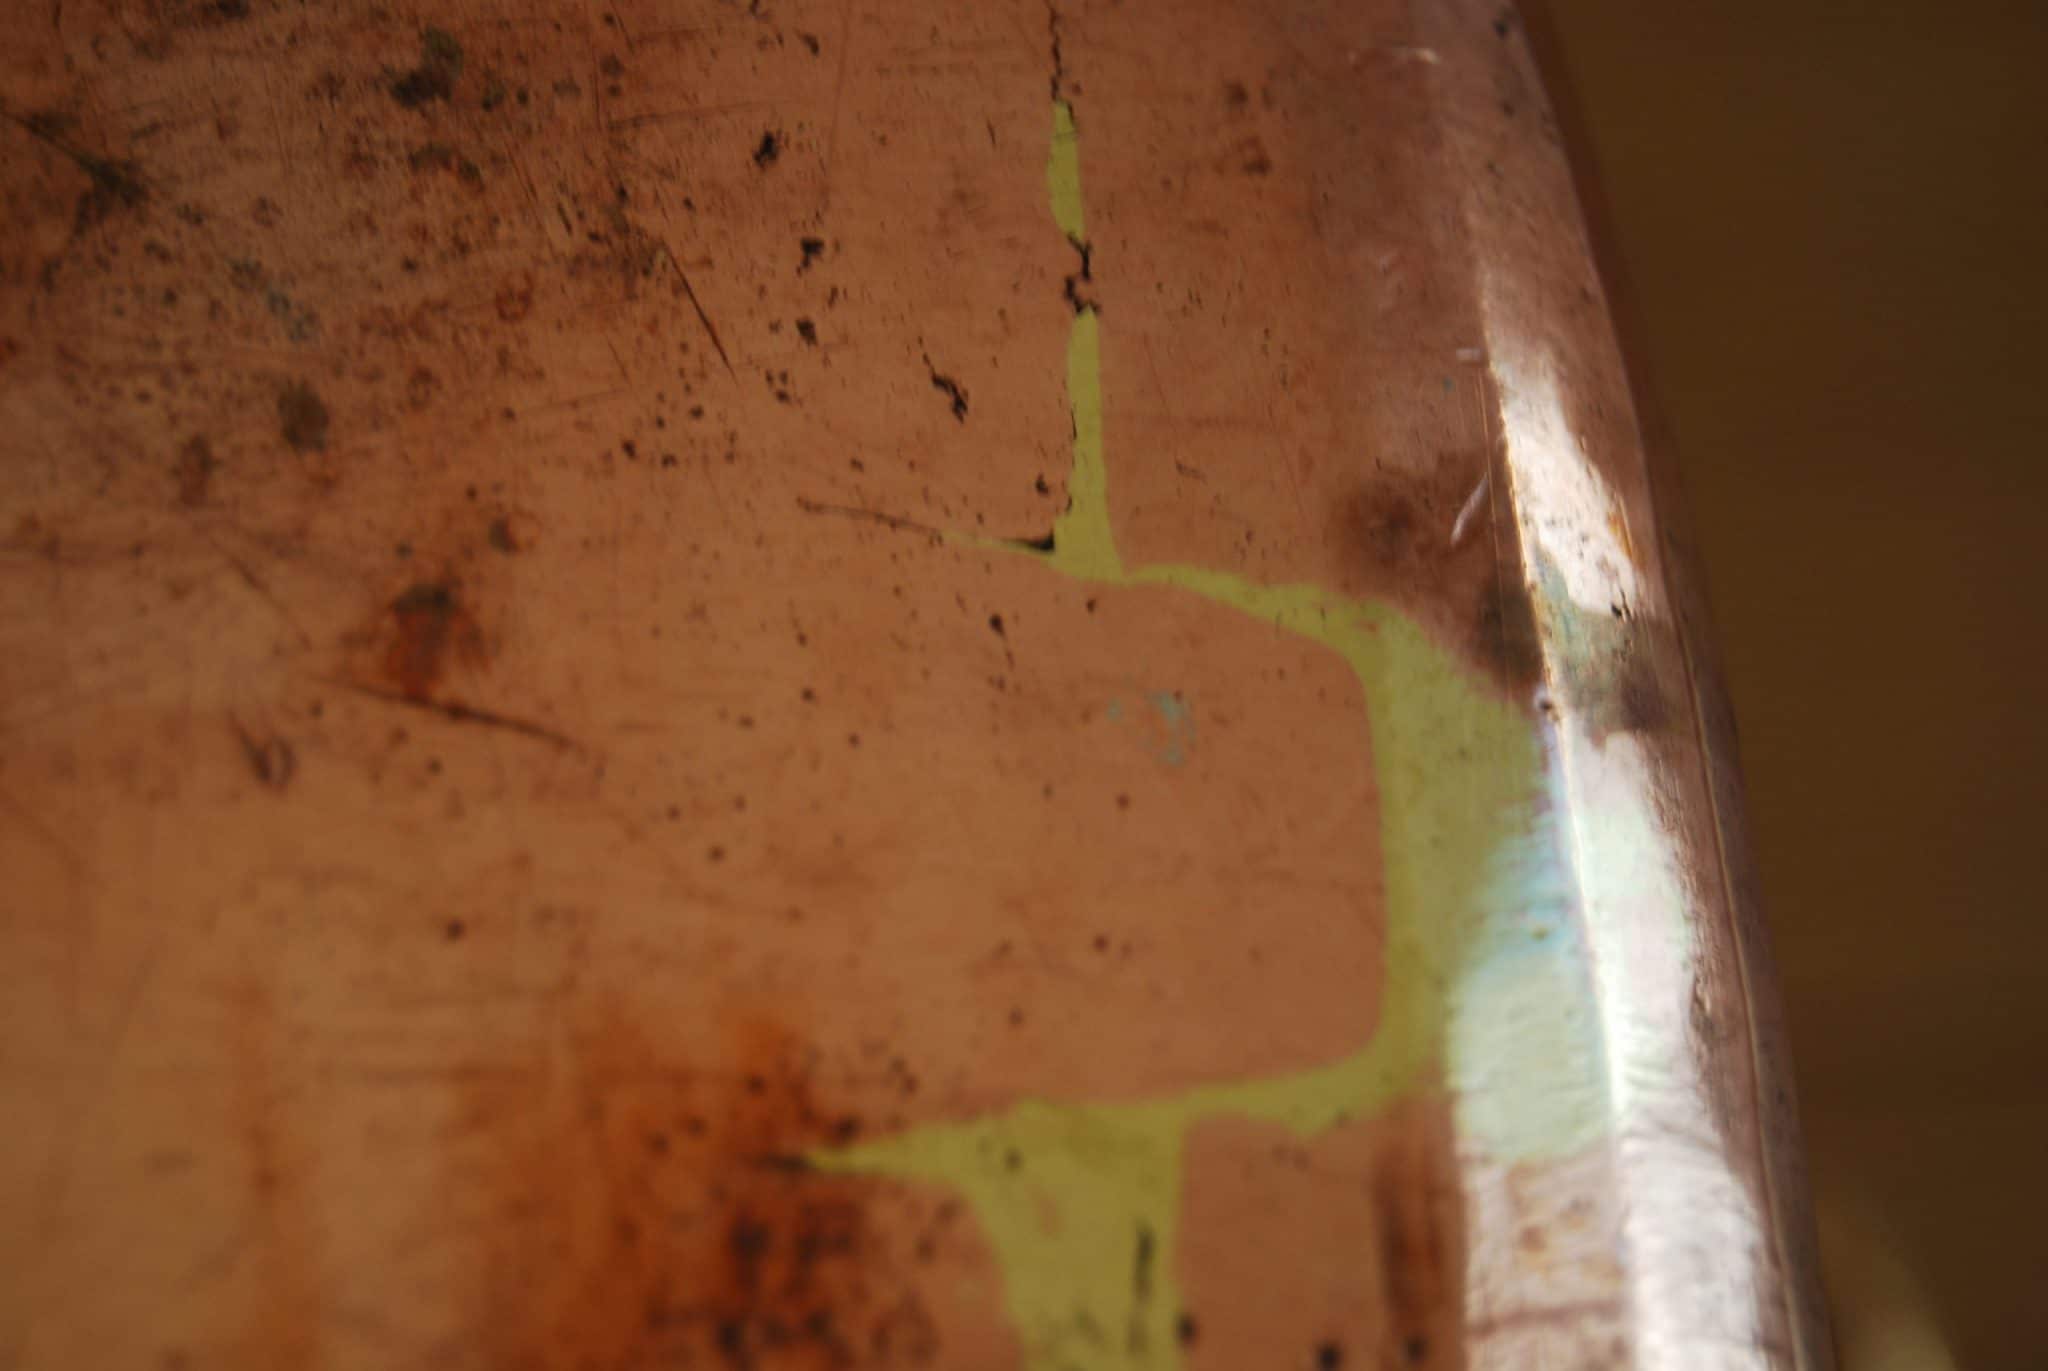
The crenellations on the base of this daubière are irregular, and there are plenty of over-cuts.
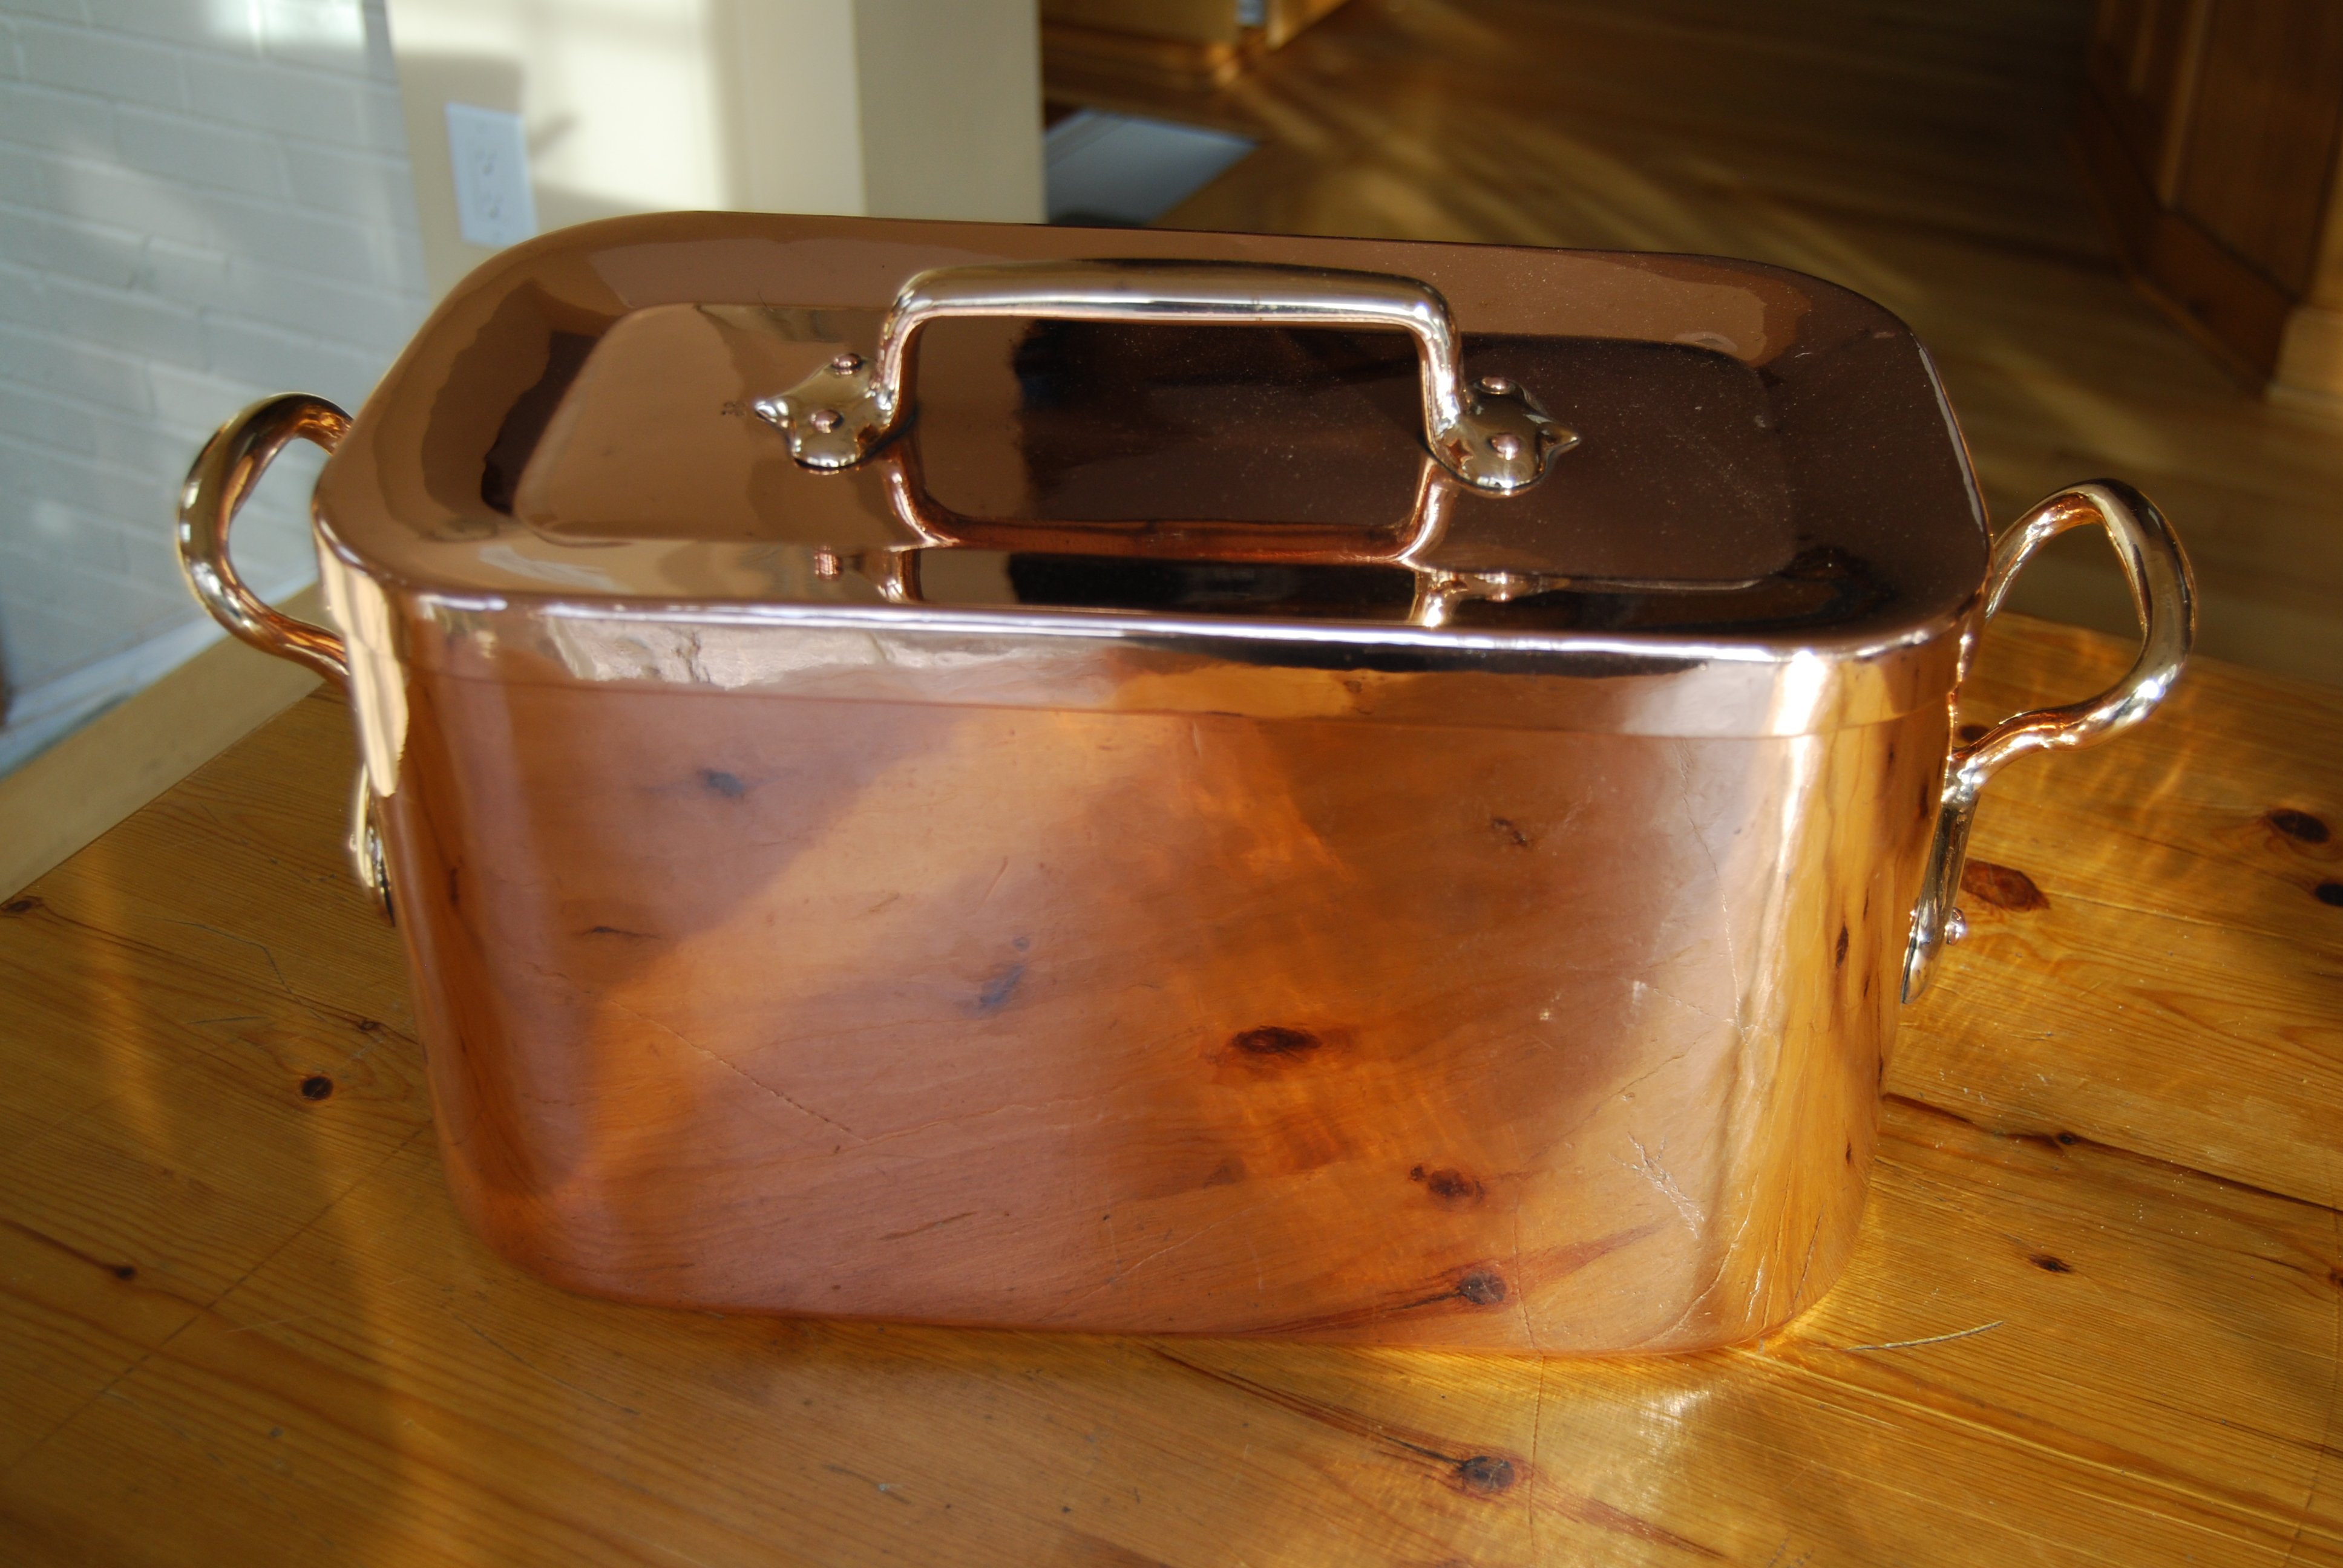
The base dovetail of this big daubière has irregularly sized and spaced crenellations and distinct over-cuts.

This oddball 38cm daubière is beautifully made. The crenellations are very symmetrical around the base, but there are tell-tale over-cuts.
Post-dovetails
The era of dovetailing ended when welding became economical enough for the chaudronneries to invest in the new equipment. There is no hard and fast date for this, as each firm made the transition on its own schedule.
Welding
Welding uses high heat to melt metals together so that they fuse to create a strong bond. There are several welding methods; the heat can come from an applied heat source such as a chemical torch, or from an electric current. Mauviel uses an acetylene torch to weld their daubières and stockpots, so my current assumption is that oxyacetylene welding was and remains the preferred method for the chaudronneries.
The principles of welding were discovered during the early 19th century but it remained an experimental technique until the turn of the 20th century. A French chemist developed a method to stabilize acetylene in 1896 so that it could be used as a fuel source, and a team of French engineers patented a low-pressure acetylene torch design in 1901. According to Anne-Catherine Robert-Hauglustaine, metalworkers quickly adopted oxyacetylene welding: “As a matter of fact, these techniques were used as early as 1901 for boiler-making [chaudronnerie], sheetmetal work, pipework and repair of cast iron parts of small dimensions.” But she notes that it took some time for a skilled cadre of welders to emerge: “Indeed, shortly before the First World War, welding developed under the pressure of the war effort. A shortage of labor quickly came about as a result of the mobilization of the professional workers. It led the industrialists to hire welders without training, without serious apprenticeship, but above all without any real aptitude. Those who started in this profession were usually chaudronniers, sheet metal workers or mechanics, or laborers and craftsmen who failed in their specialty and who, after a few weeks of practice, declared themselves welders.” She estimates that welding began to evolve into a true profession with levels of training and expertise during the inter-war period starting in 1919, and that by 1930 welding had matured into a commonplace industrial practice.
Examples
This stockpot was welded. It carries the Matfer chef’s hat stamp, a mark which (anecdotally) was in use from circa 1947 to 1967. Unlike a dovetailed stockpot, the base of this pot is one circular panel of copper that has been pressed into a shallow cup shape. (Most dovetailed stockpots I’ve seen have the side panel folded inward and joined to a smaller circle to make the base.) A second sheet is rolled into a cylinder and then soldered onto the base piece to make the walls of the pot. The seam runs around the circumference of the pot about two inches up from the base.
If you look closely at the photos below you will see faint black lines tracing the inch-wide welded seam running around the base of this 32cm stewpot. It’s invisible from the outside.


The daubière below was made by Mauviel in the 1970s or later. Its seams follow the same pattern as a dovetailed daubière, but the seams themselves are very thin dark lines with no brazing.

Putting it all together
Is copper made with this machinery still hand-made? Sure. The addition of machine tools makes the process faster, safer, and a lot easier on the coppersmiths doing the work; the people who built daubières and stockpots 200 years ago would have loved these improvements. But until those technologies were invented and perfected, some pots and pans had to be assembled with dovetails — cramp seams — and even though we have more efficient methods now, we can still appreciate the time and work and craft that went into making these beautiful pieces.
Sources
Robert-Hauglustaine, Anne-Catherine. “Les Métiers Du Soudage En France Et La Création De Filières De Formation.” Le Mouvement Social, no. 193, 2000, pp. 29–59. JSTOR, www.jstor.org/stable/3779979.
great information thanks . I have some pots of different sizes and all appear quite old one in particular with no handle only a riveted piece on the side where I guess a handle or bar would be inserted. lots of braising on the bottom and up the seam right through the middle of the riveted piece,,,, quite unique as I have been in the antiques business for 30 years in NY where there are lots of pots…. j
Hey John! You may have been lucky enough to come across one of those beloved grizzled survivors that has been re-fit with handles and other hardware after its originals wore out. I have a special fondness for these pieces, as their patchwork repairs tell me that someone loved (and used!) them enough to invest the time and energy to fix them.
I thank you for the reply as i picked up a handmade signed piece. searched but could find nothing solid hunk of copper handle with the cramp seam and a heart shape where the handle is connected to the pot… either k. uritsky or kuritsky with a bunch of numbers stamped into the handle…
sorry for the delay as I did not realize there was a response. great information about the rehandling as it is a heavy slab of copper with 4 rivets and the bottom looks like it was maybe this guys first attempt as the cramp seams are all over the place
Thanks so much! This is very helpful.
sorry for the delay as I did not realize there was a response. great information about the rehandling as it is a heavy slab of copper with 4 rivets and the bottom looks like it was maybe this guys first attempt as the cramp seams are all over the place
Hej VFC, on youtube there is a video (https://www.youtube.com/watch?v=W4Z9dAuOrWQ) of the Swiss coppersmith Walter Hauser from Glarus, in which the production of a dovetail joint for a 20 l cheese kettle is shown (from 6:16). The video is in “Schwiitzerdütsch” throughout, the Swiss dialect in the German-speaking part of Switzerland.
Dietmar, thank you for this. It’s marvelous. This is the best visual example of the dovetailing process I’ve ever seen. I will add this video in-line to the post. One question I have for you (and other German-speaking readers): He does not seem to be brazing the seam with brass, or at least that step is not shown in the video. I don’t speak German unfortunately so I can’t tell from the narration — is it possible to tell if he brazes the seam in a separate step? It doesn’t seem to be shown or discussed in the video, but I can’t be certain.
Hej VFC, unfortunately nothing is said about brazing. It only tells that after the kettle is driven, it goes on the coal where it must not reach more than 900°C (1652°F). Perhaps the dovetail is brazed on the coal fire?
By the way: the Swiss dialect of the blacksmith is also hard to understand for many Germans (especially from Northern Germany).
Hej VFC, I just watched the video again carefully, because as I said the coppersmith speaks a very distinctive Swiss dialect. Upon repeated listening, I noticed that at 7:29 he actually says that the dovetail is “geschlaglotet”. “Schlaglot” is an ancient term for “brazing” that is apparently still in use in Switzerland.
He says starting at 7:19 to 7:37 “…this is now the dovetail, a very old technique, for over 200 years, it’s brazed, it’s quite a good and strong joint, stronger than welded.”
Thank you, Dietmar! That’s excellent to know. I’ve already amended the post with this video and I’ll adjust my commentary accordingly. Thank you again for spotting this and for bringing it to the site!
If someone finds another video about the work of coppersmiths in which “Schwiizerdütsch” (Swiss German) is spoken, I will be happy to act as an interpreter.
Martin, I’d be grateful for your “listen” to the video. What can you glean from the process he’s describing? Do you see differences from what we’re observing in the antique pieces?
Dietmar has translated everything correctly. The TV report contains no references to previously unknown techniques The old term “Schlaglot” corresponds to the English term “brazing”.
Do you already know his beautiful website? https://www.kupferschmiedeglarus.ch/
Unfortunately I can’t use the media linked there, even after I released all cookies. 1-2years ago I found some more videos about Swiss coppersmiths. But since I had not saved them, I can’t find them now.
I still send you by email an article about Walter Hauser, whose essential passages I translated. What was new to me was the huge number (100) of wooden hammers that Hauser and probably other coppersmiths use. Hauser manufactures and repairs practically everything that can be made from copper. A jack of all trades!
Here is a short etymological explanation from the German “Meyers Encyclopedia” of 1897: “Schlaglot” comes from “Schlagen” – meaning “hammering” and “Lot” – meaning “hard solder”. So it means a solder joint that you can hit with a hammer without it coming loose.
Dietmar, a highly interesting derivation you have found! Does this mean that this technique works entirely without another bonding agent (alloy) and still results in a perfectly tight joint? That would be sensational.
My little research came to a different conclusion:
Hartlot (Schlaglot, Strenglot, Messinghartlot) = (brass) brazing alloy is an alloy of 41-86% copper, 13-56% zinc, the rest silicon (melting point: 710-1083 °C). It is supplied in grains or bars with the addition of fluxes and is used for joining copper, steel and cast iron workpieces subjected to mechanical stress.
Source: Verlag Media und Wissen
To clarify the question raised, I contacted Mr. Hauser. I hope he has time to answer and will report back later.
Dear Martin, if you read my text carefully you will notice that in the explanation from “Meyers Encyclopedia”, which I quoted, the origin of the word “Schlaglot” is described (etymology). In fact, this origin of the word refers directly to the important characteristic of a dovetail in a copper pot to have a high mechanical strength. However, you quite correctly explain the technique of brazing (with “Schlaglot”). This is not a contradiction to the etymology but deals with a different subject…
I think now we have completely lost our non-German speaking readers, sorry.
Thank you, Dietmar, now I understand. In any case, an interesting context.